
Wednesday, 30 January 2013
Stamping Gear..
Hi folks.. Now, you know I love my Stamping Gear. So much so that I want to share it with as many people who will listen to me. And going by the quantity we went through last weekend, that is quite a few of you. So here's a heads up for those who aren't yet aware. We have our very own Stamping Gear Demonstration Day here at Pinnacle Crafts on Saturday 23rd February 2013. There's no need to book, just turn up any time between 9am - 3pm and see what all the fuss is about. As Inkadinkado, (great name) the makers of the Stamping Gear would say, “Going in Circles (or Ovals, and eventually Squares and Rectangles!) has never been so much fun!”
 Just love the results you can achieve on your card making, scrapbooking and general paper crafting projects. So pop the date in your diary.. Thanks for checking us out. See you soon. Andy.
Monday, 28 January 2013
SteamPunk with a twist!
Hi Gang. Hope you all had a good weekend? Just getting the shop back into some sort of order after a very busy Club Members Weekend. Thanks to all of those who were able to attend. I hope you are enjoying your new purchases? Time to prep for this week’s SteamPunk class for me today. I've taken a different direction than I normally do when doing one of these classes. Usually it's a metal based theme,
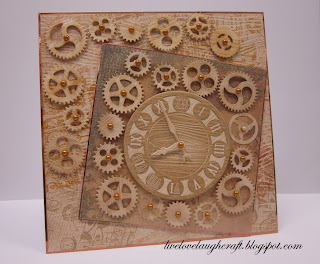 but to ring the changes a little I have gone for wood this time.. And how effective it is too!
 From the pale effect of the card stock itself
 to adding just a tad of Ink to bring it to life!!
 Now all I've got to do is finishing off cutting out 80 sets of the cogs and the clock for the classes!! I may be gone a while!! Thanks for checking us out. See you soon. Andy.


Tuesday, 22 January 2013
Where are you getting yours from?....
.....Inspiration that is! For me, my crafting mojo has done a disappearing act for the time being.. When that happens I search all over the place! Not for the mojo itself but for something to inspire me.. In today's case, I drew inspiration from the snowy weather we had at the weekend.
 This was a picture I took whilst out with Holly (the dog) on Sunday. It wasn't the actual images that inspired me, but the colours. Grey seems too been the order of the day at the moment, although I'm sure I did see a little bit of Blue sky at some point today!
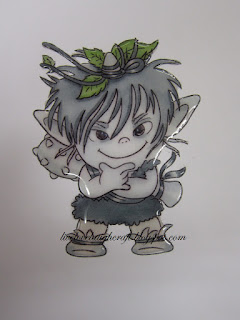 So, with the Grey theme in mind I coloured this little chappie in,
 following the Grey (ish) theme throughout the project! OK, adding just a little Green to lift it a bit! It's been ages since I've done some colouring, Dies seem to have taken over my life for the past few Months, so it's been good to re visit and old technique... Thanks for checking us out, see you soon. Andy.


Sunday, 20 January 2013

Tuesday, 15 January 2013
Gilded Clock Face...
Hi Folks.. So, it didn't snow in this part of Essex overnight. Well, not enough Snow to write home about anyway! And I'm glad! As nice as it looks, you know full well that it is ganna hover around on the ground for days to come and totally get on everyone’s nerves! Bring on the sunshine I say!...
 Just popping by to share with you another sample from last Saturday's Gilding lesson. This isn't one we actually got round to creating. Me thinks the ladies were having too much fun playing around with the other techniques to get round to this one.! But if you fancy giving this one a go, here's a quick step by step.
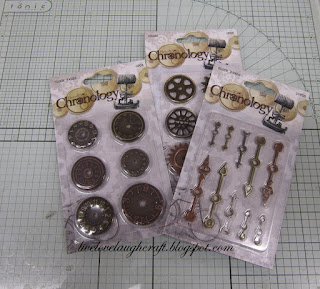
 I started off by cutting out a selection of shapes using the XCut Chronology Cogs Dies (XCU503151) in Blue Card stock.
 Applying Flitter Glue
 and Silver Gilding Flakes to each one,
 burnishing off the excess
 to add a touch of distress to each cog.
 Repeating the process using the Marianne Craftables Clock Die (CR1234).
 To add the element of time to the clock face, I took a couple of Clock Hands from the aptly named Chronology "Clock Hands" pieces (PMA353204)
 and Gilded them up a bit to tie in with the project.
 Securing them together using a screw head from the Chronology Brad Set (PMA353201).
 For my base card, I covered a piece of White card stock with Weathered Wood Distress Ink,
 passed it though the Grand Calibur Machine using the Garden Lattice (EG-003) M-Bossibilitie Folder
 and then went over the raised embossed image with Faded Jeans Distress Ink to bring out the embossing.
 Highlighting areas of the embossing with Flitter Glue and Gilding Flakes to add a slight metallic element!
 Arranging the cogs around the clock face
 to complete the project... Thanks for checking us out. See you soon. Andy.


Friday, 11 January 2013
Rustic Heart...
Hi Folks. I know I know two posts in two days! Not like me at all, but whilst I'm in the zone you might as well enjoy it! Still having a play around with my Gilding Flakes in preparation for tomorrow’s lesson.
 Now, this one won't be everybody’s cup of tea, I'm still not 100% convinced that it's mine, but I do like the technique! It's one using not only the Gilding Flakes and super duper Flitter Glue,
 but also an Embossing Folder.. In the past you may have added Ink to your Embossing Folders to get either a positive or negative letter press? You can also do the same with the Flitter Glue!
 Adding it to your Folder
 before inserting your card stock and passing it through your Die Cutting Machine.
 Add your Gilding Flakes
 and then burnish them off! Admittedly, a little bit rough and ready
 but once it is cut out it does have a certain "Je ne sais pas".
 I embossed one piece of card and de-bossed the other, just to see the different effects!
 Don't forget to give your Embossing Folder a thorough cleaning afterwards as it will be quite sticky from the Flitter Glue..
 Then all you've got to do is decide what to do with them! Thanks for checking us out. See you soon. Andy.


Thursday, 10 January 2013
Making use....
.... of a freebie. Hi guys. How's 2013 going for you so far? First "full" week back in the shop for me and I must admit it's been a struggle to get back into the routine! But get back I must, so onward and upward as they say..
 If you've been fortunate enough to grab the current issue of the Do Crafts Creativity Magazine you will have found that it comes with a set of 9 FREE Stamps.
 And blooming good ones they are too. So, if you haven't got your magazine yet, don't forget to pick up a copy next time you are in Pinnacles.. The stamps lead on from the Chronology line of products which are in the current Do Crafts promo. Chronology, meaning "an arrangement of events in time"
 so, it seemed apt to team the stamps up with the Chronology Clocks Embossing Folder.
 As I have a Gilding lesson this weekend, I thought I'd have a little practice using the Gilding Flakes with the stamp and some Flitter Glue... And I must say, I'm loving the results!
 Just the thing we need to brighten up this cold and dank day!! Apart from a little bit of sunshine that is! Have a good one and thanks for checking us out. See you soon. Andy.


Friday, 4 January 2013
Looking forward....
.... to opening the shop again tomorrow at 10am after our Christmas and New Year break.. It's been too long!! Let the crafting commence.


Wednesday, 2 January 2013
And so it begins....
Hi everyone. I hope you enjoyed your New Year celebrations and are all set for the crafting year ahead? Ideally I would have liked to ease myself into the year slowly, but already the Birthday's are coming thick and fast. Today is my "best mates" Birthday, so I really couldn't let that one slip past could I?
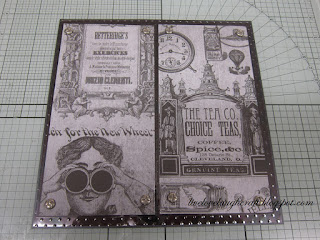
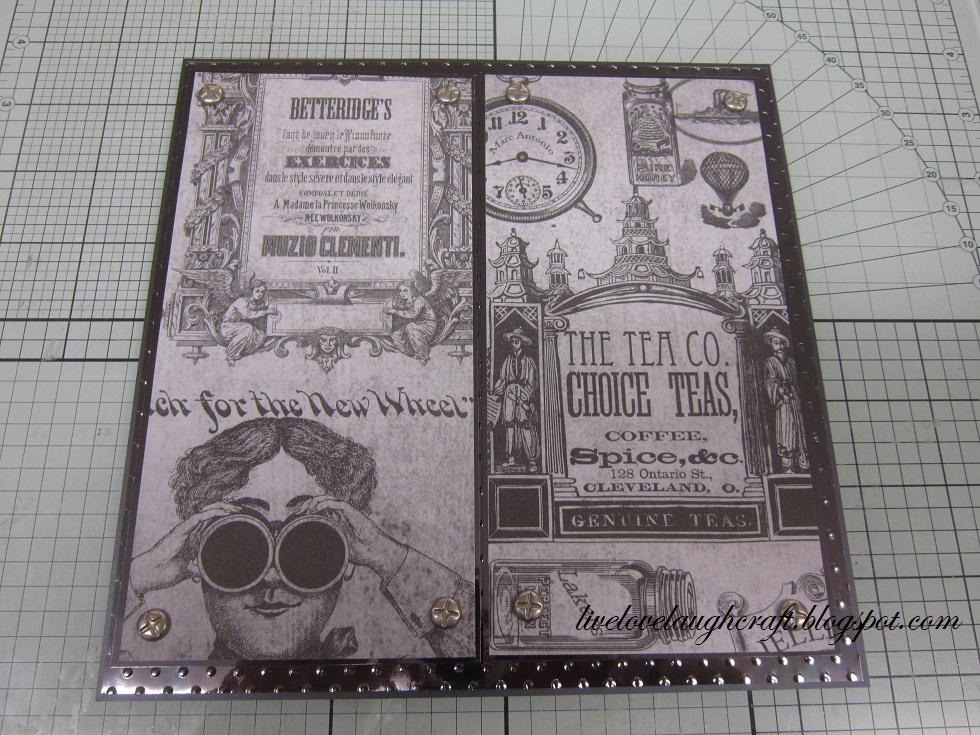
 So here is the card I made for him.
It's all pretty much been made using items from the new Chronology range of products from the current Do Crafts promotion. The Chronology products are ideal for all of your male themed Birthday's and if you're a fan of SteamPunk, then they'll be right up your strasse too.
So here is the card I made for him.
It's all pretty much been made using items from the new Chronology range of products from the current Do Crafts promotion. The Chronology products are ideal for all of your male themed Birthday's and if you're a fan of SteamPunk, then they'll be right up your strasse too.
 To start with, I cut a piece of paper taken from the 12" x 12" Chronology paper pack into two equal pieces and matt a layered them onto some Mirror Card
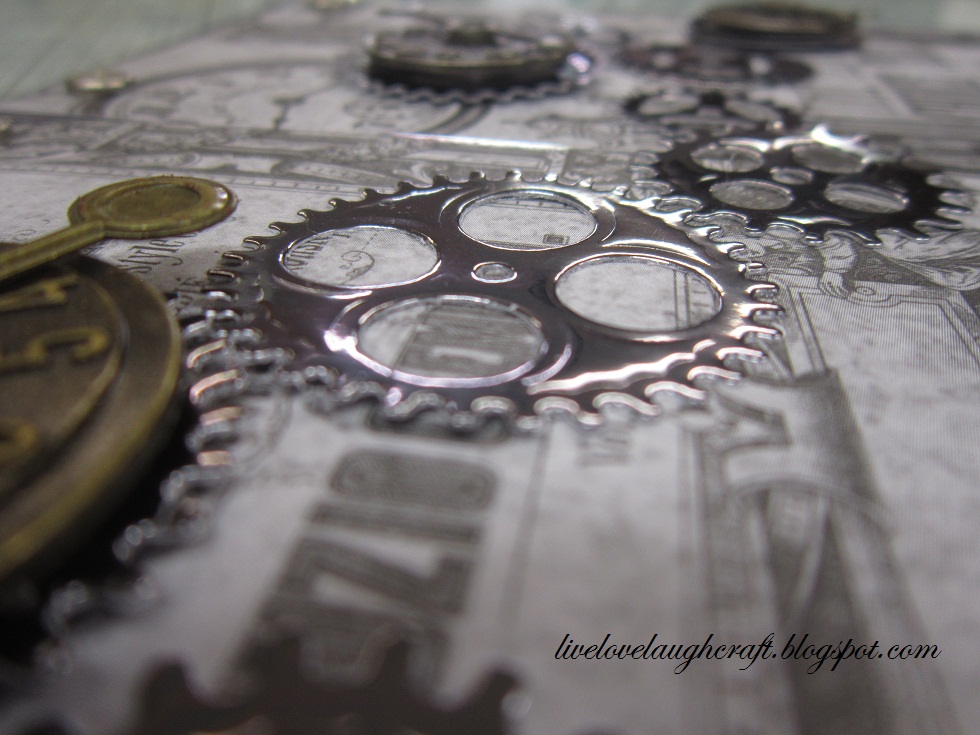
 securing them using the Chronology Brads.
 Which, if you look closely you'll see that they have a screw type head which ties in with the whole project.
 To keep the metal theme going, I embossed a piece of Mirror card using the Grand M-Bossibilitie, Dainty Dots (EG002)
 and mounted the pieces of paper onto it. As much as I love using the Spellbinders Sprightly Sprocket Dies on my SteamPunk projects, sometime they can be just that bit too big!
 Well, these little cogs and wheels from XCut, should solve that problem and they'll also co ordinate with the larger Spellbinders Sprightly Sprockets ones! Result!
 So, I teamed the cogs up with a selection of embellishments from the Chronology range,
 laying them out onto my card first just to see what would look best and then stuck them down.
 Some raised
 and some flat.
 Finishing off with a pewter gem in the middle to hide some of the double sided foam.
 All in all, I'm pretty happy with my first card of 2013! Thanks for checking us out. See you soon. Andy.


Subscribe to:
Posts (Atom)