Hi folks... I hope you are all enjoying this lovely springtime, or is it more like summer, weather we are having at the moment? Enjoy it while it lasts, there's a Bank Holiday coming up and the weather is sure to take a turn for the worse I hear!
I'm going to share with you today another Wedding card.. I like the whole concept of the card, but I'm not "100%" about the colour way I have chosen. Does it seem a little cold to you as a Wedding card?
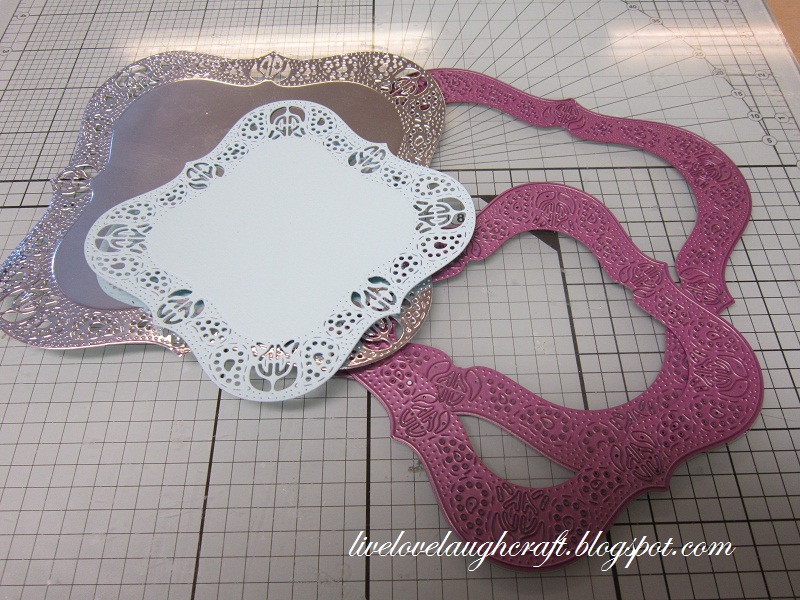
I started off by cutting out the two largest dies from the Cheery Lynn set
French Flair Doily Stacker (DL177) One in Silver Mirror card and one in a Light Blue card stock.
To be honest, I was a bit apprehensive about using such a detailed die on quite thick Mirror card! But I needn't have worried though! Yes, I had to pass the dies backwards and forwards through my Cuttlebug, turn it 90 degrees and do the same again, but the pieces just fell out of the die cut image and left very few pieces sill in the die for me to pick out!!
I then layered the two images together
before matt and layering them onto some additional card stock.
I put this to one side whilst I prepared my base card. Taking a piece of patterned Vellum and some more of the Blue card stock, I sprayed the card stock with some Stick and Stay Spray adhesive
and adhered the Vellum.
This was mounted onto an 8" x 8" base card and then I added my die cut topper...
I then added my sentiment
and a Cheery Lynn Butterfly, Large Lace Faerie Queen (DL160) to complete the project..
As I said at the beginning of Today’s post. I like the concept but I'm not over the moon with the colour.. I think it's the Silver that makes it look a little cold.
This bit is for Pat in Hertfordshire as she asked for some ideas for her Parents 70th Wedding Anniversary.. Perhaps try it in Platinum Pat, as I understand this is the UK traditional Gift/Colour for a 70th Wedding Anniversary..I did give the project a go in another colour way which I was a bit happier with...
Cutting the dies out as before, but this time using Copper Mirror card and a Pearlised Cream Embossed Gemstone card stock.
Matt and layering the images together as before,
but this time adding a topper I made using the second largest die from the
Spellinders Floral Ovals (S4-356) set, Spellbinders
Classic Ovals Small (S4-112) and the Marianne Creatables Die,
Lord & Lady (LR0211).
I think the Cheery Lynn die works really well with the more "vintage" colours I have used on this project.. We live and learn I guess...
I then mounted these shapes onto my base card to which I had added a simple Buckle and Ribbon too.
The Buckle was cut using a die from the Spellbinders
Damask Accents (S5-080) set on to Copper Mirror card stock.
I then threaded a 15mm Ribbon through the slots.
Although, as it was such a tight fit I would have preferred to use 14mm or 13mm ribbon,
but I didn't have any to hand..
But, it all came good in the end!
Thanks for checking us out..
See you soon.
Andy.


 It's very classic looking, and out of all of the samples I have made to date, this one is my fave....
 The image came from a die cut topper set from Hunkydory.
 I wasn't too keen on the edge which came with the topper, so I chopped it off
 and matt and layered it with my own choice of edging. This was put to one side whilst I prepared my base card.
 To start off with I cut out two edges in Gold Mirror card using a die from the Spellbinders set Persian Accents (S5-078). I've used this die on a previous project (which is on display in the shop), and at that time I used it on the Cuttlebug using the standard sized plates. Knowing full well that the die was longer than the plates I still proceeded to use it. And low and behold the edge of the standard Cuttlebug plates made an indentation in the Spellbinders die, although it cut perfectly well I can only think that this indentation will have weakened the die. I really would advise you to be careful when using a die which is bigger than your machines plates. Either treat yourself to longer plates or use these longer dies through the Grand Calibur machine, which is how I cut these images out.
 I then adhered them to my base card, which was part of the set which came with the Hunkydory die cut.
 This in turn was matt and layered onto some Gold Mirror card to keep the Black and Gold theme going throughout the project.
 I then added my topper.
 So, I cut out a shape using the Cheery Lynn Mega Flourish Two die (B169) in Gold Mirror card
 and placed it on the project to finish it off.
 Here is my take on the theme..
 I started off by cutting out Olly the Owl through the Cuttlebug using a Go Kreate Die.
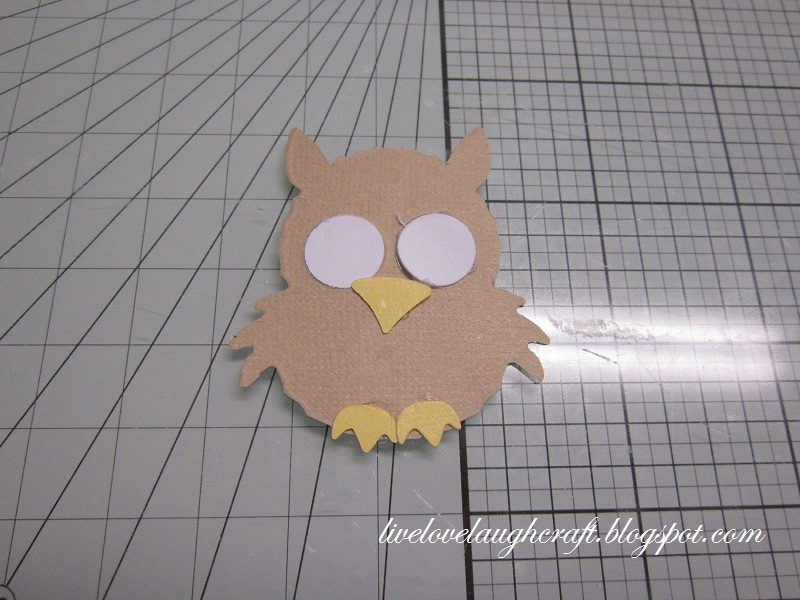 Assembling the pieces together
 and then adding some "googly" eyes to bring him to life and give him some character.
 I then cut out 2 leaf swirls (my current fave die!) using the Cheery Lynn Die Fanciful Flourish (B117), one in Brown and one in Green card stock.
 With the Green Flourish, I cut off the leaves. Which, if you are just after a Flourish is a great additional use for this die!
 I then attached the Green Leaves to the Brown Flourish to form my branch.
 This was then attached to my prepared base card, notice how the swirl of the branch links with the number 5 in the centre of the card and the little apple towards the bottom left of the card (as you look at it) has his little leaf hat on! All co-inkidinks! not planned!
 The branch makes an ideal place for Olly the Owl to perch on.
 I then made up a little rhyme for my sentiment. For those of you who are outside of the UK, GCSE's are our Secondary (High School) exams taken by teenagers before they move onto higher education! Just a little bit of info for you there...