Showing posts with label EK Success. Show all posts

Monday, 7 November 2011

Happy Birthday Sis...

Hi Everyone. I hope you had a good weekend? Yesterday was Joanne's (my Sister) Birthday. And here is the card I made for here...
It was an adaptation from a beautiful card that my Mum received for her Birthday back in September from Mrs Harrison (Pat)..Last week we received a delivery of the new Quilling Punches from EK Success and I was dying to give them a go, so using them on Joanne's card was the perfect opportunity to get them out of the packaging and have a play.I punched one of the designs out of Black and White card stock alternating the colours on each flower just to give a bit of diversity to the flowers... Take a look at this simple video to see how you can create effective flowers with these Punches.
I put the flowers to one side whilst I prepared my base card.I cut out some shapes using the Go Kreate Die XXL Square Frilly Frame #3 and matt and layered them together.
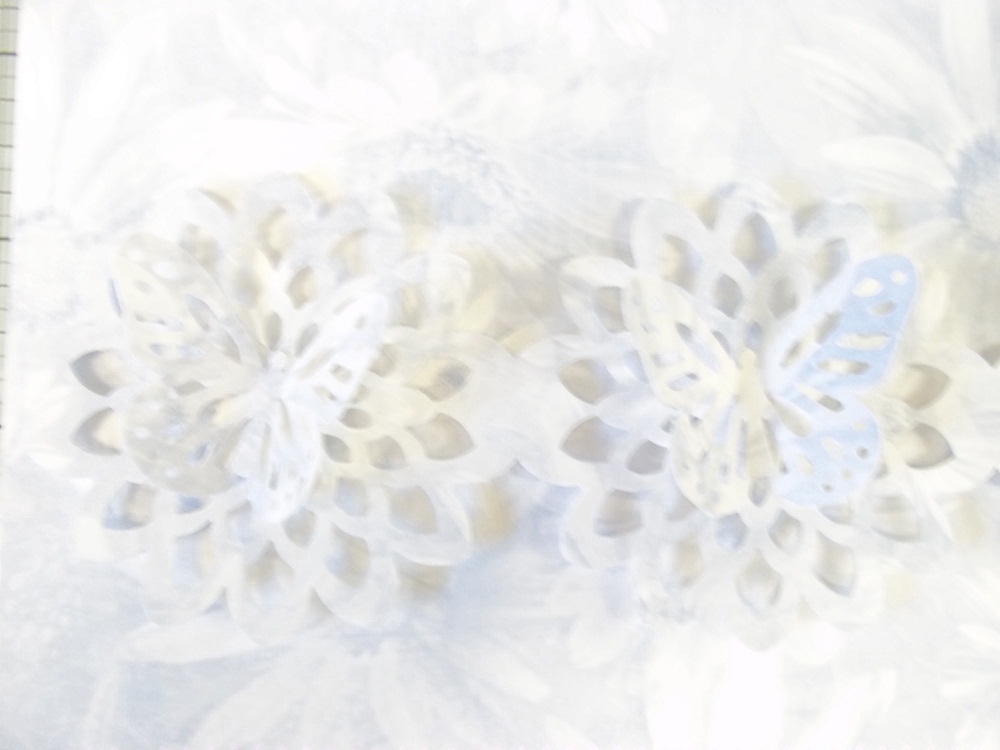
Next, I cut out one of the Butterfly images from the Spellbinders Grand Dies Wonderful Wings FL-006. Although these are classed as Grand Die's, each image will fit through the Cuttlebug,Big Shot or Vagabond Machines quite comfortably as well as the Grand Calibur Machine..This was then added to my base card to which I had added the Go Kreate matt and layer and a Peel Off Sentiment..I then added my Quilled flowers.. I guess you can't go wrong with a Monochromatic card, but I felt that it needed just a little something extra to finish it off..Along with the new EK Success Quilling Punches we received the NEW Garland Punches and also the Layering Punches. Take a look at the videos to see these new products in action and with the Layering Punches how you get 3 Punches for the price of one!!So, once my Butterflies were punched out,I gave them a little bit of dimensionbefore attaching them to my project,which really finished it off for me!...
As for Joanne's Birthday present! You may recall last year I got her some Cinema tickets for the Harry Potter film and made it as part of her card. Well, if it ain't broke...So I did something similar this year. But this time for the new Twilight Film, Breaking Dawn pt1.. I have had this idea for ages; as soon as I saw the Immortal Love papers stack from DCWV. The papers in this stack were just made for this film.So, I cut a couple of the sheets down to size and made an easel card with them, printing her Cinema information inside...When I spoke to her on her Birthday she asked my where I had got it from! "Got it from"!! I made it!! Cheek of it!!And for all you Holly fans out there.. Here is the card that she sent Joanne... Yep, she knows how to lay on the cuteness! And is certainly growing up fast. She has now had all of her injections and a full M.O.T and is now allowed out into the big wide world!!
Anyway, thanks for checking us out and see you soon.
Andy.

Thursday, 1 September 2011

Embossing with a difference...

Hey Blogland.. September already eh!! Soon be Christmas..
Today, I wanted to share with you a project I made as a sample for this weeks lesson here at Pinnacles..
This week we have been playing around with Embossing.. Now, not the traditional embossing i.e with Embossing Folders. You must know me by now? and that I like to try and get a little more out of a product other than it's intended use..So here we go with a project using a Mask... These have become so popular recently due to the increased use of Mists and Inks. But is that all you can use them for?! Me thinks not!!
Here's a "how to" guide if you fancy giving this project or something similar a go..
There are several different ways to emboss a Mask, and this is what works for me using the Cuttlebug.. If you have a Big Shot, Vagabond or Grand Calibur machine then have a play with your plates to get the right combination and see what you come up with..So, I placed the Mask directly onto my Cuttlebug A Plate,followed by my 290gsm card stock,my No Shims Mat,2 x 225gsm card stock to bulk out the "sandwich",finishing off with my Cuttlebug C plate and passed the whole thing through the machine.Mmmmmm, to be honest, not much to be seen here I grant you!But, with the addition of a little bit of London Fog Memento Ink...and a bit of matt and layering.. Viola!!My intention was to make this project into an Easel card.As every Easel has to have a stand I decided to play with one of our new EK Success Deep Edger Punches... So, I took the Flower Burst Punch and a 2.5" wide strip of card stock. Normally if I was just punching a border I would start roughly in the middle of the strip of card and punch away.. But this punch looked like it had potential to do something much more interesting so I had to line it up at a specific point.. You'll see why in a mo..I chose to line up the end of my card stock with the centre of the pattern on the punch and punch a full border along the card stock..Nice eh!!?But, if you turn your card stock over and line up the end of the card stock against the same guide you used previously and punch a border,you get this!! Now, that's getting good use from a punch don't you think!?This Flower Burst border was added to my prepared Easel Card as it's stopper.To add a little bit more interest to the Flowers, and the card in general I punched out a few Butterflies using the Martha Stewart Large Monarch Butterfly Punch.Adding them on top of the Flowersand to the Embossed image which had now been added to the card.And there you go. Quite a soft and subtle project but very effective and a great way to use this Mask in a very different way than it's intended use..So good in fact that I made another one in a different colour...
So, why not give it a go?...
And don't forget, it's our 8th Birthday Celebrations on Saturday (03/09/11).. A Free Demo with the very talented Lynn Gilbert from Creative Expressions, a 40% sale on all 12" x 12" single sheet papers, 12" x 12", 8" x 8", 6" x 6", A4 and A5 backing paper stacks and all Scrapbooking Albums.. Remember, Pinnacle Crafts Club Members can add their standard Discount onto these items making them Half Price.. Not only that!! Enter our Birthday draw with any purchase on the day and you could be one of the FIVE lucky winners drawn at random who can win one of the new release Spellbinder dies of their choice... Wowzers!! Sorry, new word I've picked up!
Thanks for checking us out, and see you soon.
Andy.

Thursday, 26 August 2010

The perfect pair!! PEAR

LONG POST ALERT!! Grab a cuppa, it's ganna be a long one, but oh so worth it!!
Hi Blogland, I have a friend who has just got engaged and is planning an engagement party in September.. For me September is Autumn, although with this global warming lark September can be as hot as mid July! I remember when I went back to school after the summer holidays, the leaves were falling off the trees, it was cold, it was wet!! pretty much like it has been in the UK for the past few days!! Hey, perhaps things are not so different now then!! Of course this is just a generalisation for us in the northern hemisphere, apologies for all our antipodean followers, you must be approaching Spring I guess??! Anyway, enough waffling..As their engagement is in September my card for them has an autumnal feel to it..
This week in our lessons here at Pinnacles we have been doing a technique called Iris Folding, NO! not folding a lady called Iris, although we do have a lady called Iris in our Wednesday Evening class, bet she got the shock of her life when she looked at the lesson sheet and saw this technique was coming up!! She still came to the lesson regardless, if a little apprehensively!!
For Iris Folding you need (a little old lady called Iris, folded in half and then half again!) NO! stop it!! You need a template of some sort,I chose a template of a pear which was cut from the Wall Decor & More Cricut Cartridge. And like with most templates you will use either the positive or negative image for your project,for the lesson, we used the negative image,which meant I was left with around 100 pears, of 50 pairs of pears!! Oh what to do with them, my first instinct was to bin them, but what a waste!! So I have incorporated them into a few projects.I took a couple of the images and coloured them with some Adirondack Ink (Lettuce)shading around the edgesto give dimension.I then added some Red Pepper ink to add more colour and shade, at first I though ooopps, too much,but they came our really well, almost good enough to eat!!You know me at the moment, if it stands sill long enough it's ganna get a blast of Glossy Accents!!Whilst the Pears were drying I took a piece of card stockand coloured it with the Lettuce Adirondack Ink,Embossed it through the Cuttlebug with one of the Embossing Folders from the Preserves Cricut Companions Cuttlebug Sets which matches this project perfectly I think. The idea behind the Cricut Companions is that they complement their respective Cricut Cartridges, but you don't need a Cricut to use them, they are Embossing Folders!....Once embossed, I went over the image again with the Lettuce,and then with Red Pepper, this project is sounding more and more like a Waldorf Salad recipe.. Lettuce, Red Pepper, Pears!! eeeekkk.I also randomly glazed some of the embossed images with Glossy Accents and put to one side to dry.I took this selection of Inksand randomly applied them to a White piece of card stock.
Punching out a border with one of the NEW EK Success large edger punches.
Glazed them, and put them by to dry.I printed my sentiment from my PC and coloured the paper with the Lettuce and Red Pepper Ink to tie the project together,cutting it out with a small Nestibilitie Circle and also cutting out a slightly larger circle in Gold Mirror Cardand layered the Two together, sorry photography is not my best skill!!I added a strip of card stock to my base card,attaching the now dry leaf border with foam pads and cutting it down to size..Matting my embossed piece of card onto some Gold Mirror card,before mounting it onto the final project.Adding the pears,and finally the sentiment.
Sorry for the long post! it took me 2 days to make the card (including drying time) and almost as long to write it up on here!! You've done well if you've got this far!! LOL. Hope this project gives you some inspiration for your Autumn crafting projects.. You still have time to win this Cricut Cartridge, so don't forget to leave a comment..
Thanks for checking us out, see you soon..
Andy.