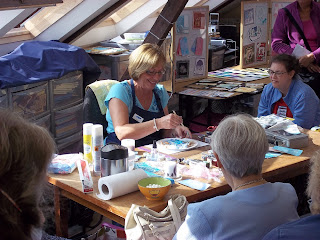
Hi Blogland, how are you doing? I know, I've been a very bad blogger of late. These past few Months have been extremely hectic.. The Summer Months are usually our "quiet time", but not this year! Perhaps due to the fact that we really haven't had a summer to speak of Weather wise!! Anyway, in between all of the day to day runnings of Pinnacles I have been kept rather busy finishing off some Wedding Stationery!! No, not for my wedding!!
You may recall
back in March that I finished off the Invites and RSVP's.. Well, now it's time to share with you:

the Menu's,

All 22 of them! I just love how these came out.

The order of Service..

All 110 of them!

The Place Names..

Another 110..

The Table Names..

I knew I'd find a use for the Tim Holtz
Small Easel stand!!

The couple's Wedding theme was Tea, hence the choice of table names and the shape of some of the stationery...

And the Table Plan...
Well, they have all been collected now as the Wedding is this Friday.. So, here's hoping the couple have a great day and a very happy future together!!
In between making all of these I have been "normal" crafting too..
September is a very busy Birthday Month family wise.. With my Dad's, Mum's, Nan's and of course MY Birthday..

Here's the card I made for my Dad's Birthday last week...
It was great to get away from the Tea theme of the wedding stationery just for a few hours to put this card together for him.

I started off with a Fern Leaf Stencil and some 290gsm weight card stock.

I placed the Stencil directly onto my Cuttlebug A plate.. I know, a Green one! Posh eh!!

I then placed a Square of 290gsm card stock on top of the Stencil,

followed by my No Shims Mat,

a couple of Shims of 225gsm weight card stock

and finally my Cuttlebug C Plate and passed the whole "sandwich" through the Cuttlebug machine.

Not much to see here,

but with the addition of a few
Distress Inks... the background and the now embossed Fern Leaves come to life!

For the base card I took a piece of text paper

and coloured it with some of the
Distress Inks used to colour the Fern

before mounting it onto some Gold Mirror card and adding some Leaf embellishments.

Finishing off by mounting the Stencil image in the middle of the card..

Nice and Autumnal, which is pretty apt for the kind of weather we have here today!! Yup! It's raining!!..
Anyway, have a great day whatever you're up to.
See you soon, promise!!
Andy.
 So, that's what I decided to do with him on this card.
 Firstly, I stamped, coloured and glazed him
 and then cut him out
 so that I could prop him up against my wall card stock.
 I then punched out some bottle shapes,
 coloured them in with a Copic Pen (Mignoette YG11)
 and then glazed them with some Glossy Accents.
 Positioning them around him so it looked like he had had a few!!..
 I cut one of the shapes from the Spellbinders Large Labels Nestabilitie Sets
 and added my text using Peel Offs,
 before applying it to my card to which I had already added a shape cut from the Spellbinders Elegant Posts S5-032 to form my pub sign..


