Wednesday 17 December 2014

Coaster'ing along .........

Hi folks... So, here we go with the last Creative Expressions Design Team project for this year...
I won't say I've struggled to come up with some ideas using this Month’s stamps! But, as fellow crafters, you know what it's like at this time of year with a gazillion things to do and never really getting done what you won't to get done!! And hands up who's already said that they're gana start Christmas making even earlier next year? (Andy raises hand!)...
Anyway, here we go with today’s project...

We've got some little Coasters!!

Some for your Tea

and some for your Coffee...

To make these I cut a piece of thick Grey Board, Felt and Heat Resistant Acetate to make a 3.5" square

Glued the Felt to one side of the Grey Board. This will help prevent the Coaster from slipping.

To stamp your image onto the Black Card Stock firstly dust it with an Anti Static Bag

"Ink" your stamp with Perfect Medium

and stamp the image onto the Black Card

Pour over your Embossing Powder and heat set it with your Heat Gun

and then attach a piece of Heat Resistant Acetate over the top. I used a Spray Adhesive for this and used a Brayer to make sure the Acetate was bonded to the card stock.

This layer was then glued to the second side of the Grey Board

to complete the Coaster.

I've made a nice little set of 6 for my Tea

and if I ever get the taste for Coffee, which I very much doubt I will, but you never know! I'll use my Coffee ones!!

It's a fun little project to do and even make a pretty unique homemade gift to use all year round....
Thanks for checking us out. See you soon.
Andy

Ingredients used;
Heat Resistant Acetate
Grey Board
Felt
Heat Gun
Creative Expressions - Cosmic Shimmer Glue
Creative Expressions - Cosmic Shimmer True White Detailed Embossing Powder
Ranger Ink - Perfect Medium
Creative Expressions - Tea & Biscuits pre cut stamp
Creative Expressions - Espresso Yourself pre cut stamp


Wednesday 10 December 2014

Time for a cuppa....

Hi folks... Last but one post for the Creative Expressions Design Team for this year before we take a little break..

This Month's Stamps revolve around food and drink.. Now, although I admit I like a little tipple every now and then! my biggest addiction is to Tea! Hands up, I admit it, I'm a right old Teapot!! Although I have lost count of the amount of cuppas that have gone cold whilst I have been crafting, defo need one of those thermal cup things... Santa, please take note!!
And what's the best thing to go with your cuppa? Biscuits of course....

But with today's project, no one needs to know where your stash is hidden, even though it might be right under their nose on your craft desk...

I've made a few of these "Hidden Books" before and am always blown away by the results.. They really do look as like authentic old books....

Now, I'm not going to bore you with a full step by step tutorial today, more than anything because I will be doing these in a Gilding Lesson in the New Year, still have to confirm the date, but it will be an all day'er on a Saturday in January.. So look out on the website for the release of our new lessons.

Apart from the fact that you will defo be making some of these books, I can assure you that there will be Biscuits on hand too! (hidden or otherwise)...

Thanks for checking us out.
See you soon
Andy.

Ingredients used;
Creative Expressions Gilding Wax - Graceful Peach
Creative Expressions Gilding Wax - Graceful Mint
Spellbinders 3D M-Bossabilitie Folder - Labels 34 (E3D-016)
Spellbinders Die - Labels 34 (S4-416)

Wednesday 3 December 2014

Espresso yourself.....

Hi folks... Creative Expressions Design Team time again today...
For December’s projects we have been given some new stamps to play with... This time revolving around one of my favourite subjects, food and drink!!!
I like to think that we all try and get the most out of our crafting goodies other than just using them on cards and scrapbook pages!! So, for today’s project I've decided to think outside of the box a little bit.

Well, not so much "outside" of the box, just "the box" in general... and use it as the main focus of my project....

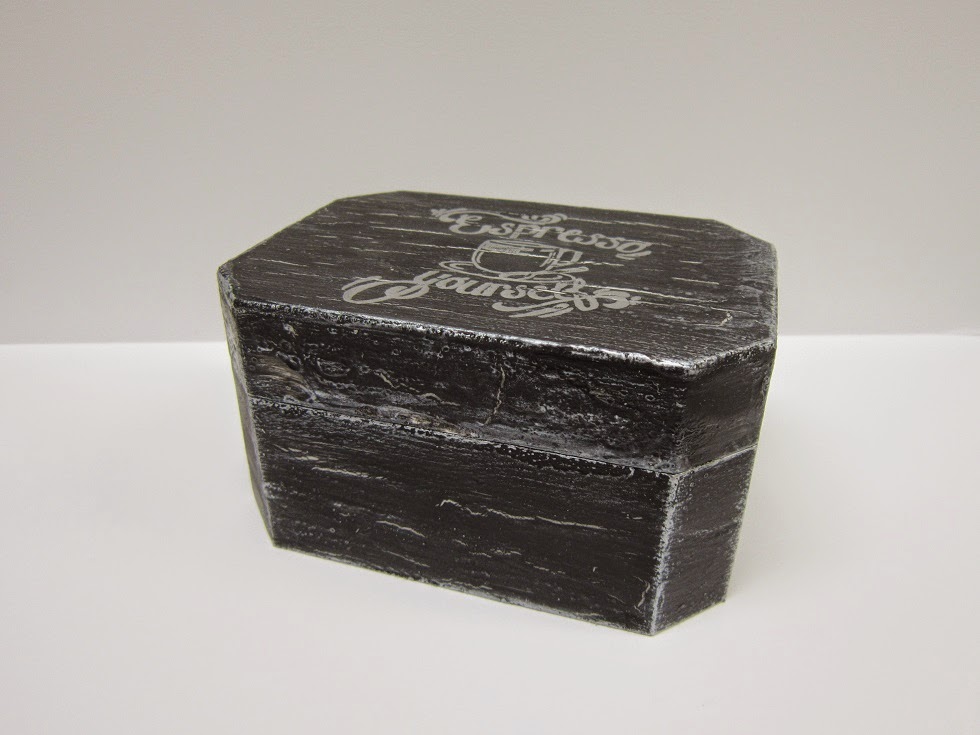
Considering how the box started off, the change in its appearance is pretty dramatic..

It's ended up looking like slate.. Which is no mean feat seeing as I was actually going for a distressed wood effect!!! oooppps...
This distress/crackle effect is pretty easy to achieve with products you probably already have, so if you fancy giving it a go here's a step by step....

To start with, if your box has hinges,

take them off so that you have a nice clean surface to work on.

Then paint the box (inside and out) with your chosen base colour and let it dry thoroughly.

Next, take some Cosmic Shimmer Glue

decant some onto your craft sheet

and then apply a thick layer to your project. (I know, White on White is not the best photo op, but I hope you get the jist!?)

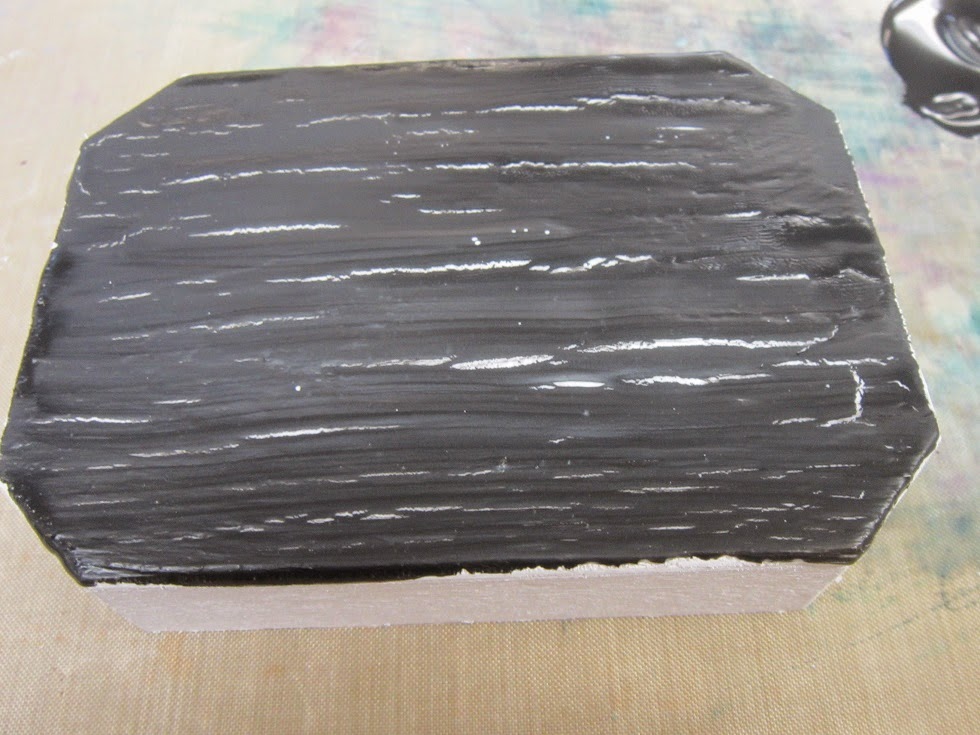
Whilst the Glue is still wet decant your second colour choice onto your craft mat

and apply over the wet glue, trying not to mix the Paint and Glue too much..

You can either leave this to air dry or if you are as impatient as me you can encourage to drying process with your heat gun, although don't get too close to the paint or it will blister as opposed to split/crackle... "The crackle effect is achieved because the drying time of the paint and the glue are different and therefore the glue splits revealing the base White colour you applied first".. Pretty cool eh!?

It's best to do the lid and sides in two separate stages as you'll get in a right old mess if you try and do everything at once...
But the effect is well worth the effort..
As I said earlier, I was actually going for a distressed wood effect, but I think the colours I have chosen certainly have given it a more slate like look!!
Once the project is completely dry you are good to go and carry on. You can tell when the glue is dry by gently touching the project with the back of your fingers, if it feels quite cold then the glue is still wet; if it is warm to the touch then it is pretty much dry.

Once the hinges were put back on the box I applied some Cosmic Shimmer Pewter Gilding Wax to enhance the Slate effect.

To stamp your chosen image, firstly dust your project with an antistatic bag, this will dry any moisture on it like fingerprints etc and help the embossing powder only go where you want it too.

Ink up your image with Perfect Medium

and stamp onto your project

Apply some Silver Embossing Powder

and set with your heat gun...

Now, I know it almost looks like slate, cos I put it next to a piece and I think we have a pretty good match?!!!
I think this would make a nice little gift for any coffee lover, maybe filled with some chocolate covered coffee beans, or in my case some chocolate covered Peanuts as the shop didn't have any coffee beans!! Ho hum...
Thanks for checking us out..
See you soon..
Andy.

Ingredients used;
Cosmic Shimmer Matt Chalk Paint - Warm White
Cosmic Shimmer Matt Chalk Pain - Midnight
Cosmic Shimmer Glue
Cosmic Shimmer Silver Shine Detail Embossing Powder
Creative Expressions Gilding Wax - Pewter
Creative Expressions Non Stick Craft Sheet
Creative Expressions Anti-Static Bag


Tuesday 2 December 2014

Naughty or nice.....

Hi folks.. Well, I think I'm on the home stretch now... Most of my crimbo cards are made.. It's now time to concentrate on my immediate family and friends...

Not quite sure who this one will be going to, depends on who's been naughty or nice!!
Me, I've been very nice with just a little bit of naughty thrown in for good measure.. Or should that be the other way around!!!
Thanks for checking us out.
See you soon.
Andy.

Wednesday 26 November 2014

Happy New Year!!!!

Hi folks... No, don't worry... You haven't dropped off to sleep and woken up 37 days later and missed Christmas and New Years Eve 2014 altogether!! It's just the title I've given to today’s post which consists of this week’s Creative Expressions Design Team Project...
It's the last one to feature their Dancing Stamps...., as I have new goodies to play with for my December projects....

So, New Years Day Luncheon che Pinnacles will have a Strictly Come Dancing theme... Well, it is being held at Joanne's (Sister) house... Her house, her rules....

So, we have crackers for the Men in the family

and for the ladies......

And for a very special lady.... Yes, even Holly the Dog has her own New Year Cracker.....

Well, like everyone else in the family, she has a Christmas Day cracker too...
In fact, I think I am all Cream Crackered out!!!
I hope you've enjoyed this Month’s Creative Expressions Design Team Posts and that they have given you some inspo to put your Stamps to good use?
Thanks for checking us out.
See you soon.
Andy.

Wednesday 19 November 2014

First Dance....

Hi folks.. As its Wednesday, it's time for another post for the Creative Expressions Design Team...
I'm still working with the Dance Stamps.. As you may recall in my last post I used them with a Christmas theme? Well today we head in another direction..... Weddings...

Although I've made this project into a card I have no doubt that it would also make a pretty decent Scrapbook page....

I started off by cutting out the Taylored Expressions Die - TE194 MR & MRS.

It has such great detail,

and looks great when backed in a coordinating coloured card stock...

I then stamped my image with Archival Ink and cut it out.
These images are fantastic, although to provide for shading etc some of the lines are not complete, so when the images are cut out they appear to be missing the edges...

If you take an Alcohol Marker and run the nib around the edges then it will "tidy" these up for you.....

It will also soften any "tufty" White edges created when cutting...

Next, I cut and embossed 2 images using the Spellbinders Die - Fleur De Elegance (S4-475)

Attaching one of the images sideways across the back of the "MR & MRS" image..

With the second shape, I cut it in half

so that when it was attached to the back of the "MR & MRS" image lengthways the edges were still visible.

The frame and the dancing couple were then mounted onto my prepared base card which I had embossed using the Creative Expressions/Sue Wilson Large Embossing Folder - Eternity (EF-024).
Adding some Small Circle Dazzlers

and my own Glitter Paste Flower.

I'll share how this was made in a future post... It's pretty effective I hope you'll agree?

So, there you go... If you have a Winter Wedding to go to or even one planned next year, there's another use for your dance stamps....
Thanks for checking us out.
See you soon.
Andy..

Ingredients used:
Taylored Expressions Cutting Plate - MR & Mrs (TE194)
Creative Expressions/Sue Wilson Large Embossing Folder - Eternity (LF-024)
Spellbinders Die - Fleur De Elegance (S4-475)
Cosmic Shimmer Glitter Paste - Aurora Sparkle
Creative Expressions Small Circle Dazzlers
Creative Expressions Stamp - Argentine Tango
Ranger Archival Ink - Black