Wednesday 29 April 2015

The hurrier I go....

... the behinder I get!!! Seems a pretty apt phrase at the moment!!

Well, they say there's no rest for the wicked!
Not had an enormous amount of time to get this week’s Creative Expressions Design Team project completed, thank goodness I had some samples left over from the weekends Creative Expression Demonstration day..

This is just a little play on a project and technique I have already shared with you. This time though using some of Phill Martin's Stamps and Decadent Oak Mica Powder... Yes, I know it looks Green (even though it is Oak (Brown)) and even to the naked eye it still appears Green, but as this has been done on Black card it has interfered with the pigment in the Mica, making it appear Green. "Double Whammy" I say, although if you were expecting Brown on Black card, you're kinda out of luck I'm afraid!
Thinking cap on for next week’s project!!
Thanks for checking us out.
See you soon.
Andy.

Decadent Oak Mica Powder
SYDBIC - Damask Borders & Icons Collection
SYBS2c - Baroque Sentiments 2 Collection
Perfect Medium
Spray & Shine

Wednesday 22 April 2015

Sending you roses....

Hi folks... A little take on last week’s Creative Expressions Design Team project for this week’s post!! Still using the Damask Stencil, but this time with Texture Paste..

You'll hopefully have noticed the addition of some Roses? Which, you may be interested to know were also made from Texture Paste?!!
So, if you fancy giving it a go, here's a step by step to help you on your way!!

As I generally do these days when using Masks, I started off the project by embossing the image..

Place the Mask back over the area which has been embossed

and apply your Texture Paste (Decadent Denim)

Remove the Mask and put to one side to dry, this could be anything up to an hour depending on how heavy handed you have been with the Texture Paste.

Once dry, matt and layered with some complimentary card stock.
If like me you sometimes struggle to find the right colour of embellishment to go with your project then I guess the best thing you could try and use is the same product, but in a different way?!
This is how the Roses came into being...
Now, I grant you, Texture Paste is a gloopy "liquid", but not when it's dry!!

Spread some of the Paste onto a non stick mat and allow it to dry overnight...

Once dry, it will simply peel off of the non stick sheet, this is the back

once turned over you have a nice smooth surface to play with.

I know this material will die cut quite well but I decided to make my Roses free hand, so I cut a "rough" spiral circle

and "Quilled" it into a flower.

Applying a few to my project

before attaching my sentiment which was stamped in Perfect Medium and "dusted" with Decadent Denim Mica Powder to tie the project together.

finishing off the centre of the flowers with some Decadent Denim Twinkles...
I must admit I'm quite in awe as to how the Texture Paste has developed into a secondary material which can be used in a different way than it may have been intended.

I've got a couple of other colours and mixtures on the go at the moment.
Looking forward to seeing how they pan out!!!
Thanks for checking us out, see you soon.
Andy...

Ingredients Used:
Creative Expressions Damask Mask
Decadent Denim Texture Paste
Decadent Denim Mica Powder
Decadent Denim Twinkles
Perfect Medium
CEC712 Scribble Rose Elements


Tuesday 21 April 2015

Demonstration Day....

Hi folks... Just a reminder from us that it is our Demonstration Day here at Pinnacles on Saturday (25th April)..

There's no need to book for this FREE Demo, just turn up any time between 10am - 3pm to see what we have planned for you.
We will be featuring products from Creative Expressions inc amongst others, Phill Martin's range of Mica Powders, Texture Paste, Sparkle Texture Paste, Gilding Wax & Stamps...
We'll be covering lot's of different techniques to help you put these products to good use.
DOUBLE DISCOUT to all Pinnacle Crafts Club Members on all purchases made in store on the day (usual exceptions apply)..
We look forward to seeing you there...

Wednesday 15 April 2015

Let it Bloom....

Hi folks.... more "playtime" today with this Month’s Creative Expressions Design Team goodies.

I've combined a couple of techniques on today’s project. So, if you fancy giving it or something similar a go, here's a step by step.

I started off by embossing the Creative Expressions Damask Mask onto some Black card stock. The reason I prefer to emboss the Mask rather than just Ink or colour through it will be explained shortly.

Next, I coloured in some areas of the card using Chic Pumpkin Gilding Wax,

followed by Chic Moss Gilding Wax,

a touch of Graceful Mustard Gilding Wax

and finishing off with Pearl Moon Gilding Wax.

I love the effect which has been created using these individual colours. They seem to intermingle yet still hold their own!
Before the next stage, if you remember, dust over the whole area with an Anti-Static Bag. We're going to be adding some Mica Powder and using the Anti-Static Bag helps prevent the Mica sticking to areas you don't really want it to...

Place the Mask back over the original embossing image. I said earlier why I prefer to emboss a Mask if I am going to colour, this is because embossing the card stock brings it up to the level of the Mask. So when you add you colour, either by spritzing, Mica, Embossing Powder etc it is less likely to seep under the Mask and therefore hopefully give you a better result!

So, whilst the Mask is in place, Ink through the open areas with Perfect Medium.

Remove the Mask and add your Mica Powder, I have gone with Chic Moss. Highlighting just the "Damask" images has really made them stand out!

You may then wish to seal the Mica with some Hairspray.

For the sentiment panel I covered the whole piece of card stock with Perfect Medium,

dusting the whole area with the Chic Moss Mica Powder.

Next, Ink up your stamp with Perfect Medium and stamp onto the Mica covered card stock..

As much as the Perfect Medium attracts the Mica Powder to the card stock, it also removes it when used on the stamp, revealing the Black card stock underneath..

Again, this will need to be sealed to prevent the Mica Powder rubbing off.

Then's all left to do is prepare your base card

and apply your sentiment!!
Makes for a pretty opulent card don't you think?
Thanks for checking us out.
See you soon.
Andy.

Ingredients used:
Chic Pumpkin Gilding Wax
Chic Moss Gilding Wax
Graceful Mustard Gilding Wax
Pearl Moon Gilding Wax
Chic Moss Mica Powder
Creative Expressions Mask - Damask
Scribble Rose Elements Stamp Set - CEC712


Wednesday 8 April 2015

On Your Wedding Day....

Hi folks.
Just a simple project today using some of this Month’s Creative Expressions Design Team goodies...

I'm slowly working my way through some of the new Mica Powder colours and today I have teamed Decadent Teal up with one of the new John Lockwood Stamps "Skeleton Leaves Striplets" and a Stamp from the Baroque Sentiments 2 set by Phill Martin.
Thanks for checking us out.
See you soon.
Andy.

Decadent Teal Mica Powder
Decadent Teal PVA Glue
UMS612 Skeleton Leaves Striplet Stamp
SYBS2C Baroque Sentiments 2

Wednesday 1 April 2015

I've gone all Decadent...

Hi folks... A new Month, so that means some new goodies to be played with for the Creative Expressions Design Team! And what goodies they are too!!
We're all going a little bit Chic and a little bit Decadent with a selection of Phill Martin's new products and some lovely Stamps from Jonathan Lockwood...
So, without further ado, here is my project..

Now, I know it may look like I've just taken a couple of pre made patterned pieces of card stock and stuck them all together, but that is far from how this project was made...
So, if you fancy giving it a go, here's a step by step...

I started off by cutting some squares of Black card stock. I cut them slightly bigger than I needed as when dealing with Mica Powder, as we will be, you'll need somewhere to hold the card, so if the edges get smudged they can always be trimmed.. If the centre get's smudged that's a whole other story!!

Anyway, take one of the squares and dust it with an anti-static bag. This will dry any finger prints off of the card and hopefully prevent the Mica Powder sticking anywhere that you may not require it.

Next, ink up your chosen stamp with Perfect Medium or VersaMark

and stamp your image onto the card stock.

Brush your chosen colour of Mica Powder all over the card stock (I have gone with Decadent Grape)

and then brush off the excess.

The piece of card stock will need to be sealed to prevent the Mica Powder from rubbing off. You can either use a cheap generic Hairspray or Crafter's Companion Spray and Shine.
Repeat this process on a second square and pop them to one side to dry.
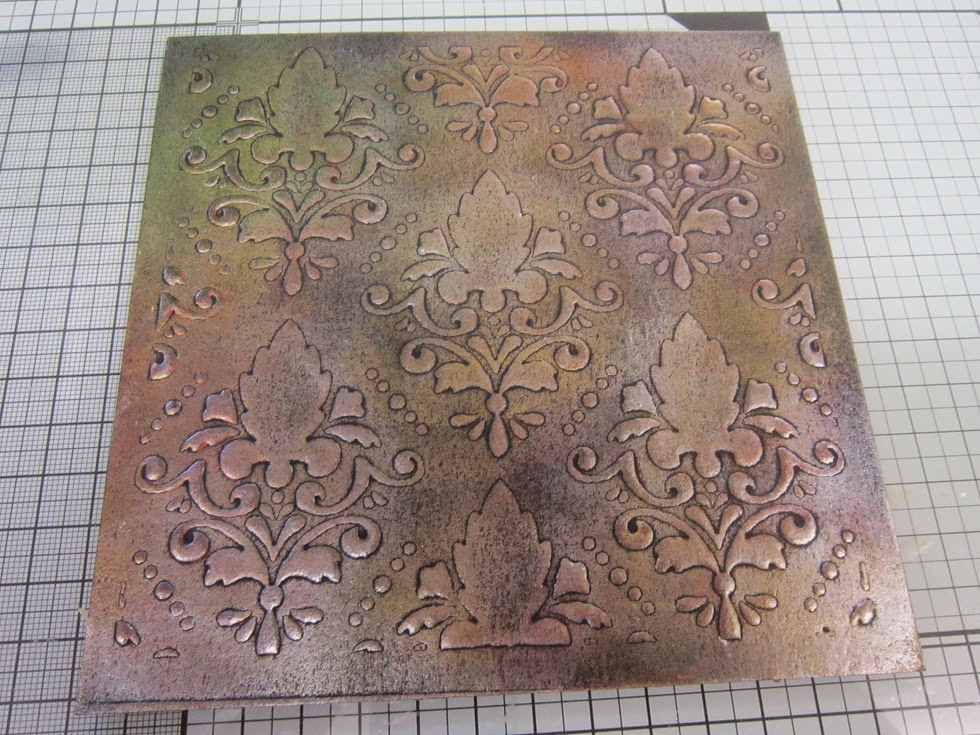
For the opposing corners of the project you can use the same ingredients as before, but in a different order to achieve a different result.

So, taking one of the remaining blank squares, apply Perfect Medium or VersaMark all over it, smoothing out the Ink with a Brayer.

Apply your chosen Mica Powder to the card to cover it completely.

Ink up your Stamp with your Ink

and stamp into the Mica covered card stock.

As Mica is attracted to moisture, this process will take the Mica away leaving the negative image behind...

Repeat this all over the card

and seal it once you have completed it..

You will need to clean your stamp in between each application to prevent transference of colour onto your Ink pad.

Repeat the application of Ink and Mica again on the last piece of Black card stock so that you end up with two of each technique.

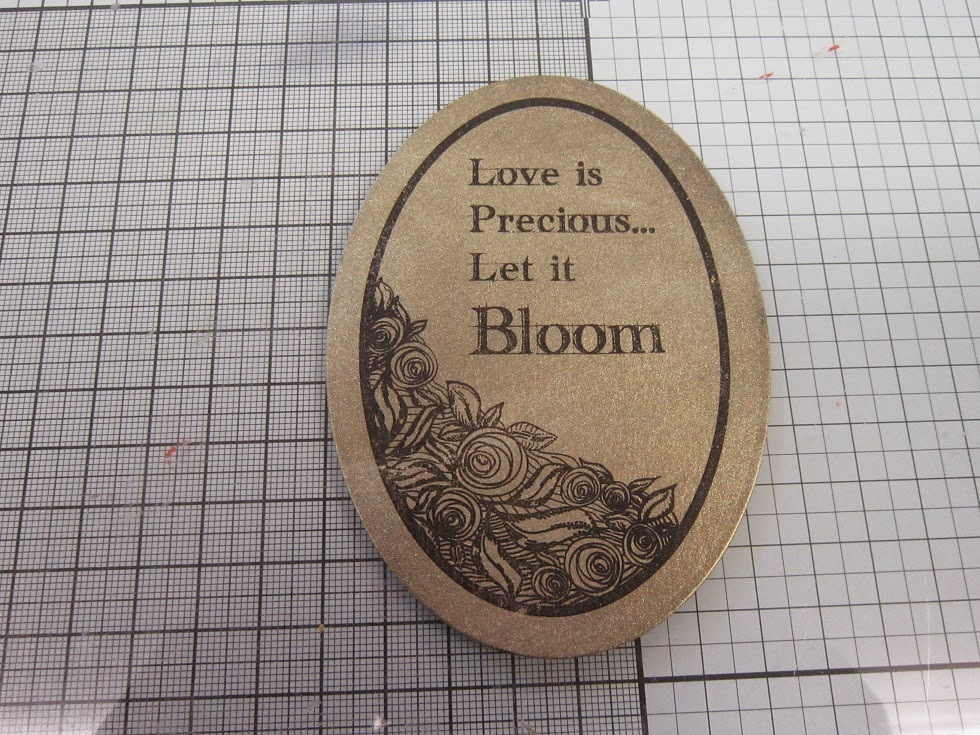
Matt and layer them onto your base card,

adding a sentiment to complete the project...

Am loving the colour way of this project, just ganna have to make time to have a little play with all of the other colours of Mica now!!
Thanks for checking us out.
See you soon.
Andy.

Ingredients used:
Cosmic Shimmer Decadent Grape Mica Powder
VersMark or Perfect Medium
Brayer
CEC715 - Fern Frames Elements by Jonathan Lockwood
SYBSC - Baroque Sentiments Collection by Phill Martin
Anti-Static Bag
Spray and Shine