Wednesday 30 September 2015

Christmas Musical Notes....

Hi folks... No real technique for today's Creative Expressions Design Team project I'm afraid.

Just several Die Cuts strategically placed to produce something I'm quite proud of.. Was going to add some words or a sentiment , but I think it's well left alone at this stage, unless I reconsider that is!!!
So, I'll give you a little step by step, although I'm sure you don't need one, just so you know what Creative Expressions goodies I've used, in case you fancy giving it a go yourself...

So, we start off with the Kalini Musical Notes Die (CO724245),

the Kalini Treble Clef Die (CO724246)

and the Sue Wilson Finishing Touches Die, Laurel Leaves (CED1437)...

As I said, all I have done for this week’s project is to strategically place these Die cuts onto my base card,

highlighting the Treble Clef image,

and adding an element of colour using the Creative Expressions Pine Cone Embellishments...

Well, it says Christmas to me, and seeing as a family member has already laid claim to it, that's another one done off of my list!!!!
Thanks for checking us out, see you soon.
Andy..

Wednesday 23 September 2015

Christmas Finial (Bauble)....

Hi Folks...More Christmas inspo for today’s Creative Expressions Design Team project...
Back in the day when I was growing up (some would say I am still trying to grow up now!!) I remember our Christmas tree... It was White with little Red "stoppers" on the ends of each branch, which I can remember were to hide/protect you from the twisted wires (no 1970's health and safety here!) which made up the branches of the tree, and against the Whiteness of the Tree looked like Red berries.. I can also remember that we decorated it with everything under the sun.. No real colour coordination like you see now a days, just 1970's nuttiness!!!!

Anyhoo, one of the main things I remember were the baubles.. Or, as I now know they are called, Finial's!! and yes, we still have some of them (those which have not broken over the years) in the loft with the current tree.. Not that we use them anymore but you know you just keep these sort of things for sentimental reasons...
So, these finials are the inspiration for today’s project....

I've used one of Sue Wilson's new Configurations Dies to create my own Finial....

Now I know the card looks unusual in the fact that the sentiment is running down the side of the project, and yes I'm sure the recipient would think that you've made the card back to front as it could quite easily be turned landscape and everything would be upside down!, I guess if you see it on their mantelpiece that way you'll just have to correct them on it!!

So, if you'd like to have a little go at this nostalgic Christmas card here's a little step by step guide for you.

To start off with I cut the Sue Wilson Charming Lace Trim Configuration Die (CED6404) out twice with White Card... Getting rid of all the waste pieces from these two particular images!

I then created a "tacky" area on a piece of card

and stuck the two pieces down next to each other to form one solid image.

Next, I cut the Die using some Red card stock, fortunately both the positive and negative (waste) all stayed in the Die, which is an advantage for the next process which will be to back fill with the previously cut images.

For me, the easiest was to do this is to lay the Die over the image and basically poke the pieces back into place.

You may get all of the pieces back in one go or you may have to "manually" pop the last few back yourself...

Either way, it's worth it for the effect it gives!!

Once both sides are back filled

you can then cut the image out..

Obviously you now have a Red image to play around with,

and you can back fill these in the same way as before using the waste from the original White images (if you still have them) or, just cut some more....

So, we now have a Red and White Finial and a White and Red one...

I added mine to a DL card, to which I added my stamped sentiment and using the Berry Sparkle PVA Glue created the chain effect for the Finial...

And there you go!! A little 1970's Christmas nostalgia!!
Thanks for checking us out, see you soon.
Andy...


Wednesday 16 September 2015

Concertina Paper Christmas Trees....

Hi folks.... Back to a Christmas themed project for this week’s Creative Expressions Design Team post..
As I've stated in my previous September posts, this Month’s Design Team goodies were anything but Christmas! But, I'm so in that zone at the moment as I want to get as much done before December as I can! and not leave everything to the last minute as per!!!

So, although the Papers I was sent were Phill Martins Butterflies and Dragonflies I put them to good use to make these Concertina Christmas Trees.. This is a great little project to make use of oddments of paper that we all have laying around, or those pages from paper stacks that you have every intention of putting to good use, one day!!
So, if you fancy giving these a go here's a little step by step guide for you...
I'm sure these can be made in various sizes, the ones I have made have 9 layers.. Personally I don't think I can make the top layer any smaller as it’s quite fiddly for my chunky hands to manipulate into shape! However, I probably would be quite happy to make the bases bigger, given the time!!

I started off with the largest Rosette. Cutting three strips from my 8" paper pad at 2 1/2". (3 @ 8" x 2 1/2") If you were using a 12" piece of paper then you would need 2 strips at 2 1/2". Basically, whatever you are using the ultimate goal seems to be to make the length of the paper 24". 2 x 12", 3 x 8", 4 x 6" etc., etc...

Using a score board and a ball tool,

score each strip at 1/2"

and concertina folds into each piece. In hindsight, I might score these increments first and then cut the paper to size as I found it a little difficult to keep the paper strips straight as you score 15 times, especially when you come onto the smaller strips to make the top layers of the tree.. Just an observation!!!

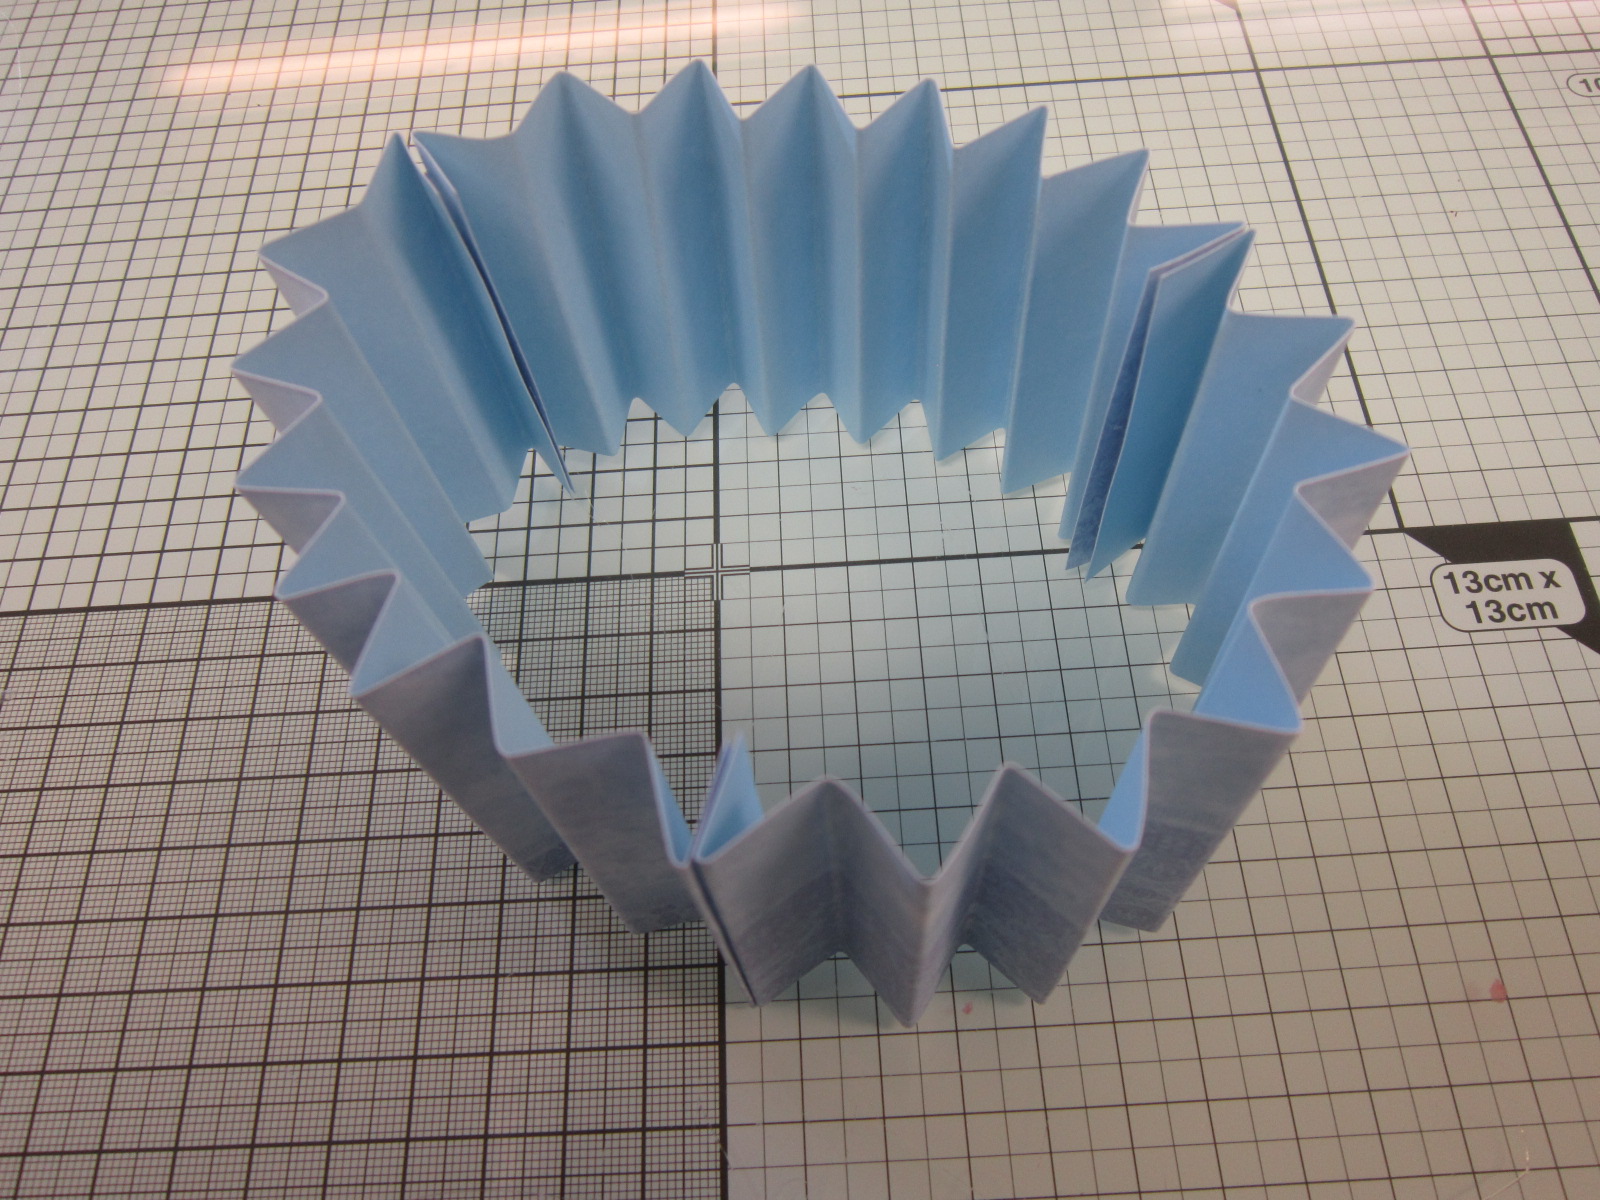
Once you've scored each piece, join them together. I used a Hot Glue Gun for speed.

And then join each end together.. And Yes, you have a Cup Cake wrapper!!!!

Whilst the Hot Glue is setting, go ahead and punch yourself some Circles. These will be used to hold the Rosette in shape, doesn't have to be Circles, an oddment of card which coordinates with your project will be just as useful!
The next stage can be a little tricky,

basically you're going to take the shape from this

to this by simply folding the Rosette flat.. It will probably pop itself back up to the original shape (which can be a nightmare when you're trying to take a picture of the process!!!!)
But persevere and it will do as it's told eventually..

Squeeze the Rosette together so that there is just a small hole in the centre,

add Hot Glue to the Circle you previously punched out and stick it to the centre of the Rosette, first on one side,

and then t'other... Adding the punched Circle will give the Rosette strength and also prevent it from popping open.. And yes, an extra pair of hand would be great at this stage!!

So, that's the first layer done. All you have to do is repeat the process with your other pieces of paper.. All I have done is go down in 1/4" increments for each layer.. I.E, Layer 2 will be 3 x 8" strips which are 2 1/4" wide, layer 3 is 3 x 8" strips which are 2" wide, and so on and so on..
When it comes to the top layer (layer 9) I think from now on I would only make it 16" in length as opposed to 24" I.E 2 x 8" cut at 1/2". For me, it was just too tricky to get all of that paper to work easily together (although I obviously did!)

The Green Tree is the one that has been made with only 2 strips and in fact I think it looks moderately better?!)

Once you have made the Rosettes you can then stack them on top of each other trying to keep them straight otherwise you end up with a wonky tree! Which, I know mine is but it's not bad for my first attempt!

I mounted the base of the tree onto a loose lid box, which I could put a little gift in or a few Christmas Sweets,

decorating the top of the tree with a Stick Pin and Beads from Creative Expressions...

And there you go, a veritable forest!!
Thanks for checking us out, see you soon.
Andy.


Wednesday 9 September 2015

Alcohol Ink Background...

Hi folks.. Creative Expressions Design Team time again today...
As I said in my last post, this Month’s goodies were anything but Christmassy! And although I made last week’s project Christmas because I was in that mode, this weeks has reverted back to everyday use. And more specifically something I can use for a Birthday..
September che Pinnacles is defo a Birthday Month! At the weekend we celebrated the shops 12th Birthday with a little Christmas Demonstration Day, (and I'd just like to thank everyone who was able to pop along, and I hope you enjoyed the inspiration!?) Next week is my Dads Birthday, followed 3 days later by my Mums, then it's mine and finally at the end of the Month we have my Nans!! You wait all year and then they all come at once!!!
Anyhoo... Here's todays sample, I've decided that it’s going to be the one I send my Dad for his Birthday...

And if you fancy giving this fun technique a go, here's a little step by step on how it was achieved...

To start off with I took three colours of Alcohol Ink

Randomly applied them to my Craft Mat

and then added some Alcohol Blending Solution, the final results of how light or dark the colours will be will depend on how much of the solution you add, as it not only reconstitutes the Alcohol Inks, but will also lightens them if you use a little more.

To allow the colours to blend together I tip my Craft Mat from side to side, trying to stay within the centre of the Mat so as not to waste too much of the Ink.

Next, place a piece of Acetate into the Ink

and then remove it and place to one side to dry. As the Inks and the Blending Solution are solvent based, this should only take a minute or two to dry as the Alcohol evaporates.

As effective as this looks on the Acetate, it's not until it is backed onto a plain piece of White card stock that the true effect comes thru..
Now the only decision you need to take is what to do with it.

For this particular project I decided to stamp one of the Silhouette images I was sent. Wasn't quite sure whether to have the Red at the top or the bottom as it seemed to work both ways, but finally went with having it at the bottom.

A little bit of Mat and Layering

and there you have it!!

Using different coloured Inks will give you a choice of different backgrounds to add your Stamps or Die Cut images to..

Using more Brown/Yellow tones has seemed to work wonders as a Desert background for this Die Cut,

or actually any colour combinations seems to work!!
As a result of Saturday’s demo, I now have a nice little pile of backgrounds to work with.. Just need to wait for the right image to add to the front of them though!!
Thanks for checking us out, see you soon.
Andy...