Tuesday 31 May 2011

Back in the land of Blog....

Hi Everyone.... I hope you are all well? It's been almost a week since my last post and with every intention of getting something put up time eluded me day after day! But, now I have gotten another Club Members Weekend out of the way, I can now share with you again some crafting goodies.. Don't get me wrong, I love CMWE's, it's great seeing all our crafters come and see us and all the effort we put into getting prepared generally makes these weekends go so very fast, the fact that this CMWE was a four day'er is testament to that! Last Wednesday's post seems like I only posted it yesterday!! Anyhoo, enough with the waffle let's get on with some crafting eh?...I wasn't going to show this card for a while, but so many people commented on it over the weekend, I promised to get it on here sooner rather than later... So here it is..
And of course here's a step by step for all of those who purchased the goodies to make it!I started off by cutting out 2 full sets using the Spellbinders Die S5-048 Sprightly Sprockets (just gotta love that name!), using some 290gsm weight White Card stock.I then embossed each image using the Swiss Dots Cuttlebug Folder.Once embossed I coloured half of the images with Weathered Wood Distress Ink Stainsand Half with Faded Jeans Distress Ink Stains..And then spent about half an hour playing around with the images to see where they went best together!! and then discarding them so I could get on with the base card.
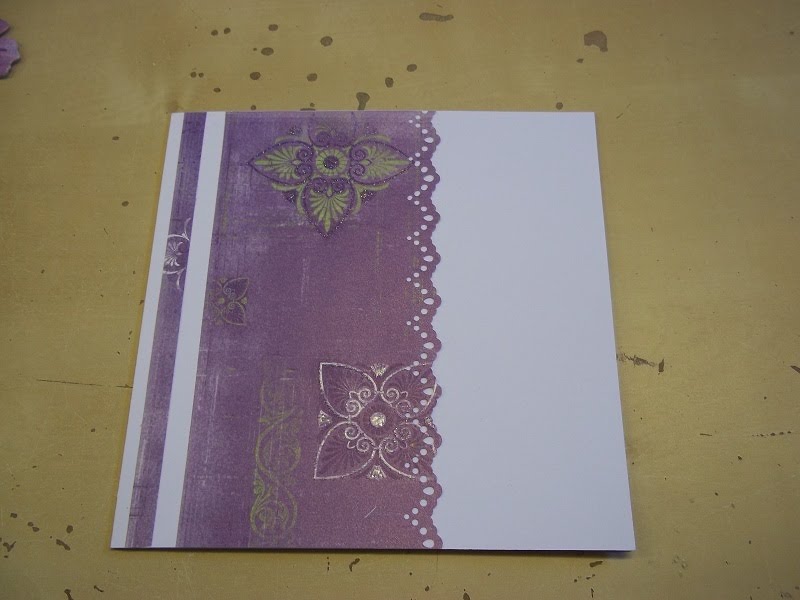
This new Teresa Collins card stock was ideal, but the wrong colour...Da da da da... Ink stains to the rescue... These Inks work best on non porous material such as card stock, so I coloured the whole piece in the Faded Jeans Distress Stain. It's a bit wishy washy, but I quite like that effect, a bit more patience and a bit more Ink I suspect you would get a much more even coverage though!I then prepared my twisted easel cardand applied a 5 3/4" square of the now Blue card stock to the base...Cutting a Triangleto form the stopper of the Easel card...Adding another Triangle to the back of the card before settling on my final layout for the cogs and applying them to the project with some double sided foam for dimension...And there you go.. A great masculine card I think, perhaps that's why it was so popular!? It was going to be my Dad's Father's Day card, I say "was", it still might be.. Don't look Pop's!!!
Thanks for checking us out, and see you soon..
Andy..

Wednesday 25 May 2011

Subtle bling..

Hi Folks... I've got another simple card for you today as I'm still settling back into the daily grind after my holiday!Whilst I was away we had a delivery of some Nestabling! And, as I have a couple of Anniversary cards to make for the coming weeks I thought I would give this new product a go..I chose to use the Scalloped Hearts White Pearl Nestabling, which co ordinates with S4-137 Scalloped Hearts Nestabilitie.Although, I couldn't find my Scalloped Heart Nestabilitie I decided to use the Classic Heart Nestabilitie S4-136 and see if the Nestabling would work with that die too.. Which it did!The work which has already been done for us in the make up of these designs will save so much time than if you did it yourselfand probably look a lot better than if I had tried to do it manually myself!!I found a piece of backing paper with some printed frames on it,chose the design I wanted for my projectand cut it out.Layering it onto some Pink Mirror card.I prepared my Easel cardand attached the matted backing paper to the back.Adding one of the bling'ed up heart shapes to the paper...I then cut a border strip from the same card I used for my easel card using the Martha Stewart Doily Lace Trim Punch.Matted it onto some of the Pink Mirror cardbefore applying it to the Easel card as my stopper.We have also had a delivery of some great new Prima Flowers and Leaves whilst I have been away.. Now, these White leaves will look great on some of my Christmas projects, but they are also crying out to be inked within an inch of their lives!!So that's what I did.. I have been meaning to play with our new Tim Holtz Distress Stains, so this was the perfect opportunity. I tried several colours (as you may have noticed on the first pic in this post?!) but settled on using Peeled Paint and Forest Moss for my leaves.Once dry the leaves looked much lighter than when they were wet, der!!! So if you want a darker colour then a second application should give you just that!I then took the largest flower from another set of Prima Flowersand applied it and the leaves to the Easel card for some decoration.And there you go.. I've just got to add my Anniversary sentiment when I am ready and pop it in the post!.
Thanks for checking us out and see you soon.
Andy..

Thursday 19 May 2011

Have you missed me??

Did you even know that I had gone?? Hi Blogland. Well, for the past two weeks I have been lazing in the sun in Lanzarote...For those who may not know where this is, it is one of the Canary Islands located just off of the coast of North/West Africa...It was definitely time for me to take some R & R...and it was great just to chill out a bitand relaxin some great surroundings for a while...But, like always, the sun has to set (corny reference I know!) on a holiday and I am now back home in the UK refreshed and ready to get some work done....So, here we go with another, "very simple" card for the guys, it is my first day back after all!!I printed my image from one of the Mickey character ranges from Charmed Cards & Crafts. Of course it was coloured with Copic Pens and Glazed with Glossy Accents before being mounted onto some Black Mirror card.We recently had a delivery of some papers by Theresa Collins and one of the papers was of Guitars which would work perfectly with the stamped and colored image. So I added a piece to the base of a prepared twisted easel card, adding a piece of Black mirror card as the top layer.Positioning the stamped image on the front before sticking it down to see how it all fitted togetherand also to make sure it would fit in an envelope.To continue the musical theme for this project I cut out a large and a small Treble Clef using the Marianne Creatables Music (LR0167) die in Gold Mirror card and applied them to the project to finish it off...It's good to be back, so now time to get down stairs and play with some more of the new stuff which has arrived whilst I have been away...
Thanks for checking us out, see you soon...
Andy.

Tuesday 17 May 2011

Flower Girl...

Hi Everyone. How's things?I wanted to share with you today another digi stamp from Wee Stamps..After colouring the image in with Copic Pens and then glazing it with Glossy Accents I cut and matt and layered it using Spellbinders Nestabilitie Labels Two.For my card for the image to go onto I punched a border along a strip of backing paper using the Martha Stewart Vintage Lace Border Punch.I then cut out several flowers using the centre shapes from the Marianne Creatables dies Doily Round (LR0168) and Doily Square (LR0169).Layering them on top of each other around the image.A very purpley card, and I have just the person to give it to...
Thanks for checking us out.
See you soon..
Andy.