Showing posts with label Gilding Wax. Show all posts

Wednesday, 2 December 2015

Bah Humbug.....

Hi folks.. Something a little different for today’s post...
I wasn't in a particularly "dark" mood when I was creating this.. It just took itself off in that direction..

It has the feeling of something about it, a bit "Bah Humbug" I think... But I kinda like it and enjoyed making it! Which, to all intense and purposes is what it’s all about right??
To start off with, I cut a circle in a piece of Brown card stock.. Initially a made a few mistakes with this part of the process, but if you don't make the mistakes then you'll never learn eh!!
First mistake was that I embossed the image first and then cut out the circle.. What does this do? You might well ask dear reader!! It flattens the embossing!!
Next mistake was that I cut the circle way to one side of the card; therefore the whole of the embossed image didn't fit on the card!!

Eventually, I got it right'ish!!

Lined up the Embossing Folder

and embossed the image..

Cutting off the excess card to achieve my favoured Square card..
Now for the fun bit!! Gilding Waxes at the ready...

First a little bit of Frosty Mink,

Then a little dabble of Autumn Bronze,

Maybe a little Chic Pumpkin,

and a little dab of Enchanted Gold...

Then a little bit more of each until I was happy with the result...

Once "buffed" the waxes do not need sealing, but I do find giving them a spritz of Spray and Shine

intensifies the colour by separating it from any non waxed areas...

For the centre hole Aperture I planned on using this Tree image which I had cut out in the same Brown card stock and coloured using Vintage Holly Gilding Wax.. It is such a delicate image, in fact I would say more of the card is waste than what's left to create the image... you only have to damage it slightly whilst applying the Gilding wax for it to lose all its structure and strength...

So, to give it some stability, I cut a circle of Acetate, slightly larger than the Aperture

and stuck it to the back,

so that the tree had something to support it,

although it looks like it hasn't!!

For the background, I deliberated, cogitated and digested (not really!!!) many, many different pieces of baking papers and card before seeking advice (thank you Lisa) and settling on this piece of Silk Mirror Card which I embossed...

Love the effect it has given...

Thinking I would be able to finish off the project by Mat and Layering in Gold then realising that there was not a piece of Gold anywhere in the shop as it all sold out at the weekend, I plumped for a piece of Black instead... Decorating the Tree and the Aperture with some Metallic Gems....

As I said earlier, it's got something, not quite sure what though!! Oh well, another sample for the window done!! Next!!!
Thanks for checking us out, see you soon.
Andy.

Ingredients used;
Gilding Wax - Frosty Mink, Autumn Bronze, Chic Pumpkin, Enchanted Gold, Vintage Holly
Embossing Folder XCU 515211 - Round Guilt Frame
Brown Card
Gold, Black & Red (Silk) Mirror Card
Metallic Effect Gems
Silent Night Collection - Fancy Tree


Wednesday, 22 July 2015

Looks can be deceptive!!...

Hi folks... A bit of a simple, but effective project for today’s Creative Expressions Design Team Post..
With one thing and another, in the voids of "Pinnacles Towers" I have mis placed this Month’s Stamps; I know they are here somewhere!! I bet I come across them when I have my end of year tidy up!!
So, just so I can fulfil my DT duties I've selected a couple of other Creative Expressions products to play with until I either locate them or next Month’s goodies arrive!

Now, I know this may look like I have just cut out two Dies and stuck them onto a Gate Fold Card?!, but there is so much more to it than that! So, read on "McDuff" and you'll find out!!
Like many crafters, I don't like to waste much.. And considering some of the waste form a Die Cut is almost as good as the positive image, it seems a shame sometimes to bin it.

So, this is the case with this Die, cuts out well, and yes it could be used on its own,

but popped back into its "negative" can make it appear as an "innie" Die, you know, one that doesn't have a cutting edge all the way round!

And can look very effective if you use an alternative colour..

Bet people will ask you how you coloured just the image and not the outside!!?

You could secure the Die Cut with a little Glue,

mine nestled quite nicely back into the original shape so I didn't bother.

Matt and Layered with some complimentary card stock has really brought them to life

and added that slight dimension I like on my projects..

See, told you there was a little bit more to it than just sticking two Dies on the front of the card!!
Thanks for checking us out.
See you soon.
Andy.

Wednesday, 1 July 2015

It's an oldie, but a goodie...

... today's Creative Expressions Design Team project that is, not me! I am neither old nor good!!
I know it’s gearing up to be the hottest day of the year so far but today starts Creative Expressions countdown to Christmas..

So, for today's project I've teamed up with one of this Month’s Stamps with one of Sue Wilsons re released Christmas Dies from last year..
I created this design last year but this time, as new products have come out, I've done it in a slightly different colour way.. Told ya, an oldie, but a goodie...
Thanks for checking us out, see you soon.
Andy.

Sue Wilson Die Holly Spray
Cosmic Shimmer Berry Sparkle PVA Glue
Chic Pumpkin Gilding Wax
Enchanted Gold Gilding Wax
Autumn Bronze Gilding Wax
Rosebud Elements Stamp Set

Sunday, 21 June 2015

Happy Father's Day.....

.... to my Dad in a million.
Although I won't be able to spend much of the day with him, I will be able to give him a special present by way of bringing Joanne and Paul home from their travels for Father's Day'ish.. Hope you'll be awake in the early hours of tomorrow morning Dad!

So, here's the card I made for him.. It's one I will be sharing with you all at our Demonstration Day next Saturday (27th) which focuses on more masculine themed projects..
Thanks for checking us out, see you son.
Andy.

Wednesday, 3 June 2015

Heart of Stone!!!

No, not me! That's the title I've given to today's Creative Expressions Design Team project!
This Month’s goodies includes lot's of "non card making" products, MDF Shapes and alike!
So, to show them off to their best I guess it's time to roll up the sleeves and get creative with some crafting techniques..

For today's offering I have taken one of the Shaker Hearts and transformed it from its initial MDF state into what I hope looks like a piece of stone?!

To achieve some texture onto the Heart I decided to "crackle" onto it. You will be able to achieve this technique with products you probably already have rather than forking out for expensive Crackle Glazes.

Firstly, paint the image with your chosen colour of paint and allow it to dry. You can use a Heat Gun to speed up the drying process.

Next, apply a generous layer of Cosmic Shimmer PVA Glue,

Whilst the Glue is still wet paint over the top of it with your second colour of Paint. Try not to move the Glue layer around too much, the paint should be on the top of the Glue not in it!!

Now for the crackle bit!! Because the drying time between the Paint and the Glue are different, this is what causes the Glue to split or "crackle". This will happen quite naturally, but you can also encourage this process to happen with your Heat Gun...

Depending on how you have applied the paint and the Glue and in which direction will depend on how the crackle will react! The results can vary and is just the nature of the beast!!

As mine didn't seem to react much on the left hand side I decided to add my own technique by way of "Blistering"! This is taking the crackle stage a little further and really just means leaving your Heat Gun in one position longer than is necessary so that the paint starts to bubble.. This creates yet more valuable texture to your project.

Now you have your base, all's left to do is colour it!!! Now, I would list the products used and show the pictures of each stage, but it took ages and about 12 different colours of Ink and Gilding Wax to get to this stage, a stage I was finally happy with it, sort of!
Any hooslebees!! what to do with it? I wanted to add something (not quite sure what)

so I went with a Peel Off word. The Peel Off was initially Gold which I coloured with a Black ProMarker so that it would stand out from the background!!
Then thinking that the recipient of this heart may wish to hang it outside I thought that I would seal the Peel Off to protect it from the elements!!

Not a good idea. The Spray and Shine I used to seal the image seems to have had a reaction with the Ink on the Peel Off and it started to bleed...I think I caught it just in time and in fact I really quite like this outline effect it has created. Close up it almost looks like the word has been etched into the "stone" effect!! Happy accidents do happen then!??

So, a little Ribbon, Stick Pin and Dazzler to create a hanger for it and its good to go...
Thanks for checking us out, see you soon.
Andy.

Tuesday, 21 April 2015

Demonstration Day....

Hi folks... Just a reminder from us that it is our Demonstration Day here at Pinnacles on Saturday (25th April)..

There's no need to book for this FREE Demo, just turn up any time between 10am - 3pm to see what we have planned for you.
We will be featuring products from Creative Expressions inc amongst others, Phill Martin's range of Mica Powders, Texture Paste, Sparkle Texture Paste, Gilding Wax & Stamps...
We'll be covering lot's of different techniques to help you put these products to good use.
DOUBLE DISCOUT to all Pinnacle Crafts Club Members on all purchases made in store on the day (usual exceptions apply)..
We look forward to seeing you there...

Wednesday, 15 April 2015

Let it Bloom....

Hi folks.... more "playtime" today with this Month’s Creative Expressions Design Team goodies.

I've combined a couple of techniques on today’s project. So, if you fancy giving it or something similar a go, here's a step by step.

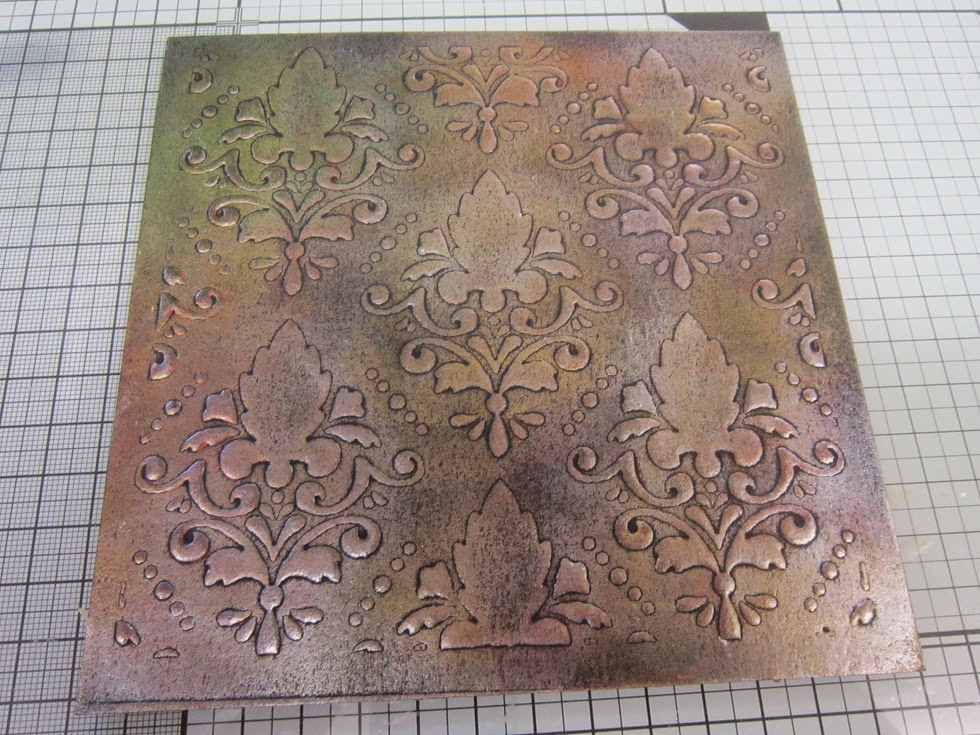
I started off by embossing the Creative Expressions Damask Mask onto some Black card stock. The reason I prefer to emboss the Mask rather than just Ink or colour through it will be explained shortly.

Next, I coloured in some areas of the card using Chic Pumpkin Gilding Wax,

followed by Chic Moss Gilding Wax,

a touch of Graceful Mustard Gilding Wax

and finishing off with Pearl Moon Gilding Wax.

I love the effect which has been created using these individual colours. They seem to intermingle yet still hold their own!
Before the next stage, if you remember, dust over the whole area with an Anti-Static Bag. We're going to be adding some Mica Powder and using the Anti-Static Bag helps prevent the Mica sticking to areas you don't really want it to...

Place the Mask back over the original embossing image. I said earlier why I prefer to emboss a Mask if I am going to colour, this is because embossing the card stock brings it up to the level of the Mask. So when you add you colour, either by spritzing, Mica, Embossing Powder etc it is less likely to seep under the Mask and therefore hopefully give you a better result!

So, whilst the Mask is in place, Ink through the open areas with Perfect Medium.

Remove the Mask and add your Mica Powder, I have gone with Chic Moss. Highlighting just the "Damask" images has really made them stand out!

You may then wish to seal the Mica with some Hairspray.

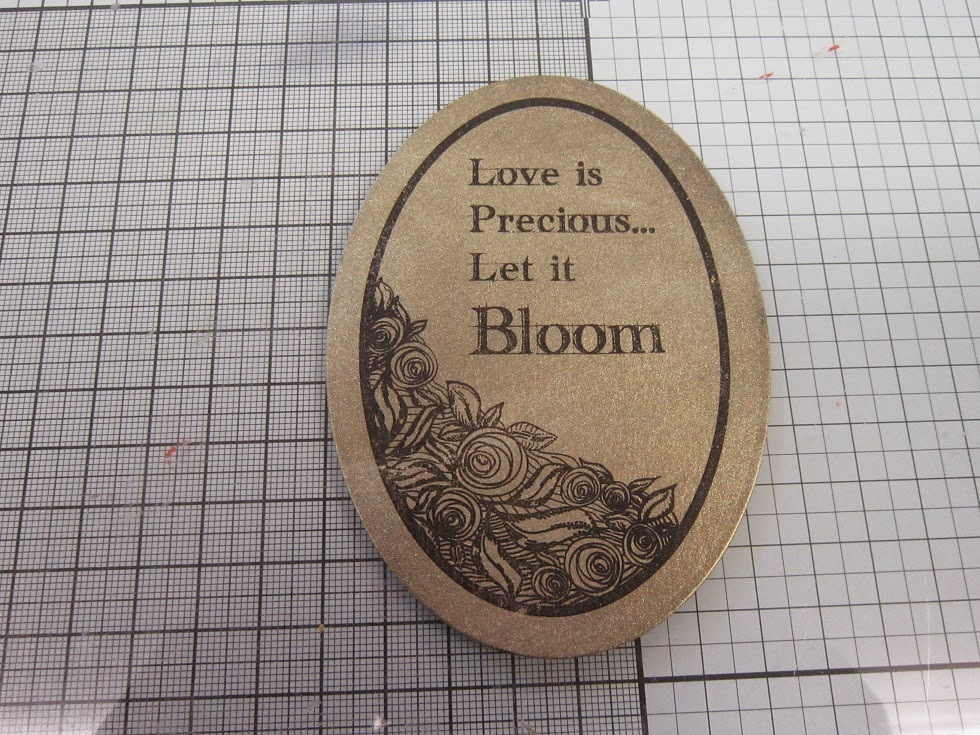
For the sentiment panel I covered the whole piece of card stock with Perfect Medium,

dusting the whole area with the Chic Moss Mica Powder.

Next, Ink up your stamp with Perfect Medium and stamp onto the Mica covered card stock..

As much as the Perfect Medium attracts the Mica Powder to the card stock, it also removes it when used on the stamp, revealing the Black card stock underneath..

Again, this will need to be sealed to prevent the Mica Powder rubbing off.

Then's all left to do is prepare your base card

and apply your sentiment!!
Makes for a pretty opulent card don't you think?
Thanks for checking us out.
See you soon.
Andy.

Ingredients used:
Chic Pumpkin Gilding Wax
Chic Moss Gilding Wax
Graceful Mustard Gilding Wax
Pearl Moon Gilding Wax
Chic Moss Mica Powder
Creative Expressions Mask - Damask
Scribble Rose Elements Stamp Set - CEC712