Saturday 29 September 2012

Cream & Chocolate... mmmmm

Hi Blogland. Today’s project is a little play on Tuesday’s card. I.E, using the same Dies, but in a different colour way..
I'm very much into Chocolate & Cream at the moment! Yum!! The process for the project is pretty much the same as the original.
Faux Emboss/Cut the Largest Die from the Spellbinders Floral Ovals Set (S4-356). You can find the instructions on how to do this here. Once the image had been embossed in to my card stock, I also cut out an aperture in the middle using the largest shape from the Spellbinders Die Petite Ovals Large (S4-138).
To add a little more interest, and depth, I lined up my image onto another piece of card stock, placed the next sized Oval die through the original cut and ran it through my machine to cut a slightly smaller aperture.
This in turn was matt and layered onto another piece of card to which I had already stamped my sentiment. To add another element of interest, I cut out the Yvonne Creations Christmas Flower Die
and the Marianne Designs Creatables Skates (LR0247)
both in the same Cream coloured card stock.
And applied them to the project.
The project was then completed with a nice Chocolate Box bow... Thanks for checking us out and have a great weekend.. See you soon. Andy.

Wednesday 26 September 2012

The Nutcracker Sweet (Suite)...

Hi Blogland.. This isn't the project I was planning to post today. But it has caused a little bit of a stir in the shop so I thought I'd share it with a wider audience... I know how lucky I am to have the opportunity to see the products which are coming, sometime Months before they are actually released. Sometimes it's almost impossible to keep a lid on my excitement and my gob shut.. (I know, get a life!) But I'm sure many of you can empathise?
This was the case with these papers from Graphic 45. I knew we had to have them and I knew exactly what I wanted to do with them!!
This!!
Page by page,
it tells part of the story of the Nutcracker..
It's not a story I am familiar with,
but the text on the papers
gives the general gist
of what it's all about..
And suddenly,
I'm informed!!
Now you may think that the book is made from wood?! Infact it is wood effect card stock which I have distressed with Toffee Crunch Memento Ink to tie in with the papers. Pretty good match eh?!
The front and back images I have sprayed with Stick and Spray to give them a glazed effect.
The whole thing amazes me how it has all come together!! I'm planning on giving it to little Oliver for his "First Christmas". Something that perhaps can be brought out every year.. I'm liking starting new traditions... Ho Ho Ho.. Hope you like it as much as I do? Thanks for checking us out. See you soon Andy..

Tuesday 25 September 2012

Get your Skates on.....

....Christmas is a coming... Only 90 days to go now... And how do I know that! Well, apart from the obvious, I counted them on my calendar! But also, today is MY Birthday (see, I said there were a lot of Pinnacles Birthdays in September!) and it is always exactly 3 Month's before Christmas... The countdown begins now...!
So, here we go with today’s project. Ideal for a guy's Crimbo card perhaps? Dad, if you're looking, this one is probably gana be yours soon!! So, here we go with a step by step if you fancy giving it a go?!
To start off with, I cut out the Marianne Designs Creatables Skate Die (LR0247) in some Cream coloured card stock.
I then cut out the die again, this time in Silver Mirror card. I cut off the laces part of the die
and applied it to the Cream image.
Next, I cut the die out in Blue Mirror card and cut away the laces and the lower skates’ blade, so that when the Blue image was applied on top of the Silver image, the blade would still show. (Sorry, no pic of this stage!)
I then cut out a second Silver image. This time, cutting away the upper skate blade
and then applied it to the Blue image.. Really gives it that dimensional look and shows each element in its correct colour. Cream laces, Blue Boots and the Silver Blades.. Worth doing, but works quite well without, as you'll see in an upcoming post! For the background of the card I had to have a little play with some of our new and existing Spellbinder Dies..
So, using the Spellbinder Fancy Lattice Die (S5-152), I cut "into" some Blue card stock. This die is one of the new "Expandable Pattern" Dies which means it will cut "into" a piece of card so that you can then place the die next to the initial cut and cut again, therefore making the image expand! There are a few of the new dies which are able to do this: Basic Lattice (S5-151), Botanical Swirl (S5-154) & Butterfly Magic (S5-154)... So, there is good potential to make some rather large projects, depending on your die cutting machines' capabilities...
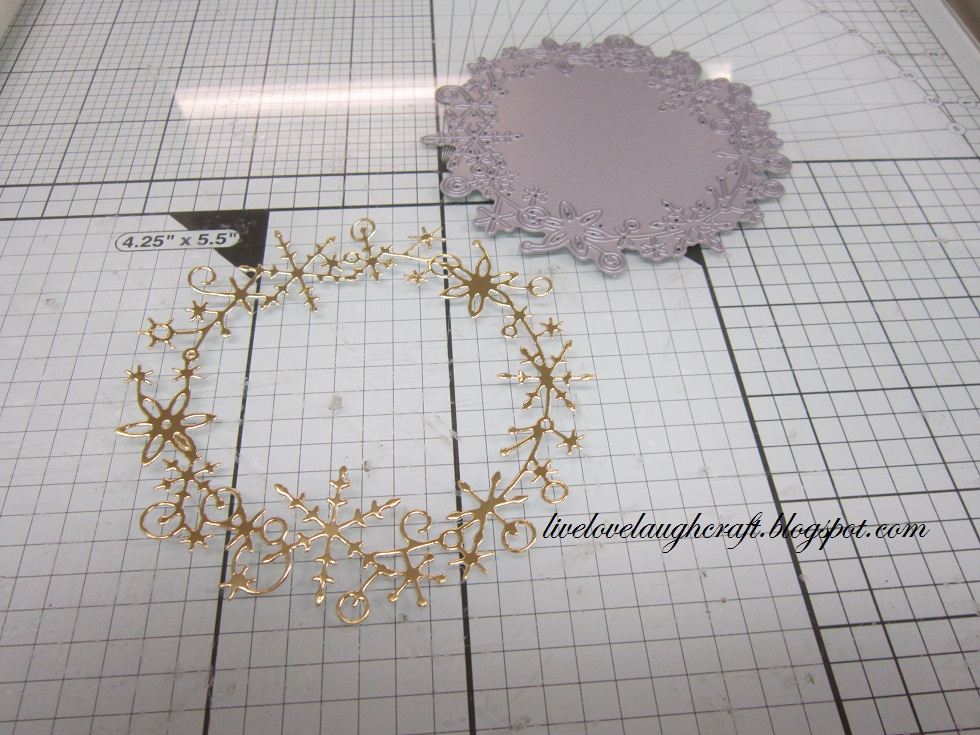
That said, I only used it in its simplest form, layering it behind a faux embossed and cut out image for which I used the Spellbinders die Floral Ovals (S4-356).
Backing it with some more Blue card
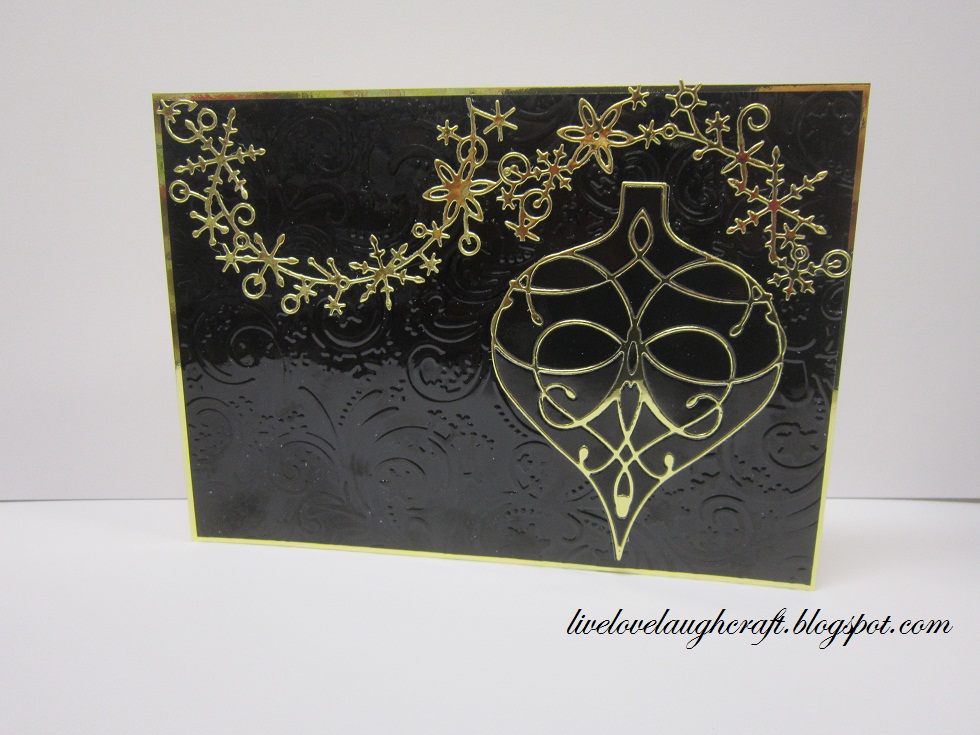
before mounting it onto my prepared base card to which I then added the Skates I prepared earlier. The embossing down the side of the card was produced by using the Swirl Corner Embossing Folder which is one of the new Embossalicious (who thinks up these names?!) Embossing Folders. They are a range of 6" x 6" and 8" x 8" Embossing Folders. So, if you enjoy making larger cards, these will be ideal!
And there you go.. Don't forget its Pinnacle Crafts Club Members Discount Weekend THIS Weekend!!! See you there. Thanks for checking us out. Andy..

Saturday 22 September 2012

Elegant Ornament.......

Hi Guys! Back onto Crimbo for today’s project.. You may remember my first post of 2012? I shared with you the Christmas cards I made for some of my nearest and dearest. As enjoyable as they were to make they were a little fiddly to do. At the time I thought that they could do with being a little bigger.. So what have Memory box gone and done?? That's right they've made the dies bigger and with new designs to boot.. They must have heard my mutterings!!! Lottery win, lottery win lottery win! Let's hope someone hears that!! he he...
So, today’s project is a slight play on those original cards... But the process is roughly the same.
I started off by cutting out the Ornament Drop (98378) die in both Black and Gold Mirror card.
I then cut out the La Rue Ornament (98377) again in Black and Gold. Trying to keep as much of the "fall out" pieces within the shape as I can, as this makes swapping over the pieces that much easier... But one of the sets has to be removed first anyway, so if they all fall out, so be it!
I covered one of the Drop Ornaments with tape
and popped out all of the "waste" from the alternative coloured La Rue Ornament
before applying the out lined shape to the solid base.. I guess many of you might say that this is good enough for a contrast (without the sticky background spaces)?
But, once you fill in the spaces with the original colour it really does lift the design.
Repeat the process in the reverse colour way and you'll end up with two really elegant Baubles...
Or why not ring the changes and make a feature of the Heart which makes up the La Rue Ornament..
I didn't want anything too fancy as a background to detract from the Ornament so I also cut out the Memory Box Frostyville Wreath (98418) die in Gold Mirror card
and cut it in half to form a swag for the Ornament to hang from..
This was mounted onto a piece of Black Mirror card which I had embossed using the Spellbinders Holiday Magic M-Bossibilitie Folder.
And there you go.... This project would also work using the new Colette Ornament (98379) or the new larger Emma Ornament (98411) as of course the original Snowflake Ornament (98231) and Classic Ornament base (98211).. Pretty elegant, no!? Thanks for checking us out and enjoy your weekend. See you soon. Andy.

Thursday 20 September 2012

Baby Shower.......

Hi guys. A little break from the family Birthday's today, and Christmas cards! Most of my friends are all turning 40 around the same time. I.E their last or next Birthday will be their 40th! An expensive time for us all! Well, you have to celebrate such an auspicious occasion now don't you?! That said, a few of those, "the women mostly!" ;-) are also having kids! Last egg in the basket syndrome maybe? My friend Leigh, who turns 40 next year, is expecting her first bub in November.. She knows he's a boy and has already chosen his name. Oliver William Carter... She has decided to have a Baby Shower and asked me to make some invites for her..
So, here we go. This is an idea I've had in my head for a while but had no real reason to use it..
The Balloon Dies
and the Cloud Dies are all from Memory Box. As the shapes are quite simple they cut through the 300gsm card stock I used like a knife through butter! Wish all of the dies were like that!
I finished the card off with the Marianne Designs "Baby Script" Die (LR0217). I just love the font of this die. And, as I have nothing to compliment this die in the same font to make "New" (Baby) or (Baby) "Shower". I think I will just leave it at that! Its defo the Blue one I'm going to be making more of for Leigh's invites. But of course I just had to see what the card looked like in other colour combos... So,
we have Pink,
Mint,
and Lemon for those who don't know if it's a Girl or a Boy..
Although I'm loving the "Candy" colours I can use for these Baby cards, I can see the potential of these Dies, (not the Baby one obviously) for some male themed projects... Watch this space... Thanks for checking us out. See you soon. Andy.