Well, if you believe that you'll believe anything!! But life is good at Pinnacles so as they say, make cards while the sun shines.. oohh where are these random babblings coming from.. I'm thinking I may still be recovering from Saturday's class.. A workshop full of crafters joined us for our Art Deco class. It was great to see, and hear that they all had fun and enjoyed themselves.. They all, well, nearly all, even managed to complete their projects So well done ladies. See you all again soon...
Today I thought I'd share with you some simple Christmas Card ideas.. I know I keep mentioning the dreaded C word but it is nearly September and the clock is ticking. Don't come running to me in November when everything is sold out... and I have taken all of our samples off the shelves to use for my Christmas cards....;)
Joanne has been buying some truly amazing products for the past 6 Years and this Christmas season is no exception.
This card stock from Hunkydory is call Twilight and is now available in the shop. I have teamed it up with some new diamante adhesive letters we also now have in, for a simple but stunning effect on these cards. This moonlight background would also be fantastic for Halloween cards or layouts.
This card stock, also from Hunkydory and called Frosted Swirls, has been soooo much fun to play with.. Again I have teamed it up with the diamante adhesive letters..
On this one I have added some Decoupage also from Hunkydory. It has been placed on a background of glossy card which has firstly been coloured with Pitch Black Alcohol Inks, literally just covered in one application. I then passed the piece of card through the Cuttlebug using a die from the Wedding Set No2 from Sizzix.
The border has been punched from Martha Stewart Embossed Snowflake, a little bit of Stickles on the Poinsettia and you're done...
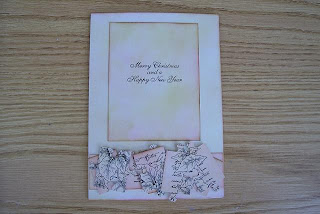
And just one more, again using products from Hunkydory...
Hope you have a hunkydory! Bank Holiday Weekend and thanks for checking us out..
Sunday, 30 August 2009
Wednesday, 26 August 2009
Flippin Christmas!!
Hi everyone, No! not a statement more the title of this card I have made for a magazine article.
It will be featured in Simply Cards and Papercraft magazine Issue 64, on sale in October. It will be under the heading of "The Best of British Cardmaking" and the theme for this issue was Christmas.. So here is my creation.. I have used a decoupage sheet from the new Flippin Christmas range.
From those who have seen the sample in the flesh, the feedback has been great. So once it arrives back from the photographers we will be displaying it in the shop for you all to see.. So don't forget to pick up your copy of the magazine when it is on sale as it has all the step by step instructions on how to make it. It even folds flat to go into an A5 envelope...
Thanks for checking us out and have a great day..
Labels:
Christmas,
Cricut,
Cricut Plantin Schoolbook,
Decoupage
Wednesday, 19 August 2009
Let them puzzle it out!
Hi Everyone, in our lessons this week we have been making "Puzzle Cards", and they have gone down a storm... Most, if not all of our crafters where unaware of what puzzle cards were, so I thought I'd show everyone what they are all about..
Starting off with just some plain White Card stock I coloured 4 pieces with Versafine Ink. Depending on the size of the stamp or image you may use will determine the size of each piece of card stock. I used an A4, 4"x5", 4 1/4" x 5 1/4" and a piece cut 1 3/4" x 5 3/4" for the sentiment panel at the bottom.
The ink was applied with a kitchen towel. When adding ink to use as a background it is best to work in from the sides inwards using a circular motion. This way the ink is applied evenly and you are less likely to get a splodge of ink where you don't want it!! Remember to use a light touch when applying the ink, you can always add more ink to get a darker colour but it will be impossible to remove it if you over do it... What I like about this technique of applying the ink is that the edges of the pieces of card are always stronger in colour, almost like faux mating and layering!! A great tip for those that don't like measuring..
Once inked I stamped my image and sentiment. The sentiment is in two places as when the card is given, it looks like a card with just some shapes on the bottom, when the card is put together the other sentiment is revealed completing the whole card. I then gave the whole card a good spray with Spray and Shine, this will seal the ink.
The image stamped piece of card was then passed through the Cuttlebug Machine using the Jigsaw cutting die..
Now it's up to you, either put the card together or place all the pieces on the sentiment bar and "let them puzzle it out"!!!
I used a re positional adhesive tape pen on the back of the jigsaw pieces, this holds them in place but allows you to move the pieces around the card.. Cool eh??!!
Why not give it a go? A great idea for other occasions as well.. A puzzle card is not just for Christmas.
Thanks for checking us out.
Labels:
Christmas,
Cuttlebug,
Inks,
Puzzle Cards,
Stamping
Monday, 17 August 2009
Totally Tropical Taste!!
Hello blogland, have you missed us?? Sorry for the lack of posts recently.. Things have been sooo busy at Pinnacles that time has eluded me yet again, but it's good to be back...
As the sun is shining and it's expected to get hot again this week, ooohhh 29C by Wednesday!!! I thought I'd share a some what tropical card I made recently...
This project has used some of my favourite products, well my current favourites, I'm sure I will move on to others very soon.. So out came my Cricut machine, My Life is a Beach Cricut Cartridge, My Cuttlebug and Alcohol Inks..oh and not forgetting the all important Mirror Card.. I just can't get enough of this at the moment, mainly because they keep bringing it out in some amazing colours..
Not just Black, Gold & Silver etc.. We now have some amazing soft pastel colours.. For this card I chose the Soft Pink and Lilac as well as the black...
I cut a 5" Flamingo in Black Mirror Card from Life is a Beach, then the body layer in Pink Mirror Card. Now this looks cool but I felt the body needed a a little more dimension.
For me, the Victoria Cuttlebug Folder supplied this dimension, almost giving a feather like effect.. Do Flamingo's have feathers? I guess they do.. Once stuck together this is how the bird looks. Take the Lilac Mirror Card inside the Swiss Dots Cuttlebug Folder to produce a simple but effective background. However the Flamingo was lost on the Lilac background, so I added a touch of Green by way of some Kanban Card (Duo Mirri Card - Trifoliata)
Then, taking a selection of Alcohol Inks I used different Greens and Yellows randomly applied to a sheet of
12" x 12" glossy card stock.
Then from on my Cricut Machine using Life is a Beach I cut out different leaves in different sizes ranging from 1" to 2.5".
I also love the waste which was left behind when the leaves were removed.. Perfect for a Scrapbook layout I have in mind..
Then, touring the shop I came across these fantastic Tropical 12" x 12" papers we have. They are from Sandylion and fit this project perfectly, they are also double sided so even greater value for money..
Then lay out everything together and stick the pieces to your card..
Enjoy the tropical weather and thanks for checking us out..
Labels:
Alcohol Inks,
Cricut,
Cricut Life is a Beach,
Cuttlebug
Tuesday, 11 August 2009
Happy Birthday Reene
Hi Everyone, Today is a very dear friends Birthday. She is as fanatical about her Cricut as I am.. and makes some truly amazing cards. I don't know about you but I find it almost impossible to make a card for a fellow crafter. I almost challenge myself to create something beyond belief which gives me a headache!!! Anyhoo as she loves her Cricut as much as me, I thought I would give her just that, in the way of a Cricut card, Literally!! I have a cart called Store Front. It has lots of ProvoCraft symbols on it, including a Cricut Machine, CuttleBug and Cricut image. I used chalks to make the blue background and embossed each line to look like a different cart.. The words on each cart are just peel off letters. Hope you like, although today more importantly I hope she likes.. Happy Birthday Reene... have a great day...
Oh also, there is a play on words here, her family are keen Cricketer's (the sport) so the term Cricut and Cricket works on 2 levels here... I hope...!
And here is Joanne's card for Reene...
What is there left to be said but WOW,WOW,WOW. So much work and effort has been put into this, well I was going to say card but work of art would be more appropriate I think...
This week in our lessons we are doing Quilling. (Quilling, or paper filigree, is the art of rolling and gluing thin strips of paper into different shapes to create decorative designs).
It's not something I can do but Pauline, who has the patience of a saint, is a dab hand at it..
Thanks for checking us out.
Wednesday, 5 August 2009
Snow Scene
Hi Everyone, These are some cards that I have been meaning to post for a while now, taken from an idea from a lady called SuzieB, thanks for the inspo Suzie.. However, every time I have taken a picture of them they have come out rubbish!!! Now I am not saying the cards are brilliant but my photography didn't really give them any chance at all!! Having completed my SDU course (Scrapbooking Design & You) I now look at taking photographs in a completely different way. I was always a random snapper, backs of peoples heads was always a speciality.. Now I try to look at what I am taking a picture of, and also try and take it in an interesting way.. When I tried to take pictures of these cards they always came out blurry. Possibly because they are so soft in colour. I even tried scanning them, this however just flattened them and made them in reverse. I.E the embossing became debossing, interesting but not what I wanted, but hey ho an idea for another project if nothing else..
A blast of inspiration tonight though, I thought I'd try a darker back ground and low and behold it worked. I think I now need to en role on an advanced photography course or at the very least invest in a better camera!!!
I have used the EK Success Alpine Tree Border Punch to create the border at the top of the cards and Sizzix Textured Impressions Embossing Folders, (and YES the go through the Cuttlebug Machines as well) Christmas Set#1
On the card at the top of this, erm quite lenghty post for me, I have just embossed onto White card. Tone on Tone cards can look soooo effective.
On this one I have used Blue Chalk from the Papermania Shimmer Chalks. TOP TIP ALERT!! I find if you chalk your card stock before embossing it, it does not show any potential cracks in the card stock created by the embossing..
This one is also using the Shimmer Chalks but with the Red and Green blended together.. I have a FULL CLASS on Saturday and I think I will let the ladies have a little play at making this card..
Hope you like them as much as I enjoyed making them, if not photographing them.
Thanks for checking us out..
Tuesday, 4 August 2009
Pinch Punch
Hi Everyone, I thought I'd share some of the cards we have been making in this weeks lesson at Pinnacle Crafts. Already this week we have had 15 crafters in our lessons, and as always, every card has been completely different. It never fails to amaze me the different perceptions we all have even though we all have the same choice..
Here are some of my samples for our Punching Lesson.
We have been using some new Border and Corner Punches from EK Success and some Flower and Leaf Punches from Mcgill and X Cut.
The above card has used Mcgill Spring Flower, EK Success Scalloped Scallop, Martha Stewart Punch (Doily Lace), Mcgill Pine Leaf, X Cut Daisy & EK Success Photo Corner.
On this one I have used, Mcgill Spring Flower, EK Success Scalloped Scallop, EK Success Zig Zag Stitched, EK Success Diamond Scallop, McGill Pine & X Cut Daisy & EK Success Photo Corner.
I have been a little extravagant and used 6 different punches on 1 card..but that is only so I can get to play with them all!!!
On this one I used Mcgill Spring Flower, Mcgill Pine, EK Success Parisian, Scalloped Scallop & Swiss Cheese, X Cut Daisy & EK Success Victorian Corner.
Thanks for checking us out.
Saturday, 1 August 2009
Blog Candy Winner!!!
Well Done, & Congratulations to dawndmm2003 which I believe is you Dawn!!? Just contact us to arrange collection of your prize.. pinncras@btconnect.com
Thanks everyone for taking part, we will have some more great Blog Candy to win very soon..
This week I have been a bit pushed, although I have only done a little bit of teaching, time just seems to have eluded me this week and everything just seemed to come at once. I have been prepping some cards for a couple of magazines we will be featuring in soon and although I can't show you them just yet here's a little sneaky peak..
I did however manage to create this. It could not have been simpler to be honest.
On a recent visit to Ikea, amongst other things I picked up some candles with the idea in mind to decorate them some how.
Working with some of the current Do Craft promotion Peel Offs these made a cheap candle into something a little more special I think..
Now you don't have to trek all the way to your local Ikea to get some candles, remember there is a Candle shop called Burout Candles right here at Barleylands!!!
Although this is a large candle and should burn from the inside out, I would not suggest lighting it with the Peel Offs still attached to it. It is a decoration piece only... However, we do have on their way to the shop some fantastic Rub Ons which will burn with the candle, so watch this space..
Thanks for checking us out..
Subscribe to:
Posts (Atom)