I myself have been locked in my little crafting cubbyhole in the shop playing with some of our new goodies, and some old goodies too..
 I promised myself that I would get a heads up with my Christmas cards and samples this year! So here we have the first one!! I know Christmas has only just gone, but I don't want to be rushing about the day before Christmas Eve finishing things off like I did last year.. Not through lack of planning, just lack of time!!
As you can see, I have used this sample as a Winter Birthday card, but I reckon a change of the sentiment and Christmas is here!!
So here's how it was made....
 I started off by embossing some thick Acetate using the new Craft Concepts Embossing Folder called Sycamore...
 I did this twice and on the debossed side I filled one in with Black Enamel Accents and one in with White and left them to dry.
 MMMMMMM, now what to do with them?? My initial intention was to do something Monochromatic.
 But, just playing around I laid the Black image over the White one and then just off set them slightly. Instant snow! How cool!!!!
 So, how to mount these images? I took a piece of spotted card stock
 and cut an aperture slightly smaller than the Acetate images.
 TOP TIP ALERT When cutting, make sure your Ruler is on the outside of the image you are cutting,
 so if you slip off of the line you cut into the area which is going to be cut away!!
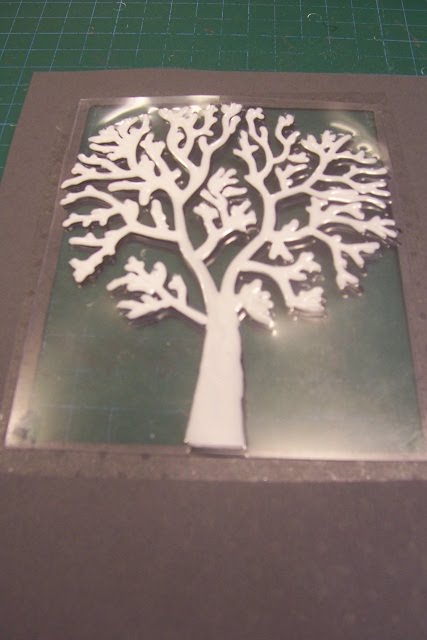 I added some tape to the inside of the Aperture and stuck the Tree's down,
 which made a nice frame for the project.
 Next, the background. I already had in mind this card stock from Kanban.. All the scenes they do whether it be Winter or Summer have so many uses, but this one was going to be perfect.
 I cut a piece to size, well in fact I cut it about 1/4" smaller, so that when the spotted card stock was placed on top the edges would not show.
 A good covering of double sided foam tape and on it goes
 creating a fantastic winter scene.
 I tied a bow around the shape and popped it onto my prepared base card.
 The open edge of the card needed something, and to be honest I grabbed the nearest thing I had to hand.. I then put my cup of tea down! (he he) and grabbed my Martha Stewart Deep Edger Infinite Loop Punch, punching out a border in the same Slate Grey Mirror card stock
 and added it to the side of the card.
 I printed my sentiment from my PC and matt and layered it with some Light Grey card stock and some of the Slate Grey Mirror card
 and applied it to the card,
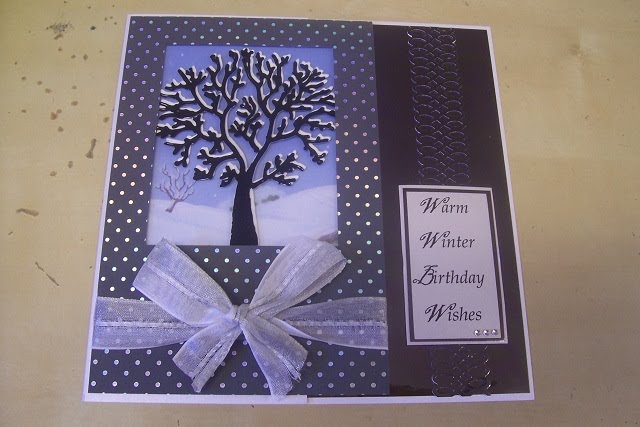 adding a few gems to finish it off... And there we go, A winter Birthday or my first Christmas card of 2011...
Have a great day everyone, and thanks for checking us out.
See you soon.
Andy.
Fab card Andy, I love it. I think it is appropriate to either sex as well as either celebration.
ReplyDeleteAndy, it is perfect. The off-set of the trees has worked so well and those good old Kanban senic cards are so useful. As you say, great for either a birthday or Christmas card - winter birthdays can be so difficult to as you don't actually want them to look like Christmas cards but this design really ticks all the boxes.
ReplyDeleteToni :o)
Wow!! Gorgeous card!!
ReplyDeleteThis is Gorgeous!!! TFS! -Sam :-)
ReplyDeleteWow this is gorgeous, love how the tree came out, I am going to have a go at this as I have the supplies.
ReplyDeleteKim xXx
Bravo Bravo! Can you hear me clapping? This is ingenious! Beth
ReplyDeleteAbsolutely LOVE this! What a wonderful idea! Thanks for sharing.
ReplyDelete