Wednesday, 10 June 2015

Self indulgence!

Hi folks.. Todays Creative Expressions Design Team post is literally what the title says, "self indulgent" crafting.. When this Months goodies arrived from Creative Expressions I did wonder what I was going to do with them! But, with thinking cap on they have allowed me to revisit crafting techniques I had long thought I had forgotten about!, and also the SteamPunk genre that I just love as it allows you to use these creative techniques and colours that you might not usually use or try...

So, here she is!! SteamPunk Betty!! One of Creative Expressions new range of colouring images.. I've teamed her up with some cogs from Spellbinders (Sprightly Sprockets), a clock die from Couture Creations and a frame from Creative Expressions which has been texturised (not a word I know) and distressed using Paints and Gilding Waxes..
Ok, the result has no practical use what so ever, unless you pop a picture in the frame before embellishing it, but the process and techniques used may give you some inspiration for you own crafting projects!?
So, if you fancy giving it or something similar a go, here's a step by step as to how it was achieved.

So, to start with I took one of the MDF frames I was sent

and some of the Decoupage papers.

Cutting them into different sized Squares and Rectangles.

To adhere the Decoupage Papers to the Frame, take a Paint Brush and some Cosmic Shimmer PVA Glue

and paint a small area onto the Frame

and apply a piece of the Decoupage Paper.

Sealing it with more PVA Glue

and overlapping another piece of the paper

building up layers all over the Frame until it is all covered.

Obviously, the appearance of the edges is a bit raggedy but this can be quite easily rectified by the use of a Sanding Block.

Just angle the block against the edge of the frame and the Decoupage paper will simply fall away leaving you with a nice tidy background.

Repeat the process with the front of the frame.

mitre the corners

before sanding to give a nice clean edge.
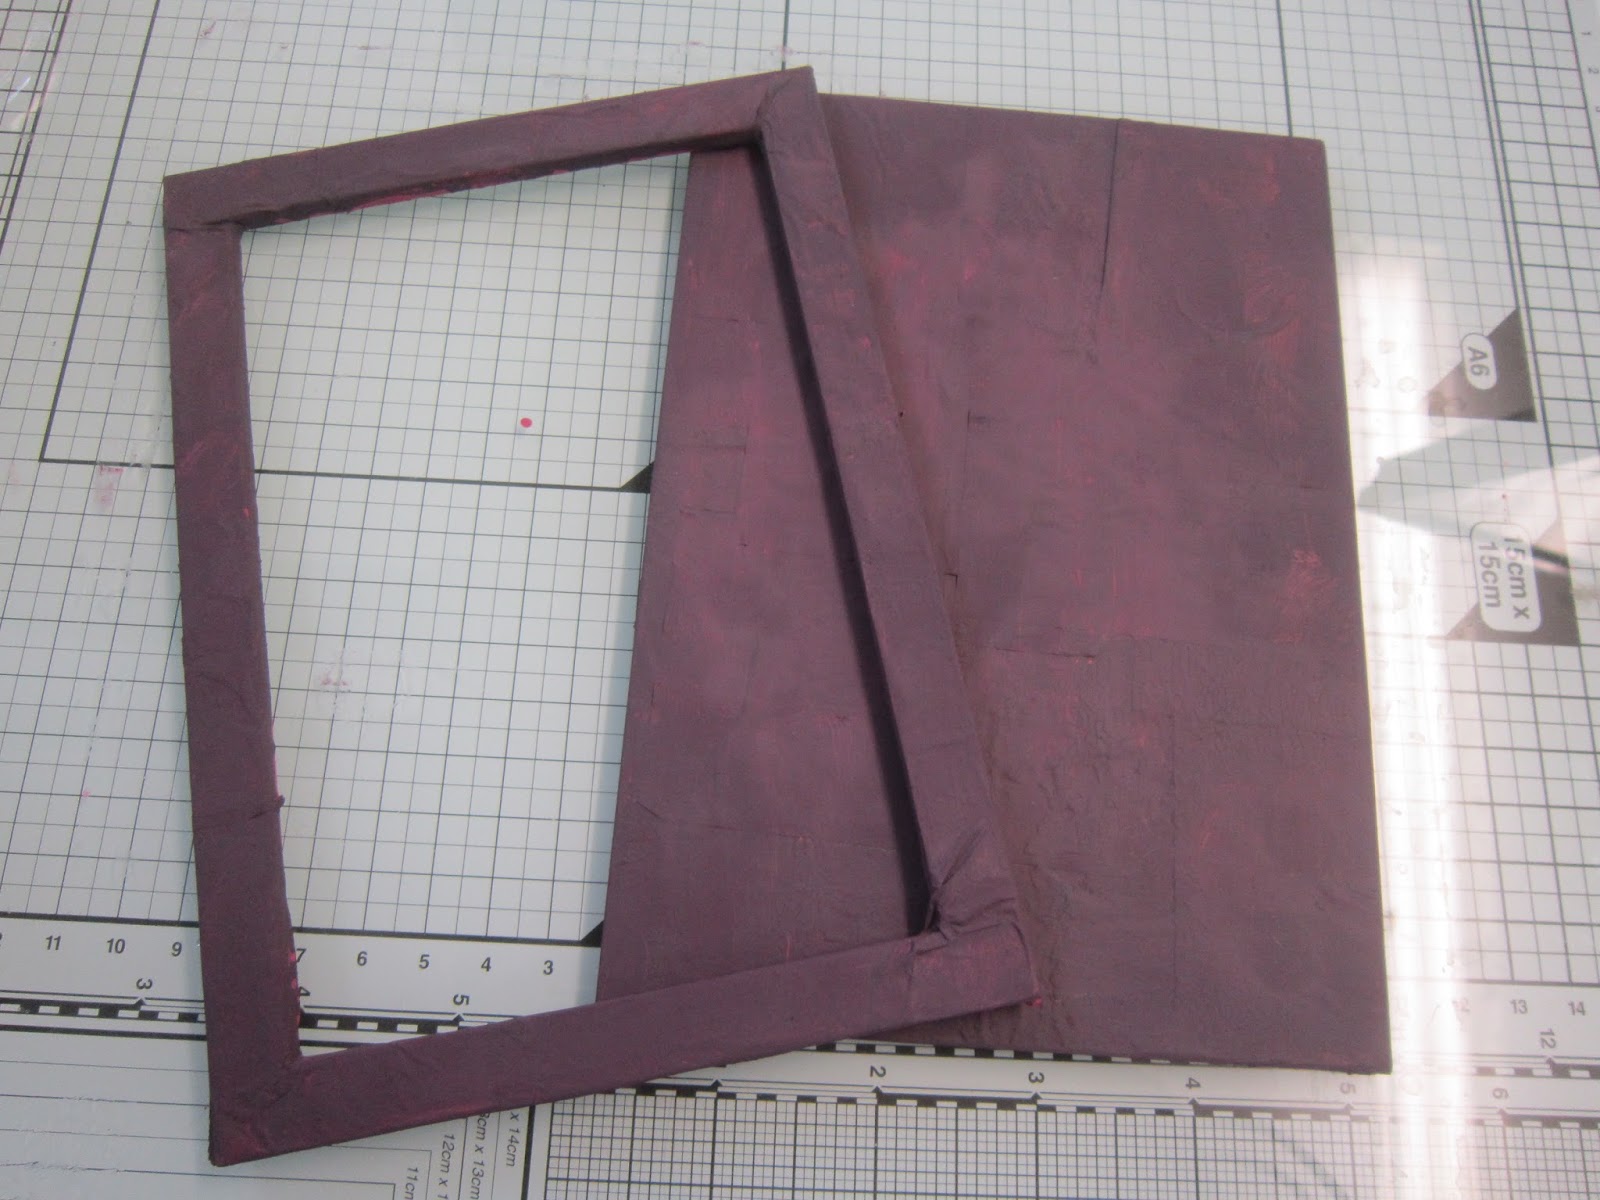
There was no way that the Paisley design Decoupage Papers were going to fit in with my plan so the back and the front of the frame got a couple of coats of paint. I used Spiced Raspberry mixed with some Midnight Black.

To highlight the layers of paper, I "Dry Brushed" over the Frame using Warm White Paint,

finishing off with some Autumn Bronze Gilding Wax...

To embellish the Frame, I cut out some cogs from the Spellbinders Die Sprightly Sprockets and some images using the Couture Creations Die - Antique Clock (CO723706) in Black card stock

colouring them using Autumn Bronze and Chic Pumpkin Gilding Wax

and then placed them onto the frame.

To complete the project I added my stamped and coloured image "Betty SteamPunk".

And there you go, self indulgent creative urge fulfilled!!!
Thanks for checking us out.
See you soon, Andy.


Wednesday, 3 June 2015

Heart of Stone!!!

No, not me! That's the title I've given to today's Creative Expressions Design Team project!
This Month’s goodies includes lot's of "non card making" products, MDF Shapes and alike!
So, to show them off to their best I guess it's time to roll up the sleeves and get creative with some crafting techniques..

For today's offering I have taken one of the Shaker Hearts and transformed it from its initial MDF state into what I hope looks like a piece of stone?!

To achieve some texture onto the Heart I decided to "crackle" onto it. You will be able to achieve this technique with products you probably already have rather than forking out for expensive Crackle Glazes.

Firstly, paint the image with your chosen colour of paint and allow it to dry. You can use a Heat Gun to speed up the drying process.

Next, apply a generous layer of Cosmic Shimmer PVA Glue,

Whilst the Glue is still wet paint over the top of it with your second colour of Paint. Try not to move the Glue layer around too much, the paint should be on the top of the Glue not in it!!

Now for the crackle bit!! Because the drying time between the Paint and the Glue are different, this is what causes the Glue to split or "crackle". This will happen quite naturally, but you can also encourage this process to happen with your Heat Gun...

Depending on how you have applied the paint and the Glue and in which direction will depend on how the crackle will react! The results can vary and is just the nature of the beast!!

As mine didn't seem to react much on the left hand side I decided to add my own technique by way of "Blistering"! This is taking the crackle stage a little further and really just means leaving your Heat Gun in one position longer than is necessary so that the paint starts to bubble.. This creates yet more valuable texture to your project.

Now you have your base, all's left to do is colour it!!! Now, I would list the products used and show the pictures of each stage, but it took ages and about 12 different colours of Ink and Gilding Wax to get to this stage, a stage I was finally happy with it, sort of!
Any hooslebees!! what to do with it? I wanted to add something (not quite sure what)

so I went with a Peel Off word. The Peel Off was initially Gold which I coloured with a Black ProMarker so that it would stand out from the background!!
Then thinking that the recipient of this heart may wish to hang it outside I thought that I would seal the Peel Off to protect it from the elements!!

Not a good idea. The Spray and Shine I used to seal the image seems to have had a reaction with the Ink on the Peel Off and it started to bleed...I think I caught it just in time and in fact I really quite like this outline effect it has created. Close up it almost looks like the word has been etched into the "stone" effect!! Happy accidents do happen then!??

So, a little Ribbon, Stick Pin and Dazzler to create a hanger for it and its good to go...
Thanks for checking us out, see you soon.
Andy.

Wednesday, 27 May 2015

It's a cracker!!

No, really!! it is!! Today’s Creative Expressions Design Team project is again something a little different.

I've used the Ivy Trellis Striplet Stamp. Which, on its own is a great image to use,

but for today’s project I have teamed it up to make a very effective background on this Cracker.

Stamping the image 4 times onto Black card stock using Perfect Medium and then going over the image with Decadent Bamboo Mica Powder.

Cutting each image to size and matt and layering it with some Gold Mirror card

before mounting each panel onto one of the sides of my Cracker which was made using the WE R Memory Keepers Candy Box Punch Board

and then securing the ends with some complementary Ribbon.

For the decoration, I cut out some of the images from the Sue Wilson Finishing Touches Die - CED1434 Dandelion Clocks in Black card stock,

applied the Decadent Bamboo Mica Powder, spraying each layer with Spray and Shine to set the Mica

before layering them together using Cosmic Shimmer Glue

and then attached a Dazzler from the Gold Collection to finish off the flower.

Repeating the process for a second flower

and then attaching them to the cracker to complete the project.

A great addition to a Wedding table as a favour or name place or just a novel gift for your guests!!
Thanks for checking us out, see you soon.
Andy.

Ingredients Used:
Perfect Medium or VersaMark
Decadent Bamboo Mica Powder
We R Memory Keepers Candy Box Punch Board
Spray & Shine
Dazzlers Gold Collection 8mm & 12mm
Cosmic Shimmer Glue
Sue Wilson Finishing Touches Die - CED1434 Dandelion Clocks


Wednesday, 20 May 2015

The perfect "Pear"!

Hi everyone. This week’s Creative Expressions Design Team post is another slightly different one! Again, just to give you an idea of how to get the most out of all of your goodies....

The concept for this unusual Wedding Card is quite quirky, but I hope you "get" the play on words!?

I started off with a shape I cut using the Cricut Machine,

taking one of the darker, more highly pigmented colours of Mica Powder (Chic Magenta)

and "stroked" colour in form one side using a sponge. As the colour dissipates in the centre of the image, it starts to create the shading..

turning the image and colouring from the other side will enhance the shading giving the image slightly more dimension.

Adding a little Decadent Bamboo Mica Powder for the leaf and Decadent Oak for the stem.

Spraying the Pears with generic hairspray to seal the Mica and then applying a couple of layers of Perfect Medium and Clear Embossing Powder to "glaze" the images.

These were then added to my prepared base card to which I had cut 4 images using the Sue Wilson Configuration Collection Die - CED6302 Lattice Arched Adornment, joining each of the sections with a Dazzler form the Silver Collection...

Finishing the project off with my own printed sentiment...

I think this project will certainly make your card stand out from all of the rest if you're off to a Wedding this summer.
Thanks for checking us out, see you soon.
Andy.

Decadent Oak Mica Powder
Decadent Bamboo Mica Powder
Chic Magenta Mica Powder
Sue Wilson Configurations Collection Die - CED6302 Lattice Arched Adornment
Dazzlers - Silver Collection 8mm & 12mm


Wednesday, 13 May 2015

Mica Powder Background...

Hi folks, today’s post for the Creative Expressions Design Team features yet again more Mica Powder, but this time in a slightly different way!!

As many of the darker colours are very highly pigmented, it allows you to create some wonderful background effects.

Masking off areas before applying the mica

will allow you to create light and dark areas,

or hills or mountains,

they erase out too allowing you to create shadow and highlights..

Something a little different to try with your Mica Powders!!
Thanks for checking us out.
See you soon.
Andy.

Wednesday, 6 May 2015

Terrific Teal...

Hi folks.. Creative Expressions Design Team time again.

Today’s offering is using Decadent Teal Mica Powder...

The last time I used Teal was on White card stock, and you can really see the "Greenness" of the Mica show through on the White.

This time however I have used it on Black card stock, this tends to show up more of the "Blue" pigment in the Mica and makes for a total contrast.. 2 colours for the price of one? Well, depending on which colour of card stock you use it on, then maybe!!!
Thanks for checking us out.
See you soon.
Andy.