 To be honest it is quite a niche product to use, but can add dimension, and you all know how much I like dimension,
 and texture to your crafting projects.
So here's how to use it.
 From a patterned piece of card I cut the following measurements, 2" x 5 3/4", 1 1/4" x 5 3/4" & 3 1/4" x 2".
 You will need 7 pieces of Flower Soft wire cut at different lengths.
 To your first wire, add some Glossy Accents
 and sprinkle your Flower Soft over it.
 Whilst the glue is still wet, sprinkle some fine glitter. The glitter will stick to any exposed glue and add a little bit of sparkle to you project.
 Stand the wire in a foam mat to dry.
 Repeat this process for the other 6 wires.
 With the widest piece of card stock which was cut earlier, punch a border down one side.
 On this particular project I used one of the new release Martha Stewart Border Punches called Modern Garland/Petal Frame. This Punch also has a co ordinating corner, so you could also achieve an Around the Page effect with the right measurements of card stock.
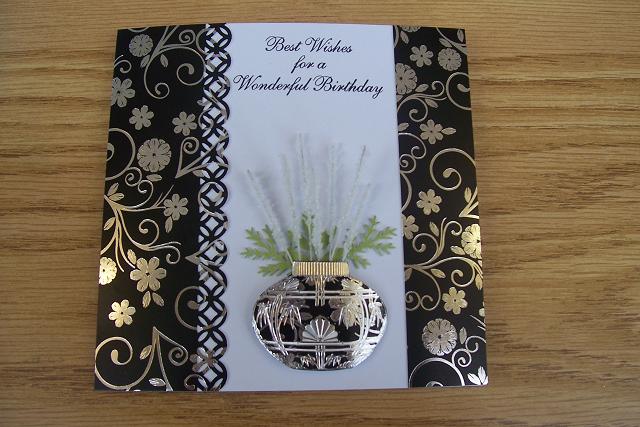
 Apply this punched card and the other thinner piece of card to your base card. The base card was cut to 5 3/4" x 5 3/4".
 Take a vase Peel off and apply it to the smallest piece of card stock you cut earlier
 and cut it out.
 Curve the image slightly to add some dimension.
 Place a piece of double sided foam on the back
 and start applying your flowers, which should now be dry.
 Punch out some foliage. I used the Martha Stewart Frond and Pine Leaf Punch.
 Apply another layer of double sided foam tape and apply your remaining flowers and then the leaves.
 Finally finishing off with another layer of foam tape to hold everything in place.
 Move the flowers around until you achieve the effect you require..
 Stamp your sentiment onto your prepared card,
 and mount your vase & flowers onto your card to complete your project.. Simple and effective, just like me!....
Here are a few others I have made using different sized vases, different coloures of Flower Soft and different Punches.
 Using Autumn Flower Soft, Rain Drop Martha Stewart Punch, which also has a co ordinating corner to form an Around the Page set, and Metallic Gold StazOn, oh yeah!, Stazon has now gone all metallic and is available in Gold, Silver, Copper & Platinum.
 Green Flower Soft with an Art Deco Punch
 Ultra Fine Koala Grey Flower Soft with a Martha Stewart Modern Garland/Petal Frame Border Punch
 Yellow Flower Soft with an Art Deco Punch
 Delphinium Blue Flower Soft with a Rain Drop Border Punch
 and Polar White Flower Soft with the Modern Garland/Petal Frame Border Punch
So, all in all I've had quite a blast making these, and it's only Tuesday!!.. Off to play and make some more me thinks..
Hope you like? & thanks for checking us out..
See you soon..
Andy (Pinnacles).


