
Can you believe Holly turns Four Today!! Every day she has been with us has been a true blessing, and I can't imagine a day without her by my side, mostly because she never leaves it!! Everywhere I go, she goes too. I'm sure she sleeps with one eye open just in case!! Anyway, Happy Birthday Baby Girl xxxxx
Right, on with today’s Creative Expressions Design Team project...

A new Month means new goodies have been sent for me to "play" with... and here's what I have come up with for today.

I have used some of the sheets from the new 8"x8" Paper Pad designed by Jonathan Lockwood..

Cutting all of the squares to size and then Matt and Layering them with some Mirror card...
I knew where I was intending on going with this project, namely an Advent Calendar, but I really think I was going around it the loooooooong way, very long to be honest! I was intending on making each box individually!! Which would have probably taken my right up to Christmas to finish..

Step in the voice of reason by way of Toni who pointed out to me the Boxes I made last year using the WeRMemory Keepers Envelope Punch Board...
And before you knew it I was a churning them out, because they really do take no time at all to do..
Here's a step by step guide if you wish to make some of your own..

Take a piece of light weight card or paper and cut it 8 1/2" x 6"

With a score board, place the card width ways (8 1/2" way) and score at 2", 4", 6" & 8"

turn the card around (6" way) and score at 1", 1 1/2", 2" & 4"

Fold all of your score lines one way

and then the other, the important thing being that all of your folds should be "Mountain" folds

apart from the score line at 1 1/2" which should be a "Valley" fold.

Next, cut off the very small tab on the bottom of the piece of card,

and snip between each of the squares next to it. This will create the base of the base of the box.

To allow the neck of the box to "concertina", take your Envelope Punch Board and fold over the small tab at one end of the piece of card, place it under the punch element of the board. You should notice that the "little Blue foot" just rests on the 1" scored line, or you could just place the card at the 1 1/2" marker at the back of the board.

And punch through.

This will create a little "oval" shape which will allow the neck of the box to spring up and down.

Fold the next score line over and repeat,

and again at the next score line,

and once more.

For the last section, there is nothing to fold over, so just place under the punch element and punch through.

Now all's left to do is apply some tape to the little flap at the side to secure the back

and then fold in the bottom flaps, taping them as you go to secure the bottom.

This is how the neck of the box should be, it's important that it’s a "Valley" fold for this reason...
Now for the lid.

Cut a piece of card stock 4 1/16"th x 4 1/16"th

score the piece of card at 1" on all sides.

Snip in on each of the squared edges

and then mitre the corners...

Fold all of the score lines and then add tape to the coloured side of the little triangular area and stick them together..

And there you go!!
Personally, when making these I tend to use a random patterned card stock, or at least one that doesn't matter which way is the right way up.

However, if you do choose to use one with a specific design on it, such as stripes, to get them the right way up, cut the card with the 8 1/2" edge as you wish the box to appear.. I.E as shown here with the RED paper, not the Green...
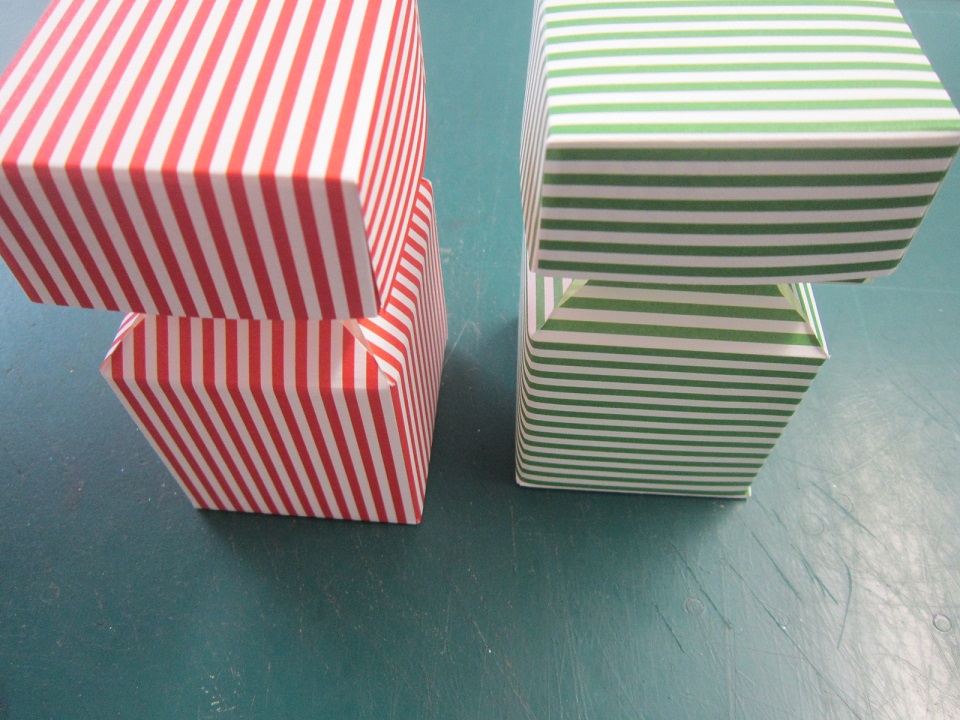
Cut the way the Red is, the stripes of the box will be vertical as opposed to the Horizontal Green ones, depends what you're after really!

That said, whatever way you cut the lid, you will always get two sides going the right way, and two going the wrong way!! Nature of the beast I'm afraid...

Thanks for checking us out, see you soon.
Andy..
Hoogie Board
WeRMemory Keepers Envelope Punch Board
Happy Birthday Holly! I can't believe it is four years either! Fab Christmas project too :) Denyse x
ReplyDeleteI still can't believe that Holly is now four - time has flown. Happy Birthday to a beautiful fur-baby.
ReplyDeleteThe 12 days of Christmas look great on the boxes Andy. I love these cute boxes.
Toni xx
Hi Andy,
ReplyDeleteThanks For Sharing Your Wonderful Box Creations With Us, And The Fabulous Breakdown Using The Envelope Maker (I Have One Now I Can Put To Further Use I Already Make Larger Envelopes Than It Says You Can) I Love The Paper Pad Used And How You've Mat/Layered Just Tremendous Instructions Thank You So Much For Sharing!
I Wish "Holly Happy Birthday" I Have Two Outstanding Cocker Spaniels Whom I Love Very Much They Bring So Much Pleasure Into Ones Life.
Hugs From Sam x