Wednesday, 29 July 2015

Christmas Flip Flap....

Hi folks.. Really wasn't sure what to call the title of today’s Creative Expressions Design Team Post, so I've gone with "Flip Flap" because that's exactly the sound the card makes when it closes!!

It really is quite an unusual design and I'm sure I'm not the first person to have made something similar but I must say, I do like its quirkiness....

and really makes a truly individual and unique card

and also, and this is its main selling point, takes no time at all to do, which, when it comes to churning out your Chrimbo cards is a phenomenal bonus!!
So, if you fancy giving it or something similar a go here's a quick step by step for you..
This particular version was really based around the size of the stamps I had chosen to use. Obviously you could make one bigger or smaller.

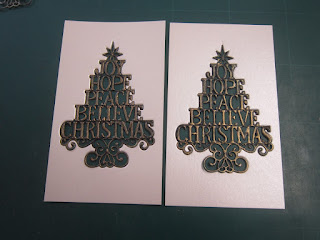
So, I cut three strips of card, high enough to incorporate each stamp image, and also long enough to take the image but also allowing an inch to create a flap.

Score each strip,

the top and the bottom one on the left hand side
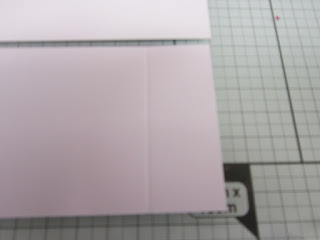
and the one in the middle on the right hand side.

Take a piece of card which will become the back of the project

and adhere the flaps of each of the strips to the back of it.

Next, add a matt of your chosen backing card stock, I've decorated mine with an inverted corner rounder punch.

On a separate piece of card cut slightly smaller than the Black piece used to Matt and Layer, stamp your chosen images,

rounding the corners as before and then Matting them onto the Black card stock.

Decorating the Holly images with some Clear Dazzler Gems coloured Red with a ProMarker Pen, or you could just use some pre coloured Red Gems, makes sense really!!
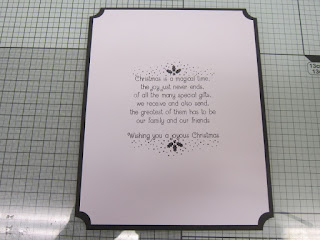
Now, this is something I don't think I have ever done before in my crafting lifetime. Stamped a sentiment!! But, seeing as I had one of Phill Martin's new stamp sets to hand, it seemed a shame not to put it to good use...

and makes for some light reading once the card is open..

And there you go.. Far from the norm I grant you, but also very unique too and hopefully will make for some interesting "crafting makes" for yourself too?!!
Thanks for checking us out.
See you soon.
Andy.

Wednesday, 22 July 2015

Looks can be deceptive!!...

Hi folks... A bit of a simple, but effective project for today’s Creative Expressions Design Team Post..
With one thing and another, in the voids of "Pinnacles Towers" I have mis placed this Month’s Stamps; I know they are here somewhere!! I bet I come across them when I have my end of year tidy up!!
So, just so I can fulfil my DT duties I've selected a couple of other Creative Expressions products to play with until I either locate them or next Month’s goodies arrive!

Now, I know this may look like I have just cut out two Dies and stuck them onto a Gate Fold Card?!, but there is so much more to it than that! So, read on "McDuff" and you'll find out!!
Like many crafters, I don't like to waste much.. And considering some of the waste form a Die Cut is almost as good as the positive image, it seems a shame sometimes to bin it.

So, this is the case with this Die, cuts out well, and yes it could be used on its own,

but popped back into its "negative" can make it appear as an "innie" Die, you know, one that doesn't have a cutting edge all the way round!

And can look very effective if you use an alternative colour..

Bet people will ask you how you coloured just the image and not the outside!!?

You could secure the Die Cut with a little Glue,

mine nestled quite nicely back into the original shape so I didn't bother.

Matt and Layered with some complimentary card stock has really brought them to life

and added that slight dimension I like on my projects..

See, told you there was a little bit more to it than just sticking two Dies on the front of the card!!
Thanks for checking us out.
See you soon.
Andy.

Wednesday, 15 July 2015

Making good use....

.... of a few left over’s for this week’s Creative Expressions Design Team projects...

Hi folks.. Following on from last week’s project, I had a few backgrounds left over which were too nice to not use, or put to one side and get lost in the ether!

So, with the addition of a couple of the new Sue Wilson Christmas 2015 Dies, I hope you'll agree that I've put them to good use?!

This Black and Brown combo was just crying out to be used.

So, with the addition of the Three Wise Men Striplet Die

it almost creates a desert background for them!

And this Aqua/Blue background

works so well with the Snowflake Striplet...
Last week’s post will give you a step by step guide on how to achieve something similar yourself if you fancy giving this technique a little try!

Thanks for checking us out, see you soon.
Andy.

Sue Wilson Festive Collection Die - CED3038 Wise Men Mini Striplet
Sue Wilson Festive Collection Die - CED3036 Snowflake Mini Striplet
Alcohol Inks
Alcohol Blending Solution

Wednesday, 8 July 2015

Art from the Heart....

Hi folks.. Back to my crafting first love today for my Creative Expressions Design Team post!!! Ink, Ink, Ink and just a little more Ink!! I make no apologies for it; I've been right selfish with this Month’s projects and loved every second of it.. It really has made a nice change to veer away from the same old same old Die cutting and re visit some wonderful crafting techniques I thought I had long forgotten.. The Dies will be making reappearance real soon though..

So, here she is...

I've delved into my somewhat neglected stash of Alcohol Inks for this one.. Some so neglected that it was difficult to get the lids off where they had died somewhat!!

Still, off they came and I chose four colours I thought would work quite well together.

Literally "drawing" with them over my craft mat with them

before applying some Alcohol Ink Blending Solution and tipping the mat from side to side a little to reconstitute the colours and mix them a little.

Now for the fun part, lay a piece of acetate into the mixture for a second or two and then remove and place it to one side to dry. As the Inks are Alcohol based they should dry in a few seconds..

Seems a shame to waste what's left on the craft mat so I think it's time for a little "double dipping"

Once the Acetate sheet is dry you be able to see your pattern appearing,

this will become even more apparent once the Acetate is mounted onto some White card stock.

Just finished the project with a stamped sentiment and an image from the new MDF Crafters shapes from Creative Expressions and there you go, not a Die Cut in sight!!!
Thanks for checking us out, see you soon.
Andy..

Alcohol Inks Hazelnut, Oregano, Currant, Ginger
Alcohol Blending Solution
Acetate
Craft Mat
White Card Stock
Stick and Stay
Archival Black Ink
Creative Expressions Rose Elements Stamp Set
MDF Decorative Accessories - Crafters

Wednesday, 1 July 2015

It's an oldie, but a goodie...

... today's Creative Expressions Design Team project that is, not me! I am neither old nor good!!
I know it’s gearing up to be the hottest day of the year so far but today starts Creative Expressions countdown to Christmas..

So, for today's project I've teamed up with one of this Month’s Stamps with one of Sue Wilsons re released Christmas Dies from last year..
I created this design last year but this time, as new products have come out, I've done it in a slightly different colour way.. Told ya, an oldie, but a goodie...
Thanks for checking us out, see you soon.
Andy.

Sue Wilson Die Holly Spray
Cosmic Shimmer Berry Sparkle PVA Glue
Chic Pumpkin Gilding Wax
Enchanted Gold Gilding Wax
Autumn Bronze Gilding Wax
Rosebud Elements Stamp Set