 So, here it is... My box and a project to keep inside it.. Fancy giving it a go? Here's a step by step guide if you do..
 I started off with four 6"x 2" pieces of Grey Board.
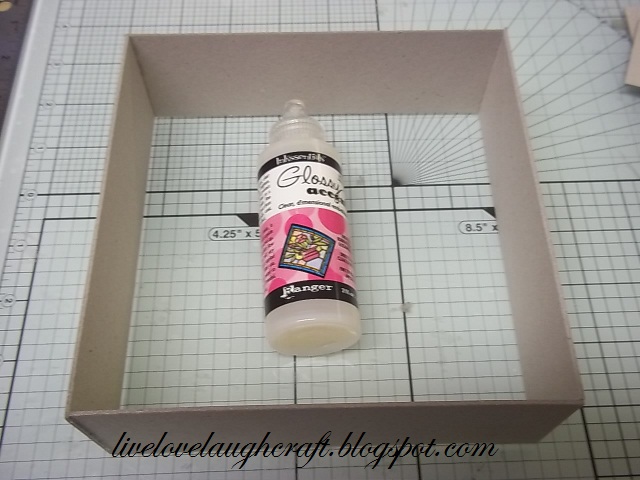 And glued them all together using Glossy Accents.
 I cut strips of my chosen card stock
 and applied them to the outside and inside edges of the box.
 The box is reasonably sturdy like this, but just to add a bit more stability I cut short lengths of the card stock, folded them in half
 and glued them to the Four outer and four inner corners...
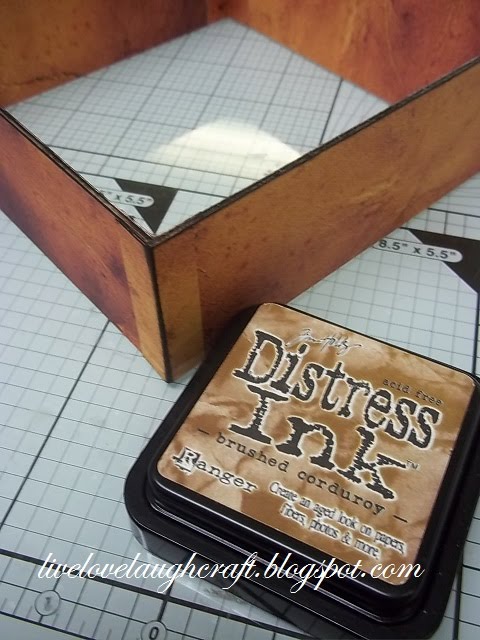 To hide the Grey board and also to add a bit of age to the box I went around all of the edges and corners with Brushed Corduroy Distress Ink.
 To make a base for the box to sit on I cut 2 pieces of my pattered card stock and also a piece of 290gsm card stock using the largest die from the Spellbinders Grand Scalloped Squares.
 Layering them all together to form a nice thick layered shape. To hide the White core of the card stock I again distressed the edges using both Distress Ink and Distress Stains in Brushed Corduroy.
 I ran some Pinflair Gel around one edge of the box, applied it to the base and put it to one side to dry.
 To make the lid of the box I started off by cutting four strips of the Grey Board 5 3/4" x 1/4"
 and joined them together in the same way as I did the sides of the box, securing the corners with some extra pieces of card stock.
 I then stained the Grey Board with the Distress Stain as before.
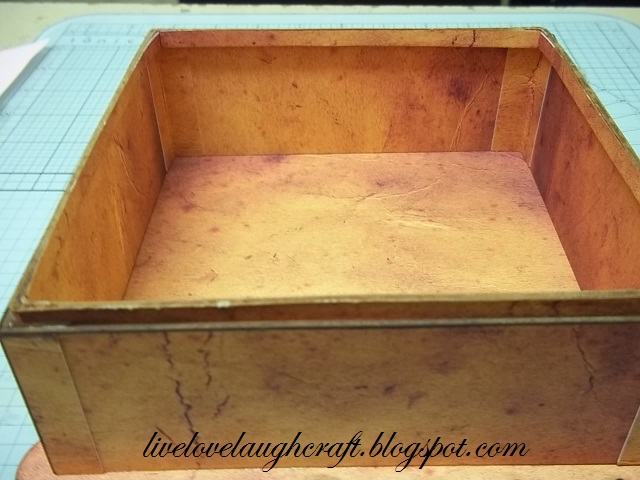 So that I could adhere the frame to the lid and so that it would line up correctly I positioned this smaller frame inside the base of the box
 and ran some Pinflair Gel around the edges.
 Placing the lid of the box, (which was made exactly the same as the base, using 2 pieces of my patterned card stock on one extra piece all stuck together) onto the Gel and then setting it to one side to dry..
 Once the Gel was dry, I lifted the lid off which brought the inner frame with it. This inner frame will make the box lid have a nice tight fit when it is placed onto the base of the box..
 To add a little bit of decoration to the box I added some matt Black Gems, which made the box look like it was tacked together.
 To decorate the lid I cut out some shapes using the Memory Box Die Madera Corner (98237). This was cut out 8 times using the same patterned card stock
 and then positioned onto the lid of the box in my desired pattern.
As nice as this effect was, I think it looks like the pattern has been carved into the box!, I wanted to add a little bit more to it.
 So I took my Gilding flakes
 and applied them to the cut out shapes.
 And there you go.... I've decided to keep my "Book of Holly" (my Dog) well, volume One anyway! in this Memory Box, as well as her first Collar which she has grown out of, her puppy teeth we have found and a few other nic naks of her first few Months with us.. Once this box is full, I can think about making another one for volume Two...
Don't forget to pop on over to the Cuttlebug Blogspot to see what my fellow Design Team Members have come up with under this theme and why not take part in the challenge whilst you are there?!
Thanks for checking us out.
See you soon.
Andy..
Hi Andy, you still amaze me! This is breathtaking! It is really beautiful and thank you so much for making this challenge a beauty!
ReplyDeleteLove
Jannie X
Fabulous project Andy and the decoration of the lid is just stunning.
ReplyDeleteWhat are you going to do with all the other boxes you were creating at the weekend?
Toni xx
Oooh now thats rather snazzy Andy - great job!
ReplyDeleteAbsolutely amazing. WOW,
ReplyDeleteSusie
Wow a project to treasure, so much work has gone into your box Andy. Stunning. Kerry x
ReplyDelete