 The shop looks sooo Christmassy all covered in the white stuff... I however do not!! But when the white stuff falls, there's only one thing to do...
 Embrace it I say... Snow angels anyone??
Stay warm everyone...
See you soon
Andy.
The shop looks sooo Christmassy all covered in the white stuff... I however do not!! But when the white stuff falls, there's only one thing to do...Embrace it I say... Snow angels anyone?? Here is the card I made for him to wish him a looooooooooooooong and happy retirement.
 I cut out 3 leaves using an old Cuttlebug die, which has been discontinued now I think?!
 I then took my Glue Pad. Now, if you haven't used this before, the pad is dry and comes with a pot of glue.
 Ideally you only need to apply enough glue for the project you are working on, otherwise the pad will dry out and the glue will go to waste!!
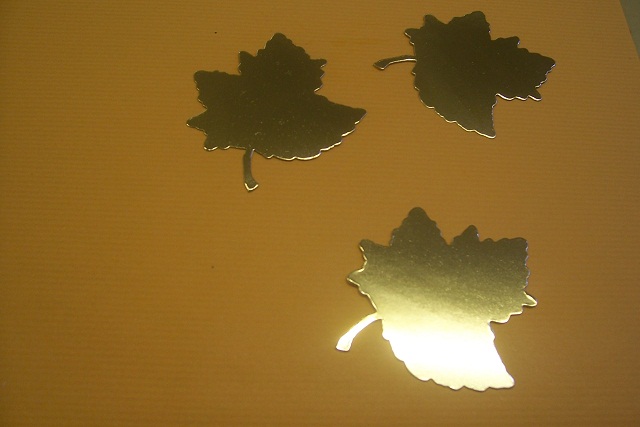 So, the glue was applied to the leaves and then, as it was a super special card, I took some gold leaf,
 well, green/gold leaf to be precise and added it to the tacky glue covered leaves... Sorry, I know there are a lot of leaf/leaves references.. Who knew the English language was that complicated? Still, most of the world can speak it, so you should get the gist!?
 I then put the leaves into the embossing folder which came with the leaf cutting die and passed them through the Cuttlebug. To be honest I was really surprised how well the embossing came out on each leaf.. So much dimension and texture...
 For my base card I added a strip of ribbon and a simple sentiment.
 Before adding the leaves to the card I teased them over the edge of my work bench to give the some dimension and movement
 and then added them to the card.
 Anyway, back to today's project.. We had a delivery of some new Kanban Art Deco Images recently. And yes, I was in that box before anyone could stop me! There were so many to choose from, and here is my first one.
 I started off by joining some windows from the Christmas/Noel Cricut cartridge using my Gyspy Machine. One set just as the plain window and one set using the blackout function.
 I then mounted the images together.
 I then set about making my easel card. Last year I made a great little card with Santa in the bathroom. And at that time I needed a tiled floor effect paper, could I find one?!!! This year, my prayers were answered. Not only a tiled effect paper, but a paper with perspective too...
 I added some great embossed Mirror card
 and some wallpaper to the top of the easel card.
 Before adding my window scene
 and then my Art Deco image.
 For the stopper of the easel card, I cut another piece of the tile paper,
 backed it with foam tape
 and then added it on top of the previously cut tile paper so you can barely see it!
 Love it! I hope you do too...
 I Really can't believe a week has passed already since Cricut owners old and new descended upon us in their droves... I sat demoing the Cricut, Gypsy and
 Design Studio for 6 hours solid, and I haven't got a clue where the time went!!
 Still, lot's of new customers were bitten by the bug (Cricut, bug! get it!! ehhh!!) and walked out with their new toys!
 This is one of the cards I made for the demo.
 I started off by cutting a 5 1/4" circle frame from the Plantin Schoolbook Cartridge using the Roly Poly function on my Cricut Machine. This was cut on some thickish non shedding Glitter card, so I needed to use the multicut function to cut the card.
 I then punched out 80 leaves using the Martha Stewart Branch Punch.
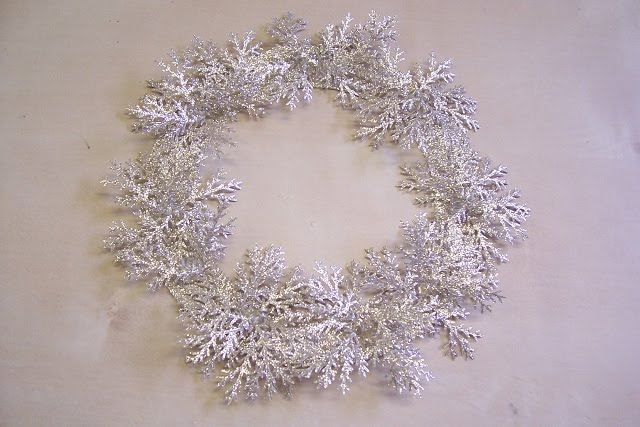 And then added them to the circle frame in 8 groups of 10.
 Using my Gypsy Machine I prepared my sentiment. Now, although the Cricut machine as a standalone machine is fantastic, it's the Gypsy that can do the welding of letters! But I hope you can see that it is not only the Purple letters which are welded, I even managed to weld a Silver shadow around them which really makes the sentiment pop.
 I prepared my easel card,
 and placed my wreath and car embellishment onto the front.
 I then added my sentiment,
 and there you go....
 and now for the "Thank You" cards..
 I have tried to keep the Black & Silver them going throughout my projects, so here is my "little" Thank You notelet.
 I started off with a piece of Silver Mirror card measuring 5.5" x 11.5". I wanted a large area embossed! Something much larger than a standard embossing folder allows. So I needed to join the embossing together. And here's how. (This one is for you Sue, who lives in Spain. I said I would eventually get this technique on here for you!!)
  You will need your Cuttlebug Machine and your A & B Plates.
 Insert your card stock into your embossing folder and place on top of the a fore mentioned plates.
 Instead of adding another plate, add your No Shims mat and pass through the machine.
 As the mat passes through the machine you will notice when it comes out the other side it will have dragged, this is fine... It's what is supposed to happen!
 Bring the whole thing round to the front of the machine and place your embossing folder close to the previous embossed image.
 Lay your No Shims mat on top of the folder a little way away from the edge and pass through the machine again.
 And then one last time!
 Perfectly embossed,
 and no lines where the two folders have met!!! If you had used another B plate instead of the No Shims mat, you would have potentially got the edge of the embossing folder marking where to embossing joins! Cool eh??
 I added my embossed image to my Cricut mat in the bottom Right had corner
 and manually moved my blade housing of my Cricut machine to meet the top of my embossing
 and pressed the Set Cut Area button. This button used to be called Set Paper Size, but I think with the addition of the Cricut Cake and the potential of the Cricut Machines to cut other materials than paper, they have changed the description of this button on the newer cartridges...
 I then selected my Fit to page button so that the Machine would work out the largest image it could cut with the size of card stock I was using. You may also notice that on this particular Cartridge, "Christmas Cards" the Paper Saver button has changed it's description to Material Saver! Another updated key!!
 Once the image was cut out,
 I scored the guide lines of my envelope
 and stuck it together
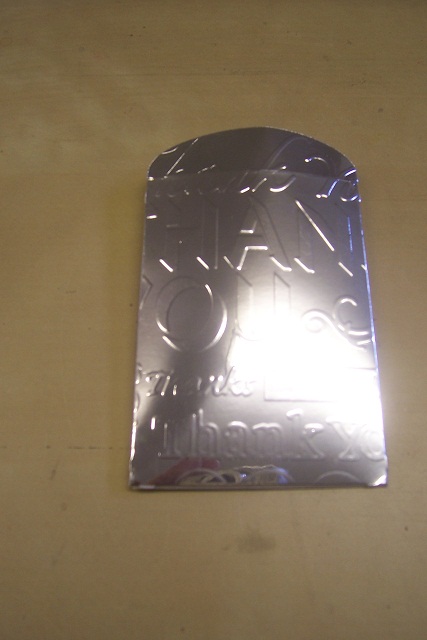 with some high tac tape.
 I then took a piece of Black and a piece of Silver Mirror card cut the same size
 and embossed them with the Thank You set #2 from Sizzix.
 And cut out two tags, one slightly smaller than the other.
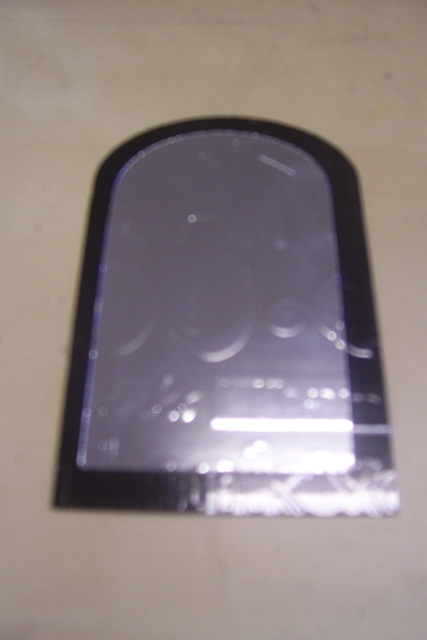 And layered them on top of each other so that the text matched.
 Added an eyelet and some ribbon,
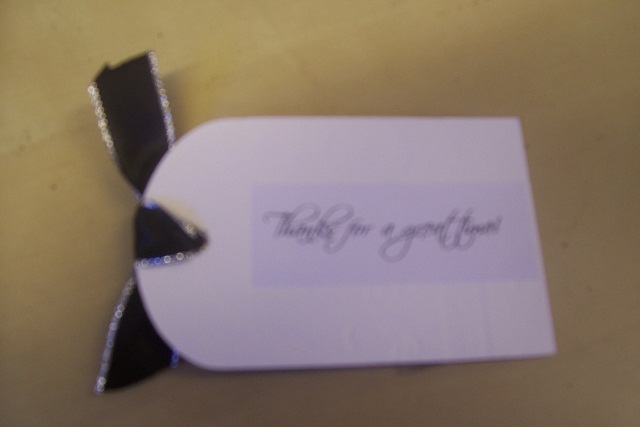 and printed my simple " Thanks for a great time" sentiment on the back,
 before popping it into the envelope...
 And then taking it out for one last photo...


 Beautiful eh?? The sun is out now and they have all melted away, so I'm glad I got to take my photos when I did.