Showing posts with label Easter. Show all posts

Wednesday, 11 March 2015

Easter is a coming....

Hi folks... Time for something a little different from me for today’s Creative Expressions Design Team Post..

A "Novelty" card...
I really am not a fan of these types of projects.. just not my style or cup of tea! But, when the mood takes you in that direction you just have to kinda go with it... and when all said and done it does put to good use some Dies, so that can't all be bad..

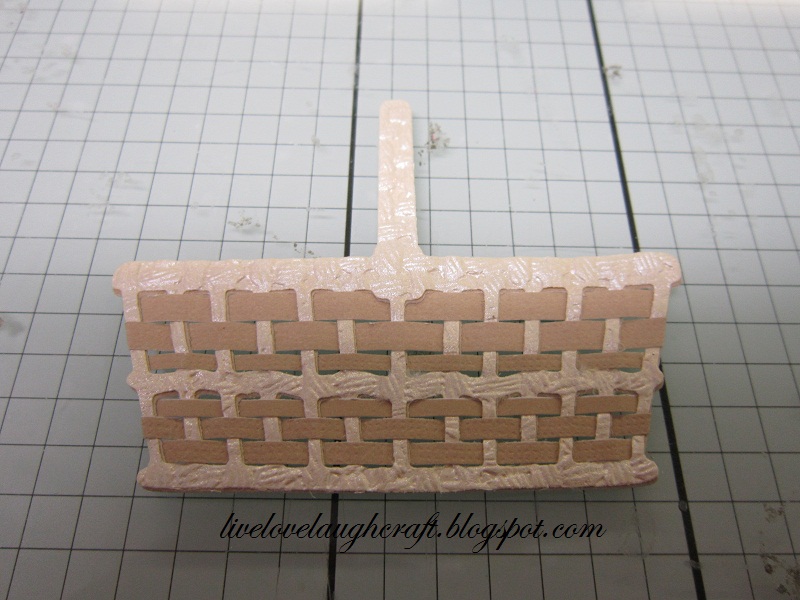
To make the basket I used the Striped Sue Wilson Weaving Die

which really did give the desired effect for the wicker basket

trimming the edges

and then cutting it into shape

to complete the basket effect.
One of the Dies I was given to use this Month was one of Couture Creations new Hearts...

Trying to think outside the box a little rather than just producing heart after heart etc... I cut one out

and then cut into it

using a Spellbinders Oval Die.

If you position these well, you can get at least 3 out of one Heart...

Next, I cut out the Oval again, this time using some Silver Mirror card

and stuck the "filigree" image over the top to produce something on a par with an "Easter Egg"?

I did this in several "spring" type shades of card stock and positioned them into the basket...

Created a handle for the basket

and finished it off with a ribbon and a flower which was made using the Sue Wilson Delicate Daisies Die...
Well, it says a basket full of choccie eggs to me!! "Hoppy Easter" as they say!!

Actually, the design isn't that bad!! It has allowed me to make a version for my Mums Mothers Day Card on Sunday....
Thanks for checking us out.
See you soon.
Andy.


Sunday, 8 April 2012

Happy Easter

Hi Blogland, and Happy Easter to you all... I suspect, like many of us perhaps, that we don't really send too many Easter cards each year.. But, I occasionally do make a few samples for the shop to give those who do send cards some ideas..
So here's one that I eventually managed to get finished yesterday! I've left the sentiment off of the card as, obviously it's Easter Sunday Toady, and to be honest I think this project could equally be used for other Occasions such as a Wedding, Confirmation, or Baptism etc...
So, to start off with, I cut out and embossed the largest shape from the Spellbinders Floral Ovals set (S4-356) in Pearlised White paper.
Next, I cut out and embossed the Marianne Craftables Die, Flower Border Oval (CR1215) in the same Pearlised paper
and then mounted it onto the Floral Ovals shape.
I then cut out and embossed one of the Crosses from the Spellbinders Crosses Two set (S5-093) of Dies, again in the same pearlised paper.
This in turn was then mounted onto my previously cut images. Although all of the elements have been cut from the same paper stock they all hold their own against each other and tone on tone can be so effective don't you think? So, with the "topper" done, time to get on with the base card for it to sit on.
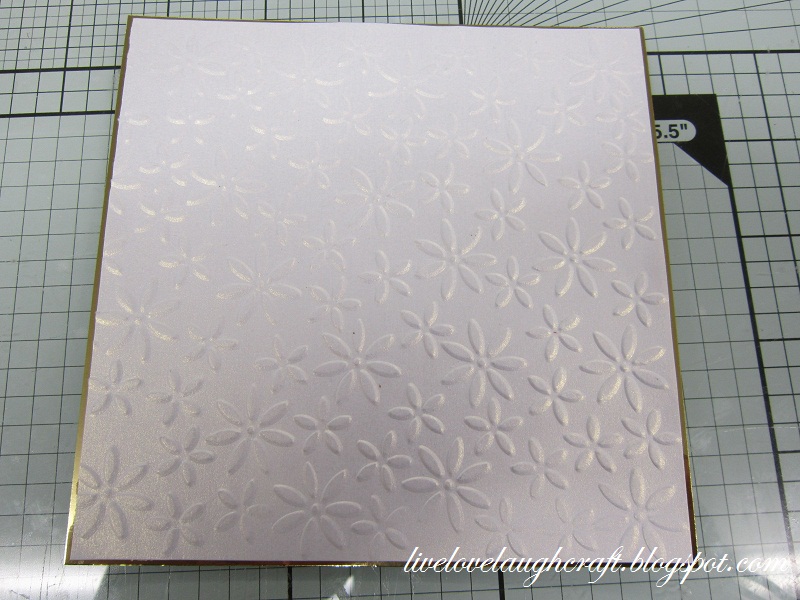
Using the Spellbinders M-Bossibilities Folder - Splendid (EL-005), I embossed another piece of the Pearlised paper,
cutting it to size and matt and layering it with some Gold Mirror card
before attaching it to my base card
and adding a simple piece of Ribbon.
Just to add another element to the card I cut out the largest die from the Spellbinders set Bitty Blossoms (S5-086)
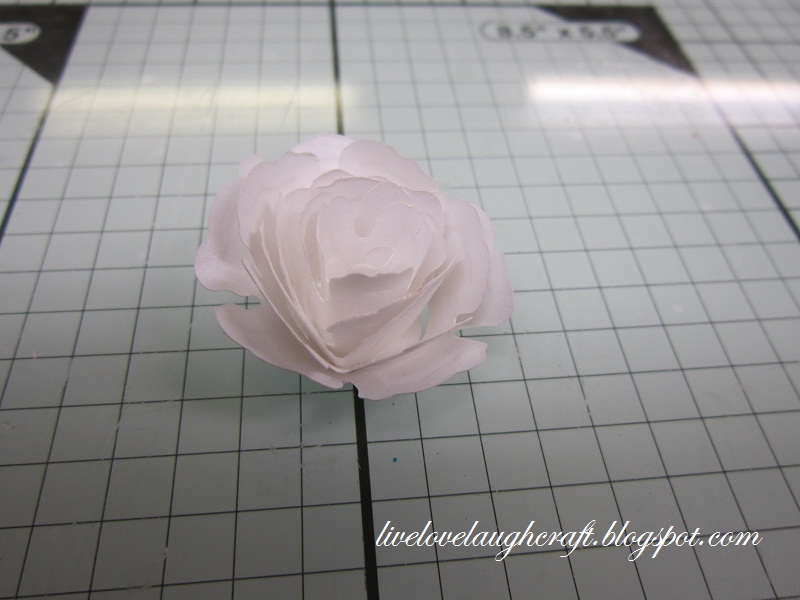
and "Quilled" it into its flower shape..
I then cut out a set of leaves, which are also part of the Bitty Blossoms set,
and joined them to my flowers.
Although I made several sets of leaves and flowers, 12 sets in fact! I decided to only use one for this project! That means I have several already prepared for another project then I guess...!
I then finished the project off by adding my topper.. And, as I said earlier, this card really could be used for several different occasions.. Not just for Easter.. Anyway, I hope you have a great day and thanks for checking us out. See you soon. Andy.

Tuesday, 14 February 2012

Just for you.....

Hi Blogland... And, "Happy Valentine's" Day to you all.. I wouldn't say I was an old romantic at heart. A loving gesture every day does more than a forced act once a year for me.. That said, Valentine's will come and go very quickly, and I have done all of the cards for this event I am going to make,so, it's a "Just for you" card today...
You know when you know you have just that perfect piece of backing paper? Well, that was the case for this project..I've had this basket weave paper for a couple of years now, and what better way to use it than with a .... Basket of course...I cut a piece of it out using the Marianne Craftables Die Daisy Basket (CR1207). As the paper is rather flimsy, I also cut the die out in some card stockso that I could back the two shapes together to give it some stability.I wanted to add more texture by way of some additional weaving; I cut some strips of card stockand started to weave them through the basket.Sealing down the edges,before cutting off the excess card stock. Pretty effect eh?I wasn't 100% sure where I was going with this project! Was it going to be for Mother's Day? A basket full of Choccie Eggs for an Easter card? Both do'able ideas, but once I had found my image I knew where I was going!So, once stamped, coloured and glazed,I snipped off the basket handleso that my image could sit proudly in the basket.Spring on a plate! Well, card anyway!!
Enjoy your day, and thanks for checking us out, see you soon..
Andy.

Monday, 18 April 2011

Happy Easter...

Hi Everyone.. I hope that you had a good weekend and are looking forward to a shorter working week this week with the Easter Bank Holiday weekend approaching... Don't forget, Pinnacles is open all over the Bank Holiday Weekend - Good Friday, Easter Saturday, Easter Sunday and Bank Holiday Easter Monday 10am - 5pm....
Although I don't really celebrate Easter it's a great time of year to use all those spring like colours..So here's my project for today.. And of course a step by step if you fancy giving it, or something similar a go...I printed my image from a Digi Stamp from Wee Stamps..The image was then coloured using Copic Pens and glazed with Glossy Accents.I then cut the image out using the second largest die from one of the new release Spellbinders dies Reverse Wonky Rectangles (S4-307). Matting it onto some Lilac Mirror card cut with the largest die from this set.Using my Gypsy machine I selected some egg shapes from the Easter 2010 Cricut Cartridge. Laid them out and sized them to fit within a rectangle shape. These images were cut out 4 times using 225gsm weight card stock.Each layer was stuck together using Stick and Stay from Crafter's Companion.
Having made my Embossing sheet, it's time to put it to good use. I am building up quite a collection of these sheets and they are becoming a great addition to my crafting stash...So, to emboss them through the Cuttlebug, place the image on your A plate.Add your card stockfollowed by your No Shims Mat and your C Plate. This particular embossing didn't require any additional shims which I have used on past projects...Eggsraordinary, Eggceptional even... Ok, I'll stop now...I cut the image to size and matt and layered it with some of the Lilac Mirror card.Adding it and the coloured image to my base card.Now for the little flowers. This is the same technique I have used in the past using the Tim Holtz Tattered Florals Die. However, the Flowers made with that die were going to be far to big for this project so I decided to use the Marianne Designs Creatables Flower Set (LR0145).I cut out the 3 larger flowers from the set in some Lilac Paper.These dies can be easily used through the Cuttlebug. And to save time I cut them all out at once. Place the dies on top of your paper which will need to be placed on top of an A and B Plate.Add your C plate and pass through the machine.There is little point in embossing these dies as there is nothing to emboss!!..Take the largest flower shape and cut a slit to the centre of the shape.Overlap the 2 open edges and stick together, I used Glossy Accents.With the next sized flower, cut away one whole petal.And the overlap the open edges and stick as before.For the smallest Flower, cut away 2 petalsand stick together as before. This process will give you the main 3 layers for your flower.With the single petal and the double petal which were cut from layer 2 and 3, roll them in on themselves to form the centre of your flower.Glue all the layers together to form your flower...I then punched out some leaves using the Martha Stewart Frond Punch,before adding them and the flowers to the card using some Pinflair Silicone Gel.The left had side of the card was looking a little bit bare! So, I found some Ribbon which had just come in.. But how do you stick something like this down? It has 2 strands of Ribbon and beads intertwined!!My solution was to attach it using an Eyelet... And then finishing the project off with a Peel Off sentiment...
Have a great week folks. Looks like the wall to wall sunshine is set return.
Thanks for checking us out.. See you soon.
Andy.