Showing posts with label Embossing. Show all posts

Wednesday, 2 December 2015

Bah Humbug.....

Hi folks.. Something a little different for today’s post...
I wasn't in a particularly "dark" mood when I was creating this.. It just took itself off in that direction..

It has the feeling of something about it, a bit "Bah Humbug" I think... But I kinda like it and enjoyed making it! Which, to all intense and purposes is what it’s all about right??
To start off with, I cut a circle in a piece of Brown card stock.. Initially a made a few mistakes with this part of the process, but if you don't make the mistakes then you'll never learn eh!!
First mistake was that I embossed the image first and then cut out the circle.. What does this do? You might well ask dear reader!! It flattens the embossing!!
Next mistake was that I cut the circle way to one side of the card; therefore the whole of the embossed image didn't fit on the card!!

Eventually, I got it right'ish!!

Lined up the Embossing Folder

and embossed the image..

Cutting off the excess card to achieve my favoured Square card..
Now for the fun bit!! Gilding Waxes at the ready...

First a little bit of Frosty Mink,

Then a little dabble of Autumn Bronze,

Maybe a little Chic Pumpkin,

and a little dab of Enchanted Gold...

Then a little bit more of each until I was happy with the result...

Once "buffed" the waxes do not need sealing, but I do find giving them a spritz of Spray and Shine

intensifies the colour by separating it from any non waxed areas...

For the centre hole Aperture I planned on using this Tree image which I had cut out in the same Brown card stock and coloured using Vintage Holly Gilding Wax.. It is such a delicate image, in fact I would say more of the card is waste than what's left to create the image... you only have to damage it slightly whilst applying the Gilding wax for it to lose all its structure and strength...

So, to give it some stability, I cut a circle of Acetate, slightly larger than the Aperture

and stuck it to the back,

so that the tree had something to support it,

although it looks like it hasn't!!

For the background, I deliberated, cogitated and digested (not really!!!) many, many different pieces of baking papers and card before seeking advice (thank you Lisa) and settling on this piece of Silk Mirror Card which I embossed...

Love the effect it has given...

Thinking I would be able to finish off the project by Mat and Layering in Gold then realising that there was not a piece of Gold anywhere in the shop as it all sold out at the weekend, I plumped for a piece of Black instead... Decorating the Tree and the Aperture with some Metallic Gems....

As I said earlier, it's got something, not quite sure what though!! Oh well, another sample for the window done!! Next!!!
Thanks for checking us out, see you soon.
Andy.

Ingredients used;
Gilding Wax - Frosty Mink, Autumn Bronze, Chic Pumpkin, Enchanted Gold, Vintage Holly
Embossing Folder XCU 515211 - Round Guilt Frame
Brown Card
Gold, Black & Red (Silk) Mirror Card
Metallic Effect Gems
Silent Night Collection - Fancy Tree


Wednesday, 25 March 2015

Another Marmite project....

Hi folks... I've gone "reet" grungy for today's Creative Expressions Design Team project.. And I think, as the title of today’s post suggests, it's another Marmite project, you'll either like it or not..

I'm still taking some convincing! But, as they say, it's all about the journey, not the destination! And I certainly enjoyed the process of making it, if not the finished result...

And considering it started off as just a bit of White and Black card stock the results are pretty cool...

I stated off by embossing a piece of White card stock using the Tapestry (EF-012) Embossing Folder from Creative Expressions.

Placing it in an old box

and selection a range of Spritzing Inks.

The results of spritzing the Inks are always going to vary,

depending on how much of each colour you use..

But carry on until you are relatively happy with the results.. They final colour will still change somewhat as the project dries.

To encourage the project to dry quicker, place it onto a piece of kitchen towel

and place another piece on top.

Take an iron and iron it dry.

As the water from the Spritzing Inks evaporates not only will the project dry but will probably also lighten in colour slightly.

Once dry you can add some colour to highlight the embossing

use what you have

as each different type of Ink will add its own element to the project.

To seal "all" of this "Inkage" you can apply some clear Embossing Powder.

This also adds a nice sheen to the design.
I have in mind to use this project as a book cover at some stage so I wanted to create some sort of binding/hinge effect.

I cut 2 Borders from the Sue Wilson New York Collection Border, Corner & Tags Die Set (CED4102),

coloured them with Graceful Peach Gilding Wax

and applied them to the base card. "Says to me rusty old hinge/spine don't you think?"

I had a couple of Gilded Hearts left over from a previous project,

so rather than let them go to waste I popped them onto the Borders. Not quite sure why, but I do think that it adds to the effect somehow!

I then added a sentiment from the Couture Creations Vintage Rose Garden Paper Collection. I glazed it with Glossy Accents to give it a glazed effect..

This is where I think I should have stopped, but I went ahead and added another sentiment, it's only on foam pads, so it can easily be removed for when I am ready to create my book for this cover to go onto...

So, all in all a fun, if messy project to get your teeth into.. And I kinda like messy!!
Thanks for checking us out.
See you soon.
Andy.

Friday, 6 March 2015

A little bit of texture....

Hi folks...

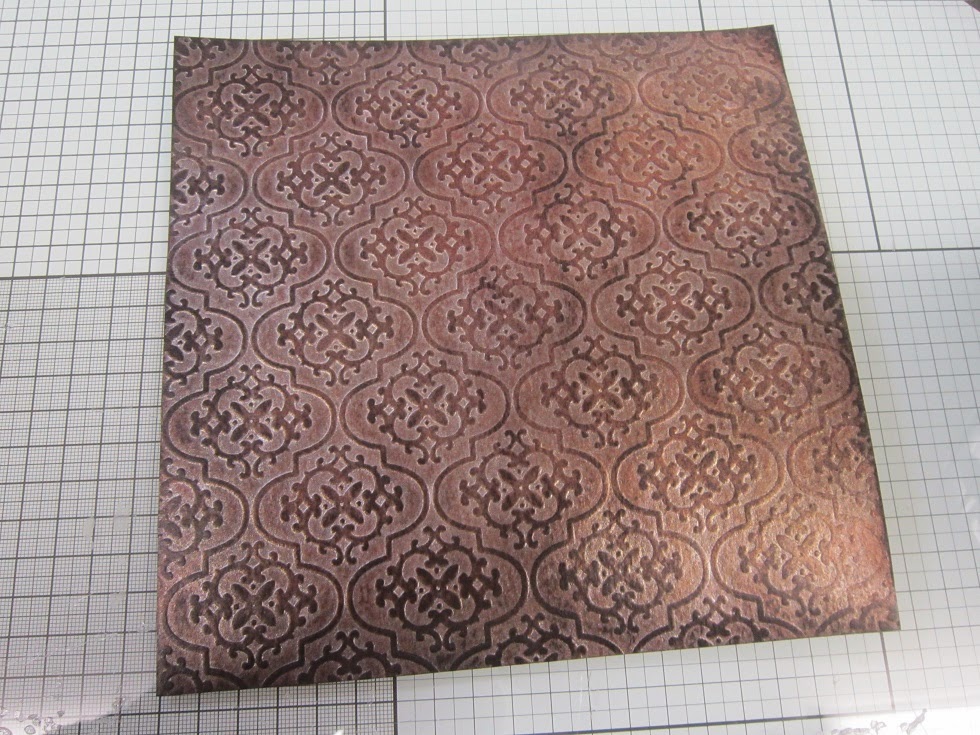
Been having a little play with some of our new Die'sire Texture Embossing Folders... and a little bit of Gilding Wax.

I think the results speak for themselves...
Just needs a sentiment when the time is right and then it's complete!!
More play time today me thinks.
Thanks for checking us out.
See you soon
Andy.

Wednesday, 10 December 2014

Time for a cuppa....

Hi folks... Last but one post for the Creative Expressions Design Team for this year before we take a little break..

This Month's Stamps revolve around food and drink.. Now, although I admit I like a little tipple every now and then! my biggest addiction is to Tea! Hands up, I admit it, I'm a right old Teapot!! Although I have lost count of the amount of cuppas that have gone cold whilst I have been crafting, defo need one of those thermal cup things... Santa, please take note!!
And what's the best thing to go with your cuppa? Biscuits of course....

But with today's project, no one needs to know where your stash is hidden, even though it might be right under their nose on your craft desk...

I've made a few of these "Hidden Books" before and am always blown away by the results.. They really do look as like authentic old books....

Now, I'm not going to bore you with a full step by step tutorial today, more than anything because I will be doing these in a Gilding Lesson in the New Year, still have to confirm the date, but it will be an all day'er on a Saturday in January.. So look out on the website for the release of our new lessons.

Apart from the fact that you will defo be making some of these books, I can assure you that there will be Biscuits on hand too! (hidden or otherwise)...

Thanks for checking us out.
See you soon
Andy.

Ingredients used;
Creative Expressions Gilding Wax - Graceful Peach
Creative Expressions Gilding Wax - Graceful Mint
Spellbinders 3D M-Bossabilitie Folder - Labels 34 (E3D-016)
Spellbinders Die - Labels 34 (S4-416)