Showing posts with label Heat Embossing. Show all posts

Wednesday, 14 October 2015

Shadow Stamping....

Hi folks.. Another little stamping technique for you today...

I know it's not very clear in this pic

but the vase for these Christmas Poinsettia's has been shadow stamped to give the impression that one is behind the other.. A great little technique to add dimension to your projects without adding too much depth..
You can do this technique with most images, although solid (silhouette) stamps do tend to work best.
Again, I thought I'd put some of the Dies I was sent to good use and make them into stamps, which gives them yet another use.

To start with I cut the solid part of this Die using some funky foam,

Then positioned the inner part of the Die ready for cutting.

As I would have expected it cut all the way through, however, the fact the pieces didn't drop out was advantageous...

as this allows for it to be positioned onto a second plain image but will still give the detail..

So, stamp the image using a clear Ink such as VersaMark or Perfect Medium.

Cover with Embossing Powder

and heat set.

Cut a solid image out in light/medium weight card stock

and position this over your initial stamped image,

Ink up your stamp again and stamp just to the side of the original image,

add Embossing Powder, and heat set.

Makes the second vase appear that it is behind the first!!

I cut mine out just to give a little dimension, but you could do this directly onto your project and sill have the desired effect...

Then, decorate how you see fit!!

Thanks for checking us out, see you soon.
Andy.

Wednesday, 25 March 2015

Another Marmite project....

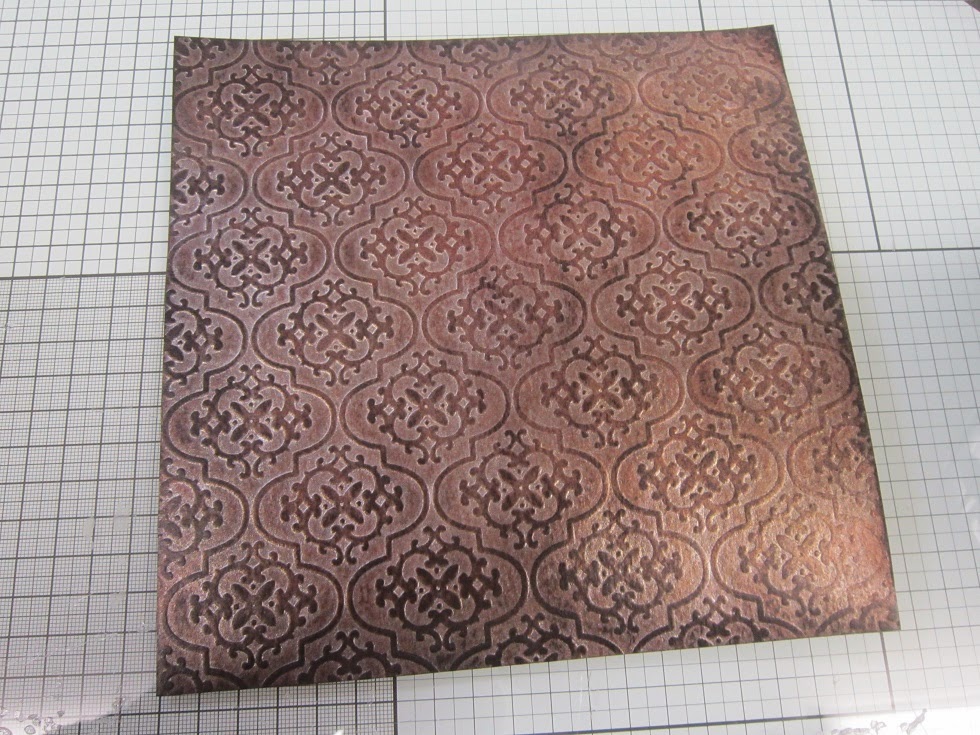
Hi folks... I've gone "reet" grungy for today's Creative Expressions Design Team project.. And I think, as the title of today’s post suggests, it's another Marmite project, you'll either like it or not..

I'm still taking some convincing! But, as they say, it's all about the journey, not the destination! And I certainly enjoyed the process of making it, if not the finished result...

And considering it started off as just a bit of White and Black card stock the results are pretty cool...

I stated off by embossing a piece of White card stock using the Tapestry (EF-012) Embossing Folder from Creative Expressions.

Placing it in an old box

and selection a range of Spritzing Inks.

The results of spritzing the Inks are always going to vary,

depending on how much of each colour you use..

But carry on until you are relatively happy with the results.. They final colour will still change somewhat as the project dries.

To encourage the project to dry quicker, place it onto a piece of kitchen towel

and place another piece on top.

Take an iron and iron it dry.

As the water from the Spritzing Inks evaporates not only will the project dry but will probably also lighten in colour slightly.

Once dry you can add some colour to highlight the embossing

use what you have

as each different type of Ink will add its own element to the project.

To seal "all" of this "Inkage" you can apply some clear Embossing Powder.

This also adds a nice sheen to the design.
I have in mind to use this project as a book cover at some stage so I wanted to create some sort of binding/hinge effect.

I cut 2 Borders from the Sue Wilson New York Collection Border, Corner & Tags Die Set (CED4102),

coloured them with Graceful Peach Gilding Wax

and applied them to the base card. "Says to me rusty old hinge/spine don't you think?"

I had a couple of Gilded Hearts left over from a previous project,

so rather than let them go to waste I popped them onto the Borders. Not quite sure why, but I do think that it adds to the effect somehow!

I then added a sentiment from the Couture Creations Vintage Rose Garden Paper Collection. I glazed it with Glossy Accents to give it a glazed effect..

This is where I think I should have stopped, but I went ahead and added another sentiment, it's only on foam pads, so it can easily be removed for when I am ready to create my book for this cover to go onto...

So, all in all a fun, if messy project to get your teeth into.. And I kinda like messy!!
Thanks for checking us out.
See you soon.
Andy.

Thursday, 6 November 2014

Happy Birthday Sis....

Hi folks... I knew these new Creative Expressions Stamps would come in very handy!!!

Today is Joanne's (Sister) Birthday. And as she is an uber Strictly Come Dancing fan they fit in very well with the card I have made for her....

Happy Birthday Sis, hope you enjoy your day. xxx
Thanks for checking us out and see you soon.
Andy.

Top Hat & Tails Stamp
Step by Step Sentiments Stamp
Small Circle Dazzlers
Tonic Die - 637e Keepsake Frame - Dragonfly
Creative Expressions Large Embossing Folder - Quilted Flower (EF-017)

Tuesday, 3 June 2014

Birthday Wishes.....

Hi folks.. 2 Birthday cards finished for this week using the Die from issue 5 of the Tattered Lace Magazine as a stamp..

Both cards are similar

but they are going to different people who don't know each other so they'll never know!! Result!!
I know it's only early June but we've already taken delivery of some new Christmas dies from Sweet Dixie.
So, inevitably some of the older dies have got go... Go check em out. Once they've gawn they've gawn...
Thanks for checking us out.
See you soon.
Andy.

Tuesday, 1 April 2014

INKredible!!!

Hi folks... This week’s lesson che Pinnacles is all about Inks!!
Now, I've been known to have a dabble every now and then! And why not, when you can achieve such dramatic results!?
Who would have thought that this little project started out as just a plain piece of White card stock?!

I've added Distress Inks for my background, made my own stamps from some of my (our) Dies (Yes, I'm still churning them out!), heat embossed and water coloured with Distress Inks...
Loving the results so far... More to come during the week...
Thanks for checking us out.
See you soon.
Andy..

Tuesday, 21 January 2014

I'm melting!!...

No, not the wicked witch of the west....but me!!!
This week's lesson here at Pinnacles is all about Melt Art...
Perhaps not to the depths and degrees it could be taken too, but Andy's way..
We've had a go at making our own little Hearts using the Spellbinders Bezel’s

and Flowers dunked in UTEE which has given them an almost Porcelain appearance...

We've had fun so far this week, and no burnt fingers as yet!!!
Here are just a couple of samples I prepared for the lesson, with some more to follow later in the week...


Thanks for checking us out.
See you soon.
Andy..