Showing posts with label Tim Holtz. Show all posts

Thursday, 24 October 2013

You'll either ....

... Love it or Hate it!!! Steampunk that is!! Just like Marmite! Which, as you may know.. I'm a fan of!!
Just getting a few samples ready for next weekend’s "Steampunk Christmas" workshop...

This little cheeky Chappie will be adorning the Pinnacles Christmas Tree this year, once he had served his purpose in the workshop that is!!
Thanks for checking us out.
See you soon.
Andy.

Tim Holtz Gadget Gears Die
Cheery Lynn B383 Owl with Gears Die

Friday, 8 March 2013

Tim Holtz "style'ie" Book...

Hi Folks. Just wanted to give those of you who are attending our Tim Holtz stylie'ie lesson tomorrow a heads up of what you can expect to be making! From wood to metal to pastles (not really Tim's style!) to basically whatever you want to create. If you have half as much fun creating as I have had preparing, we should be in for a fun packed creative day.. See you all at 10! Andy.

Wednesday, 29 August 2012

Now, I'm not a big fan of....

"Novelty" type cards.. But occassionally I let my inner child take control and just see what it comes up with... In my last couple of posts I have shared with you a few stamping techniques using the Spellbinders 2012 Heirloom Ornament, in, perhaps it's more traditional context.. Today, we have something slightly different, but still using some stamping and inking techniques which I will be sharing on Saturday at our 9th Birthday Stamping and Inking Demo Day...
So, is it a Bauble?
or a Fish?
or a Venetian Mask?
You decide... Oh, and one last thing for today.....
Good Luck Team GB!!!! Thanks for checking us out, see you soon. Andy

Tuesday, 21 February 2012

Has Spring sprung?.....

Hi folks... As we approach the end of another Month of 2012, hopefully the weather will start to change and get just a tad bit warmer than of late, heralding the arrival of Spring! (Andy crosses fingers as he is fed up with these cold early morning doggie walks!!)
So, with that in mind, (spring that is, not cold dog walks!) over at the Cuttlebug Blog Spot, this week’s challenge is... Springtime..
And here is my Design Team entry...I'm not 100% sure it screams "Spring" but I guess Flowers in a pot and you can't go wrong! This was one of my other ideas!However, it was too corny for me to send in,as I put "Harold the Hedgehog" on an actual Spring, I thought that was taking the brief a little too literally!!
Anyway, let's make a start on our "How to"I started off by cutting out a pot shape from the Spellbinders Die Flower Pot's (Doh!) S5-060 using White card stock..To give it some colour I added a few shades of Distress Ink, shading in some area's to give it some definition..The colouring needs to be done on both sides as the top part of the die folds down to form the lip of the pot.I then went over the whole of the image with Glossy Accents, leaving air bubbles on the lip of the pot. Not intentionally mind, but we will cover that up later!
Whilst the pot was drying, I prepared the rest of my project.Firstly, I cut out sets of Tulips using the Marianne Creatables Die Tulips LR0209. One set in Green card stock and one in Blue.Cutting the Flower Heads off of the Blue Tulips to attach to the Green ones to make them look realistic..To add another floral springtime twist to the project, I punched into a piece of backing paper using the Martha Stewart Punch around the Page set Wild Flowers (M42-80005).Then added some gems to each of the punched out Flower shapes. I also positioned the now dry Flower Pot onto the backing paper and arranged my Tulips. Finishing off with an "ickle" Ladybird to hide the air bubbles created when using the Glossy Accents.
This lot was then matt and layered onto my base card and finished off with my sentiment...
Don't forget to pop on over to the Cuttlebug Blog spot to see what my fellow Design Team Members have come up with for this week’s challenge.
Thanks for checking us out, see you soon.
Andy.

Tuesday, 24 January 2012

A Box full of Memories....

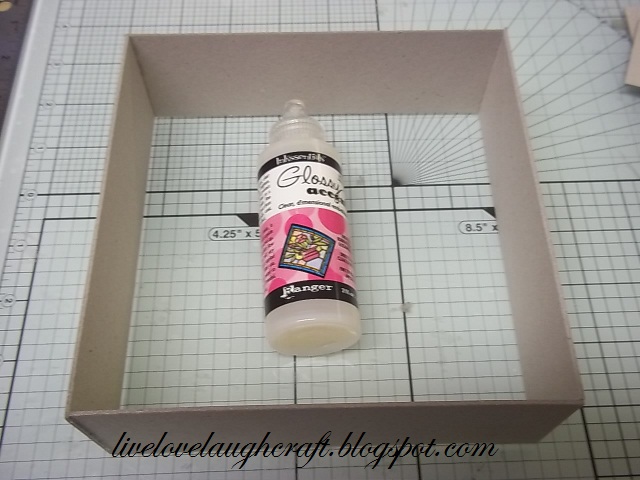
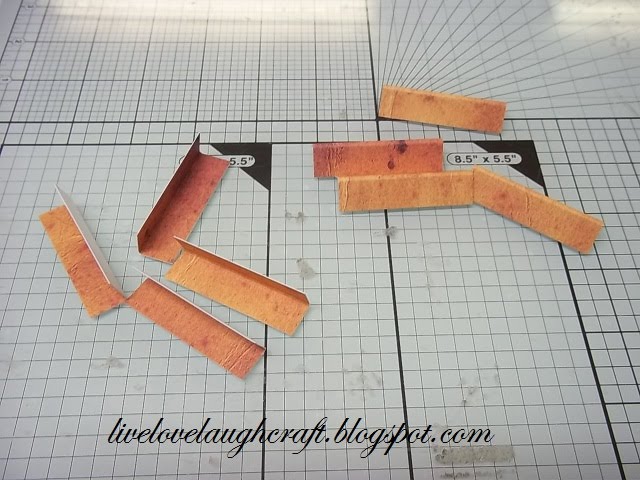
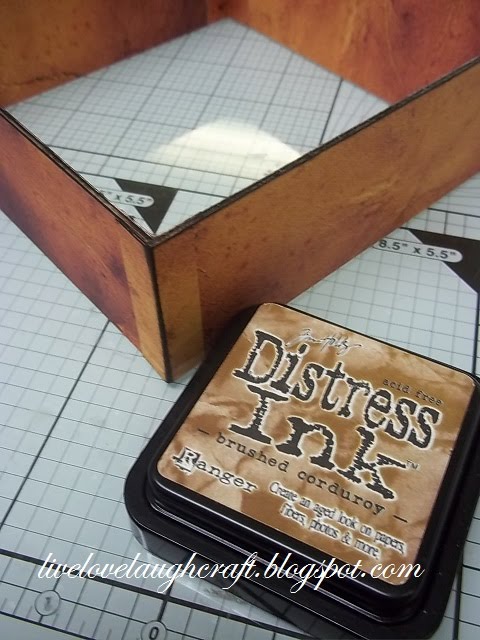
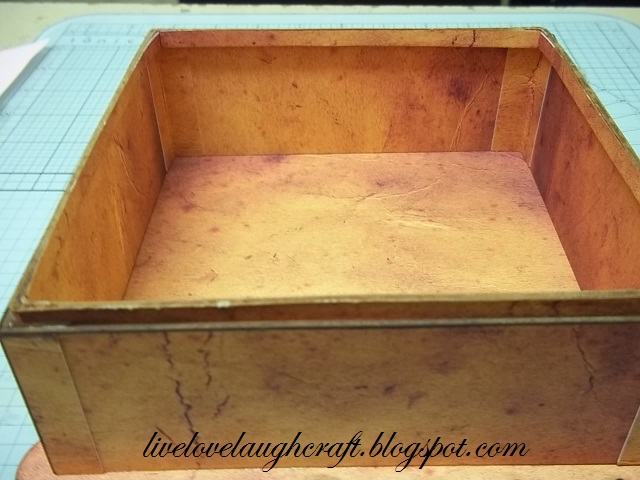
Hi Blogland... This week’s challenge over at the Cuttlebug Blogspot is to create a box... Occasionally, when you get a bit carried away with your crafting, you may find that your project does not fit into a standard sized crafting envelope and to cut the project down so it does fit would ruin it.. So, what's left to do? Make your own box or envelope to fit of course... There are many scoring boards on the market such as the Hougie Board or Envelobox Creator which will help you to make standard and out sized envelopes and boxes, and once you have mastered the instructions they are a God send.. However, I decided to make my own from scratch.. ! Why?, because it was a challenge and it's something I've been meaning to do for some time now..So, here it is... My box and a project to keep inside it.. Fancy giving it a go? Here's a step by step guide if you do..I started off with four 6"x 2" pieces of Grey Board.And glued them all together using Glossy Accents.I cut strips of my chosen card stockand applied them to the outside and inside edges of the box.The box is reasonably sturdy like this, but just to add a bit more stability I cut short lengths of the card stock, folded them in halfand glued them to the Four outer and four inner corners...To hide the Grey board and also to add a bit of age to the box I went around all of the edges and corners with Brushed Corduroy Distress Ink.To make a base for the box to sit on I cut 2 pieces of my pattered card stock and also a piece of 290gsm card stock using the largest die from the Spellbinders Grand Scalloped Squares.Layering them all together to form a nice thick layered shape. To hide the White core of the card stock I again distressed the edges using both Distress Ink and Distress Stains in Brushed Corduroy.I ran some Pinflair Gel around one edge of the box, applied it to the base and put it to one side to dry.To make the lid of the box I started off by cutting four strips of the Grey Board 5 3/4" x 1/4"and joined them together in the same way as I did the sides of the box, securing the corners with some extra pieces of card stock.I then stained the Grey Board with the Distress Stain as before.So that I could adhere the frame to the lid and so that it would line up correctly I positioned this smaller frame inside the base of the boxand ran some Pinflair Gel around the edges.Placing the lid of the box, (which was made exactly the same as the base, using 2 pieces of my patterned card stock on one extra piece all stuck together) onto the Gel and then setting it to one side to dry..Once the Gel was dry, I lifted the lid off which brought the inner frame with it. This inner frame will make the box lid have a nice tight fit when it is placed onto the base of the box..To add a little bit of decoration to the box I added some matt Black Gems, which made the box look like it was tacked together.To decorate the lid I cut out some shapes using the Memory Box Die Madera Corner (98237). This was cut out 8 times using the same patterned card stockand then positioned onto the lid of the box in my desired pattern.
As nice as this effect was, I think it looks like the pattern has been carved into the box!, I wanted to add a little bit more to it.So I took my Gilding flakesand applied them to the cut out shapes.And there you go.... I've decided to keep my "Book of Holly" (my Dog) well, volume One anyway! in this Memory Box, as well as her first Collar which she has grown out of, her puppy teeth we have found and a few other nic naks of her first few Months with us.. Once this box is full, I can think about making another one for volume Two...
Don't forget to pop on over to the Cuttlebug Blogspot to see what my fellow Design Team Members have come up with under this theme and why not take part in the challenge whilst you are there?!
Thanks for checking us out.
See you soon.
Andy..

Tuesday, 3 January 2012

The best laid plans

Hi Blogland, and how is 2012 treating you so far. I guess for many it is/was a return to work today after the New Year Holidays. What a day to go back! It was rather windy out there today don't you think?! It was fun taking Holly for her morning stroll this morning! Those of you who visit us here at Barleylands will know that the car park, albeit FREE really could do with a wind break at the best of times, but when it is blowing 50 - 60mph you don't really stand a chance.. Still, Holly had fun chasing any leaf or bit of paper that got whipped up in the wind!!
Now, with every good intention and the best laid plans to get a friends card made yesterday for their Birthday and then posted in Blogland Today somehow, a rather busy first day of our sale put paid to that plan! And I had to do the ultimate crafting No No and go out and buy one!! So, as I still haven't had a chance to get one made, Today I'm going to offer you another Christmas card.. This will make 11 so far this year and it's only January 03rd.. Get in!!This is a card I made for a very special Pinnacles Friend.. She said that her Grandson said that she received it because it was old looking.. I know she corrected him saying that it was Classic and Vintage, just like her!! Touché.....
Late last year I had a week’s worth of lessons where we used Alcohol Inks.This was one of the samples I produced and kept, as, although I had no plans to make a card with it at the time; I knew it would come in handy in the future!
It initially started off as a piece of White Glossy card stock (sorry, I don't have step by step photos of this stage). I added a couple of Alcohol Ink colours to it and then Embossed it using the Christmas Vine Embossing Folder and then went over the embossed image with the Alcohol Ink Gold Mixative..I then cut the largest die from the Fleur De Lis Rectanglesand then matched it up with its counterpart Chipboard shapeso as to make a much thicker and sturdier image.I prepared my base Easel card using a 12" x 12" piece of backing paper which was a Christmas Wreath image and cut it so that it roughly resembled its original shape..Adding my Embossed image and a vintage die cut topper to the back of the card.This particular piece of card stock has served me well over the past few Months and the particular Carol on this piece is very apt! After all, my dog is called Holly!!This was also added to the back of the card.
For the stopper for the Easel card I decided to make Poinsettia's.I cut out my images using the Spellbinders Poinsettia Creations Die (S5-055) using Red card stock.To make them slightly more aged and vintageI applied some Gold Ink to them using a Stippling Brush.And then layering the pieces together to form my Poinsettia.I then took some pre made leavesand added some of the Gold Ink to them to tone them down to fit in with the project.Finally adding the Leaves and the Poinsettia Images to my card to finish it off..Another one for your Christmas 2012 pile.
Thanks for checking us out, see you soon..
Andy.