


 This is an idea I got from Sam Poole, take a look at her wonderful Blog, she has some great crafting ideas for you....
 I started off by cutting out 20 x 1" and 20 x 3/4" squares using Chocolate Mocha coloured Core'dinations card stock. I used my Cricut to cut out the Squares for quickness, but a couple of Punch's of these sizes could just as easily be used..
 I then went around the edges of each of the Squares with a Copic Pen. Any dark colour or Pen, such as a ProMarker can be used as it is really just to add an element of shadow to the Squares. Although I did all 40 of the Squares, you really only need to do about half of each size as some of them will be covered up later on in the project.
 Once coloured I layered the smaller Squares on top of the larger ones using double sided foam pads.
 Next, I cut a piece of the Chocolate card stock at 4 1/2" x 6"
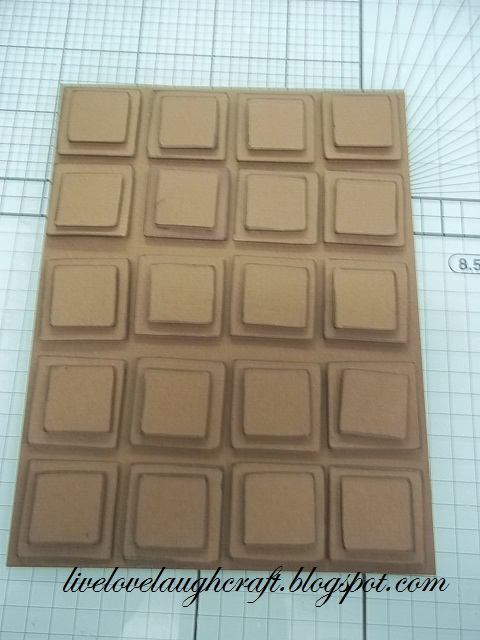 and spaced out the layered Squares to form my Chocolate bar..
 Take a 6" x 6" piece of candy stripe paper
 and tear it towards you
 and then wrap it around the Chocolate Bar
 to form some wrapping.
 I stamped my sentiment (taken from Sam Poole's set called - Chocolate) onto White card stock using some Distress Inks in complimentary colours to suit my projects, Festive Berries, Broken China and Brushed Corduroy. Each sentiment was cut out using Spellbinders Nestabilities Labels Four.
 To line up my sentiment with my Ribbon, I found it easier to stick the label to the Ribbon
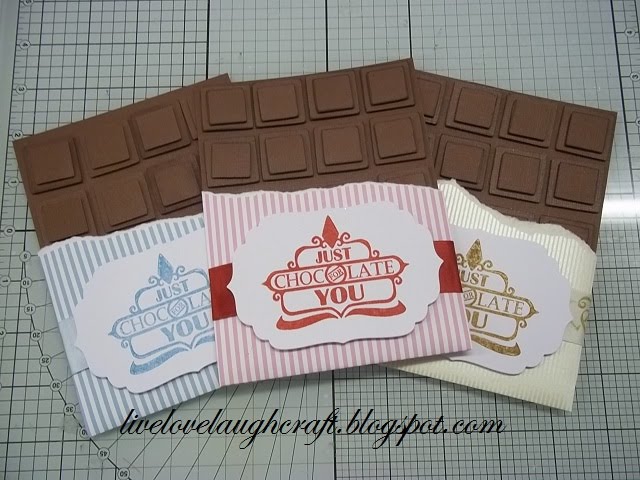 before applying it to the project..
 The bar of Chocolate was then applied to a complementary luxurious piece of card stock, (well, it is for Valentine’s Day after all!) adding a Big Chocolate Box Ribbon to the side of the project to finish it off....
 So, that's one for her,
 One for Him,
 One for someone else,
 And I'd be happy with this!! No, it's not Terry's, it's mine!!
 For this card I used a digi stamp from Mo Manning..
 It was coloured with Copic Pens and Glazed with Glossy Accents.
 Whilst it was drying I had a play with my Cricut Machine and Gypsy and welded some Mobile (Cell) Phone shapes from the Smiley Cards cartridge to a Rectangle from Plantin Schoolbook and cut them out on some Silver Mirror card.
 Once the image was dry I matted it onto the rectangle and added some Black Mobile Phone shapes to make them stand out a little more..
 After matting one more time onto some light Blue card stock
 I attached the image to my base card.
 I then cut out a tag using a die from the Spellbinders Ribbon Tags Trio Three (S4-323) set.
 Added a peel off sentiment
 and then threaded some ribbon through the loops before adding it to the card to finish the project off.
 So, just an idea for some of the younger guy's in your life..
 And did they? Yes they did!! Twice!!
 Again, this one is very simple in it's make up but think the colour combination really makes it stand out!
 I punched a couple of border strips using the Martha Stewart Garden Gate Trim Deep Edger Punch in Some Red and White Polka Dot card stock
 adding them to a prepared Easel card. I also added some Red Gem Stones to the centre's of each flower shape.
 Using an image form one of the new Kanban Sassy Soho Ladies, I matted it onto some Red Mirror card
 and applied it to the side panel of my Easel card.
 I then cut out my sentiment in the same Red and White card stock used for the base card. I used the Plantin Schoolbook Cricut Cardtridge, using the shadow function to give each element some depth.
 The sentiment was applied to the front of the card,
 but can also be seen when the side opening easel is put together...
 So, which one have I chosen to give this afternoon?
 This one....
 I started off by cutting out my silhouette image in Black Mirror card at 5" from the Forever Young Cricut Cartridge. I also cut the Trouser Suit at 5", remember the machine will size the other elements to the largest image. It's that clever!!!
 I then layered the two images together.
 Next I cut a plain circle and a scalloped circle using the Spellbinders Grand dies through the Grand Calibur machine
 and layered them together adding letters which I had cut at 1" using the Plantin Schoolbook Cricut cartridge...
 For the base of the card I decided to make another twisted easel.
 I scored it in half and cut it to make a 5 3/4" square, then scored the front of the card from corner to corner
 and folded it to form the twist!
 I then cut two triangles from a separate sheet of card
 using one to form the stopper for the easel
 and using the other one to cover one of the White side panels.
 I then added my image to see how the whole this was coming along.
 For my sentiment I printed the words in a 70's style font from my PC, matting and layering it using a plain circle and scalloped circle Nestabilitie and applied it to the card.
 "Yeah Baby"! Sorry, couldn't resist!!!
 I made sure that the card would lay down flat and go into and envelope before finishing off the card. I've been caught out like that before!! Oh you have too!!!
 So, just to finish it off I added some pre made Prima Flowers
 to give the project a bit more of a 70's flourish...
 I hope if I decide to give this one to her that she gets the concept of the card, after all, 1971 was a classic year! It was the year I was born! And aren't we all grateful for that!? Answers on a post card... nah, forget it!