Showing posts with label Valentines. Show all posts

Wednesday, 28 January 2015

And they call it... Puppy Love.....

Hi folks..

Last post today using January's Creative Expressions Design Team Stamps....

Today's project was inspired by another photo I have of Holly....

So, after Stamping and colouring "Toby"

I glazed him using Glossy Accents...
I love using Glossy Accents over a coloured image as it adds that dimension I often seek on my projects...

The other reason I like to use it is because it seals the image so that you are able to colour the White card stock with Ink. As the Glossy Accents (once dry) resists Ink, you are able to make the background whatever colour you like..
"Why not just stamp onto coloured card stock" I hear you ask? Because colouring in the image would just not work, most of the colours would not show up and there would be very little chance of obtaining any shading effects either...

Once I had coloured and trimmed the card stock to size, and before mounting it onto my prepared base card I spritz'd it with a little bit of water just to soften it slightly.. On this particular project it's almost created a faux velvet effect.. Bet I couldn't do that again if I tried!!!

And there we go, just added a few handmade embellies to finish the project off....
Thanks for checking us out, see you soon.
Andy.


Monday, 13 January 2014

Are you an "innie" or an "outie"?

Well today, I'm an "innie"...
What am I on about? Die cutting of course!....

I've been using the Vines of Passion Die quite a bit lately, and on today's project I have used just one of the sections.. The "innie" bit, sorry, can't think of another term to call it!

It's the filigree section in the middle, and as it has no cutting edge all the way round the die, it cut's it's design into a piece of card as opposed to out of it!
I don't think I've ever got as much use out of one die before. Apart from perhaps; the Tonic Verso Dies which from the get go have always had huge potential!
Still more sample to come from this lovely Heart set I'm afraid!
Have a great day and thanks for checking us out.
See you soon.
Andy.

Thursday, 9 January 2014

Heart to Heart...

Hi folks.. Well, I said I wasn't going to! But I have started our wedding samples for this year.....
I've had several requests since Christmas for some samples, so here is the first one off of the production line...

I've used the Spellbinders Vines of Passion D-Lite Die (S2-022). Which, apart from being a Heart shape and having uses for weddings, Valentines, Anniversaries etc. It is also a Die which cuts into and out of a piece of card, so therefore is pretty diverse...
Using both the dies in the set allows you to; firstly cut out a solid Heart shape,

and then if you wish,

cut out the filigree design.

And then stick them together..

There are several different cutting combo's you could choose for this die, but this is what I have chosen this time...

I also prefered to do the cutting process separately, just so that I could line the dies up and also to get a good cut!
Am liking the Blue and White combination..

And you must know me by now! Yes, other colour combinations are on their way!!!
Thanks for checking us out, see you soon.
Andy.

Friday, 11 January 2013

Rustic Heart...

Hi Folks. I know I know two posts in two days! Not like me at all, but whilst I'm in the zone you might as well enjoy it! Still having a play around with my Gilding Flakes in preparation for tomorrow’s lesson.
Now, this one won't be everybody’s cup of tea, I'm still not 100% convinced that it's mine, but I do like the technique! It's one using not only the Gilding Flakes and super duper Flitter Glue,
but also an Embossing Folder.. In the past you may have added Ink to your Embossing Folders to get either a positive or negative letter press? You can also do the same with the Flitter Glue!
Adding it to your Folder
before inserting your card stock and passing it through your Die Cutting Machine.
Add your Gilding Flakes
and then burnish them off! Admittedly, a little bit rough and ready
but once it is cut out it does have a certain "Je ne sais pas".
I embossed one piece of card and de-bossed the other, just to see the different effects!
Don't forget to give your Embossing Folder a thorough cleaning afterwards as it will be quite sticky from the Flitter Glue..
Then all you've got to do is decide what to do with them! Thanks for checking us out. See you soon. Andy.

Tuesday, 7 February 2012

Sweetheart Challenge..

Hi Blogland.. It's another challenge over at the Cuttlebug Blog Spot today.. This week’s challenge is called "Sweethearts", and with Valentine's Day only a week away it's probably about time to get your thinking caps on and get making that special project for the one you love...So, here is another idea for you to try if you haven't made your card already..To start off with, I prepared my Hearts. I decided to use Cosmic Shimmer Mica Powders with my stamp, so first of all I "dabbed" an Anti Static Bag over my chosen card stock. The reason I have applied my Anti Static Bag first is so that when I add my Mica Powder to my stamped image, the powder only sticks to the stamped image and not to the card around it or any finger marks I may have left on it. You'll see the effect in the next few images..I inked my stamp with VersaMarkand then stamped onto my card stock.I then applied my Mica Powder, a little goes a very long way!. I used Jade Teal which is from Set 6, Luscious Greens.I then brushed off the excess. As you can see, by using the Anti Static Bag, the Mica has only adhered to the VersaMark ink, leaving a nice crisp image. And considering the detail of the stamp I have used, I think that it has come out pretty well!.. You could also use an Anti Static Bag when using Embossing Powders as it also helps with this technique too. How many times have you heat embossed an area with embossing powder that you just didn't want? Yeah! Me too...I then cut and embossed the text using the Spellbinders Die Nested Hearts (S4-296).I did this 3 times in all.
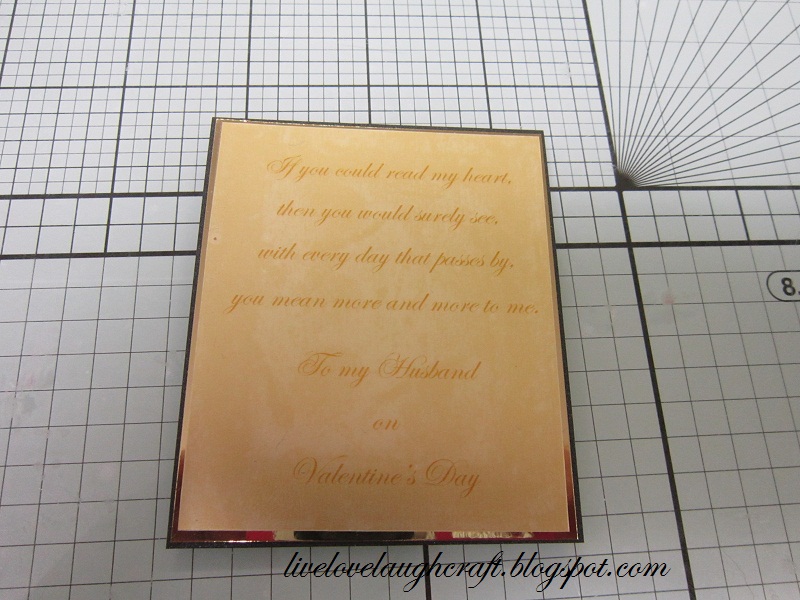
I wasn't quite sure how this project was going to be put together, so I thought I'd get all of my elements together, and then take it from there...Therefore, I typed up my sentiment on my PC and printed it onto some Safmat,peeled it from it's backing,and mounted it onto some Gold Mirror card, which was mounted onto some Blue card stock..
So, I have my elements, now for the base card.I found this great Heart background paper in one of the new Kanban paper packs; it was either from the Alchemy or the Odyssey pack. Sorry, there's only one sheet of the paper in the pack and once I had taken it out I couldn't remember which one it came from! Doh! This was matt and layered onto some Gold Mirror card and some Blue card stock, as I had done with my sentiment topper.I then added my Heart shapesand finished the project off with my sentiment.A bit of a change from the traditional Red for Valentine's I grant you, but a change is as good as a rest don't you think?
Don't forget to pop on over to the Cuttlebug Blog Spot to see what my fellow Design Team Members have been up to, and have a go at this weeks challenge yourselves..
Thanks for checking us out, see you soon.
Andy.

Saturday, 28 January 2012

Love Hearts.....

Hi everyone, I hope your weekend is getting off to a good start? Almost at the end of January now!! Wow! where has that Month gone? So, February arrives next week, the Month of Love, which means Valentine's Day, is not too far away!!So, with that in mind, here is a simple, but effective little Valentine's card to make for the one you love...I cut out the two largest shapes from the Spellbinders Heart Circles Die (S4-316) using Red card stock. I also cut out the corresponding sized circles in White card stock using the Spellbinders Classic Circles Large Die (S4-114).And layered all of the shapes together.
For the centre I tried a few different dies, just to see which one worked best...The La Rue Heart...Nope!!The La Rue Flourish...Nope!!!Or the Quinn Flourish...Could be!!.. Is anyone getting a bit of Déjà Vu about Hong Kong Phooey?? No? Well, I guess you have to be of a certain age!! to appreciate where I'm coming from.. This is Rosemary, you're telephone operator!! OK, I'll stop now....
So, Yes the Quinn Flourish was the Die I went with, placing it in the centre of the previous dies I cut. These were then positioned on to my base card to which I had added some of the "waste" Hearts which were left over when I cut out my Heart Circles...To add some Valentine's sparkle I added some Heart Gems around the edges of both the larger and smaller Heart shapes..And there you go,....
Thanks for checking us out and enjoy your weekend..
See you soon.
Andy.