Hi Blogland.. Here we go with another
Cuttlebug BlogSpot Challenge... This week’s theme is a
sketch which has been designed by one of my Design Team buddies Kerry...
I've never really been one for sketches, as I always thought that you had to follow them exactly! And as I always try to think outside the box I found that quite limiting. However, as I now understand, the sketch is just really a guideline and as long as you roughly follow the design, you are doing it right!
So, here is my project, roughly, very roughly following the sketch....
Ah, but where is the sentiment? You might well ask!!
Ta da! Oh, and look, the layers, which were also part of the sketch, have appeared, and also a stopper for the Easel card...
Here's a closer look at the card. I hope you can notice that, whilst the stopper is still within the card that the background scene is still complete?
The scene is still complete once the stopper is taken out and used as it should be, as a stopper...!
I think that you can see this effect to its fullest extent
from a distance?
So, here with go with how it was made... Grab a cuppa, as this is going to be quite a lengthy, picture heavy post!!
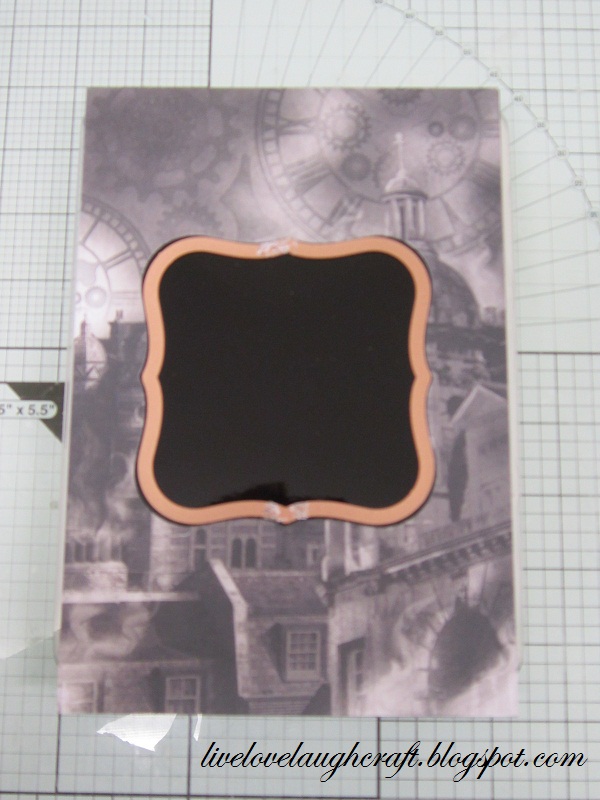
I started off by cutting 3 pieces of my patterned card and 2 pieces of Black Mirror card to exactly the same size.
With my first piece of patterned card, I placed the largest die from the
Spellbinders Labels One set onto an area of the card and ran it through my Cuttlebug
to cut the die out.
For the next step, I positioned my next layer of card, in this case, my Black Mirror card, directly under the previously cut piece of patterned card stock and lined up the largest die from the
Spellbinders Small Labels One set. I could have done this step using the second largest die from Labels One as opposed the Labels One
small, but I like the effect that this slightly smaller set gives as it decreases the layer sizes from 1/4" to 1/8".
Before passing this through the Cuttlebug I removed the patterned card stock, as this would have added another layer to be passed through the machine, and although I'm sure it would have gone through ok, it would have added unnecessary bulk to be passed through the machine..
So, once this die was cut out,
I positioned the frame underneath the original patterned piece of card stock.
Now, don't throw away the positive images, as these will be layered together to form the stopper for the card.
So, for the next layer, I positioned another piece of the patterned card stock under the piece of Black Mirror card I had just used. I positioned the second largest die from Spellbinders Labels One set within the frame which had been created. Remove the Black Mirror card and then pass through your Die cutting machine.
This will produce another layer, which will go under the Mirror card. And also another positive layer to form the stopper...
Repeat this process one more time, this time using the second largest die from Spellbinders Labels One Small..
This will create another frame.
The last layer will be a full sheet of the patterned card stock.
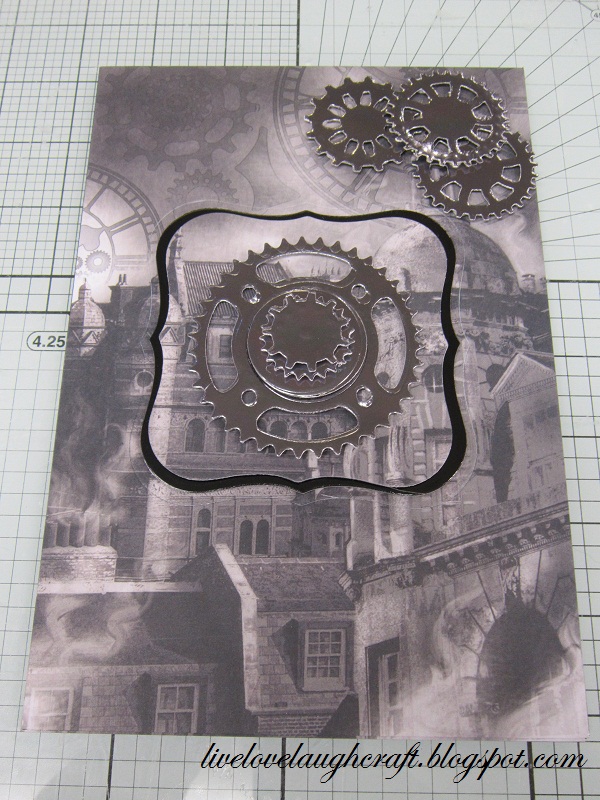
This is where; I hope you can see, that because you have lined up all the secondary die cuts with the original cut you will get a concentric shape? And also, because all of your card was initially cut to the same size, the image flows all the way through the project.. Here's a close up which will hopefully show you better than I can explain it!!
And because the positive images are basically the waste from our negative images, when layered all together,
they fit exactly back into our frame... And line up with the picture perfectly!!
So, that's most of the sketch followed, now on with the rest of it...
To tie in with and to keep the Steam Punk, Cogs theme going, I cut out some shapes in Slate Grey Mirror card using the Spellbinders Die
Sprightly Sprockets.
I used a selection of these shapes to create a "handle" I think I'll call it, so that the topper can be removed from the frame and positioned as the stopper,
I also used a few of the shapes to create the 3 Circle accents which were part of the original sketch.
And under the "stopper" I positioned my sentiment which will be revealed when the stopper is removed!!
I created a Twisted Easel card using Black Mirror card and patterned Vellum for my image to be mounted on to.
And before it was all put together I added Velcro dots to the back of the stopper
and onto the base of the card.
So that when the stopper was removed from the frame and used as a stopper it would hold securely...
To add a little bit of interest to what I considered to be quite a bleak looking area on the card I added a swirl cut from Black Mirror card.
I hope I still have you attention after quite a lot of waffling on? I'm really pleased with the result and am happy with the way I have used the dies to try and get a little more out of them other than their intended use... Why not give something similar a try yourselves.
And don't forget to hop on over to the
Cuttlebug BlogSpot to see what my fellow Design Team members have created this week...
Thanks for checking us out.
See you soon..
Andy.