Showing posts with label Decoupage. Show all posts

Monday, 21 November 2011

and the winners are......

Hi Everyone... First things first... Our Blog candy Winners are....... Jovan and Jenny...Jovan wins the Autumn Set of Tim Holtz Distress Inks and Jenny Wins the Winter set..Congratulations ladies, I hope you have fun using them when you receive them.
Thanks to everyone else for taking the time to enter. There will be plenty more chances to win some Blog candy in the very near future...Anyway, here we go with Today's project.. I've been very lucky to have been given one of Martha Stewart’s new Punch All Over the Page punches called Nordic Snowflake (M42-90006) to play with.. And this is what I came up with.. Not only a card but a candle holder too...I started off by punching my design onto some printed backing paper and trimming it to size.I then mounted the sheet onto some Acetate to give the flimsy paper some stability..Next, I made my stepper card using my Hougie Board, scoring the A4 Acetate sheet at 2", 4" and then manually folding the largest part of the sheet in half. The measurement for this fold should be 7 3/4", but as the Hougie Board does not measure in 1/4" this bit had to be done manually, which really was no big deal!I then added my punched image to the back of the stepper cardand some prepared Decoupage to the front step of the cardto add some dimension to the project...The fretwork which can be created with this punch seemed perfect for creating a Candle Holder.So, I punched out my design onto an A4 piece of patterned paper, trimming off the excess and then rolled it into a cylinder before placing it over my Candle..Pretty effective if I do say so myself...Great in other colours too to match your Christmas table setting perhaps..And how about this for a backing paper for all you Scrapbookers out there!!..All in all a pretty useful Punch...
Thanks for checking us out.
See you soon.
Andy.

Tuesday, 14 June 2011

Like Marmite! You'll either love it or hate it!!

Hey Blogland.. Now, I know some of you are going to start shouting at me and some of you are going to enjoy today's post!! Today I'm sharing my first project of the year featuring the dreaded C word!! No, not that one, nor that one either!!! But Christmas!!! (covers ears!!)And yes, we are in summer here, but you know you've got to start some time! So maybe it will fool your subconscious into cooling down a bit!!So, here we go with our first Crimbo step by step!!
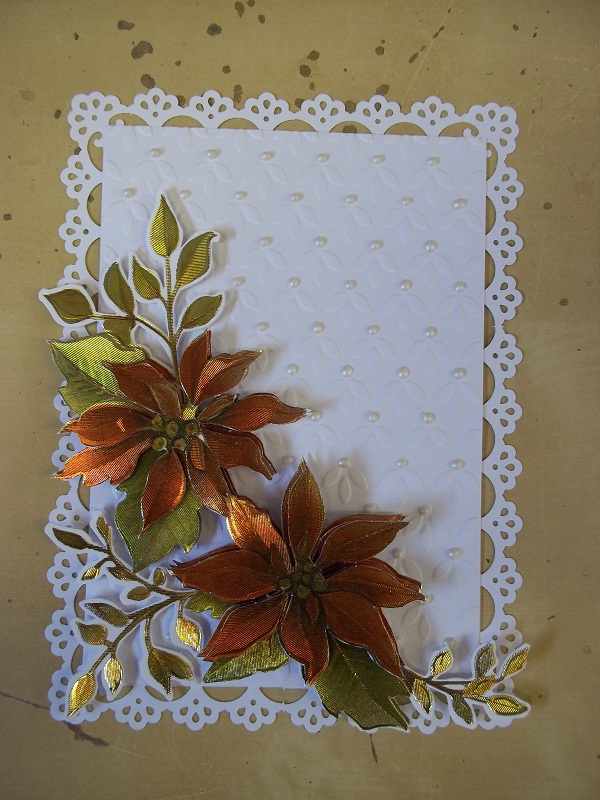
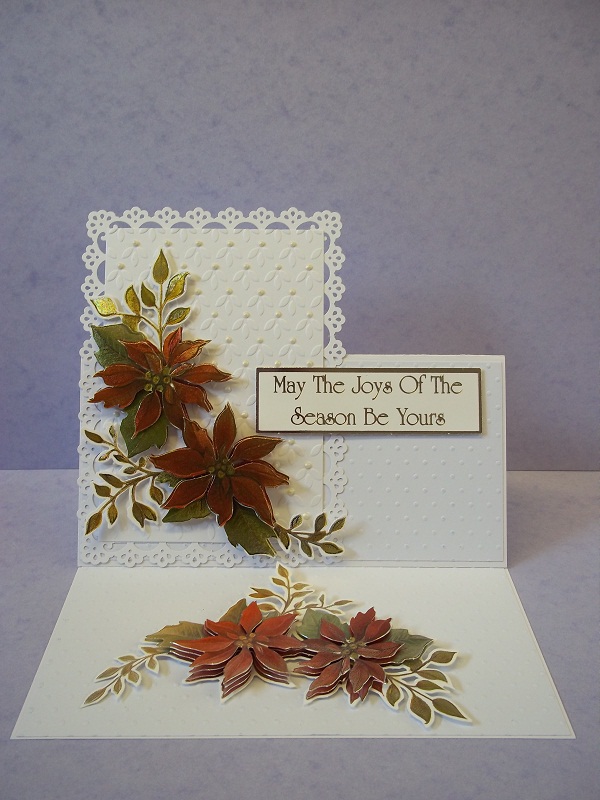
I started off by embossing a piece of White card stock using the Petal Embossing Folder from the new Black & Gold Forever Friends range..To me these little petals look a little like Snow Drops.. Not that I am much of an aficionado when it comes to plants!! I felt they needed a little bit of something to really make them pop off of the card. Initially I thought of adding gem stones to each set of petals! However there are 78 of them! (Thumbs up if you are now counting them!!) So that would have worked out too expensive. So I took some Pearlised Glue and added a dot to each set of Petals...Great effect huh!!Whilst the Glue was drying I took a piece of White card stock measuring 6 3/4" x 5" and punched around it using the Martha Stewart Vintage Floral M40-60043 Punch Around the Page set.. This set of Punches is also known as Deco Flowers..The space created in the middle of the punched area was just perfect to sit my embossed petals into.I had already prepped some die cut Decoupage, so this was added on top of the framed embossing.. It's all coming together now!!!I prepared my Easel card using some pre embossed dot White card stock,adding a second Decoupage image for my easel Stopperand then adding the framed images to one side of the cardand my sentiment to the other side of the card!!And there you go, one Crimbo card down, several more to go!...This card and many more will be on show at our Christmas in July Event on 09th & 10th July... So you can come and see it in the flesh if you are in town!!
Thanks for checking us out..
See you soon for some more inspo...
Andy..

Tuesday, 8 February 2011

House Mouse 3...

Hi Blogland. Well, it's Tuesday, so that means another Cuttlebug Spot Design Team project for you. As you may be aware throughout February we will be sharing with you some different folds for your cards.This weeks theme is Step cards. As I used this fold last week too, I thought I would step things up a bit (no pun intended!).I also added a little gift to the project..I started off with my basic side stepper fold (instructions can be found here), and played around with it a bit!MMMMMM I don't think so!Side of a House!!Bow of a ship maybe!Stairs!! In the end I opted for this!In my last few posts I said that I would be using the remaining images from the House Mouse decoupage set Food & Drink. So after cutting out all of the images I layered them togetherand then matt and layered them onto some "Chocolate" coloured Bazzil card stock and some Mint Green coloured card to keep the theme going from the picture. MMMM Choco Mint, could there a better combination??! I'm thinking Ice Cream here!The image was then added to the front of the card.I then took the Sizzix Embossing Folder set Valentine #3 (656508), cut some of the Mint card stock to size and passed them through the Cuttlebug.Once embossed I matt and layered the Mint onto some of the Chocolate card and applied them to the open panels on the card.I also added a matt of the Chocolate & Mint card stock to the inside of the card to cover up the White core which could be seen and was annoying me!! I also added a punched heart to complete the card...The folds in this project allow for great dimension,and don't worry! it lies flat to go into your envelope!I also added a little gift to the project by way of some Mint coloured Marshmallows in... what else, but the packaging the Sizzix Embossing Folders came in! I added some complementary Ribbonand a sentiment I printed from my PC and cut with some Scalloped Nestabilitie Circles..The idea of the gift is to complement the image on the card, just in case you were wondering!!!Hop on over to the Cuttlebug Spot to see what all of the other Design Team Members have come up with for this weeks theme..Enjoy your day and thanks for checking us out!!
See you soon..
Andy.

Friday, 4 February 2011

House Mouse 2

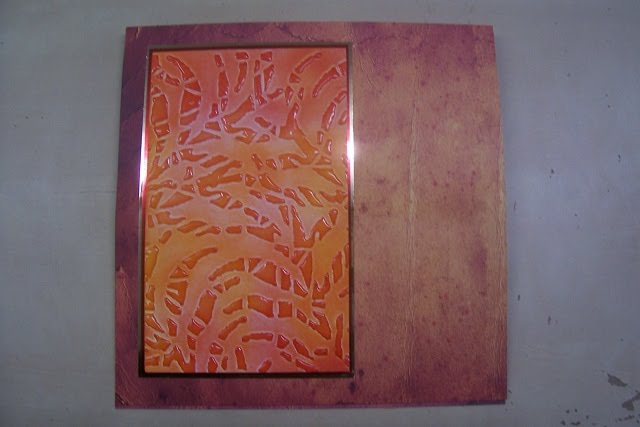
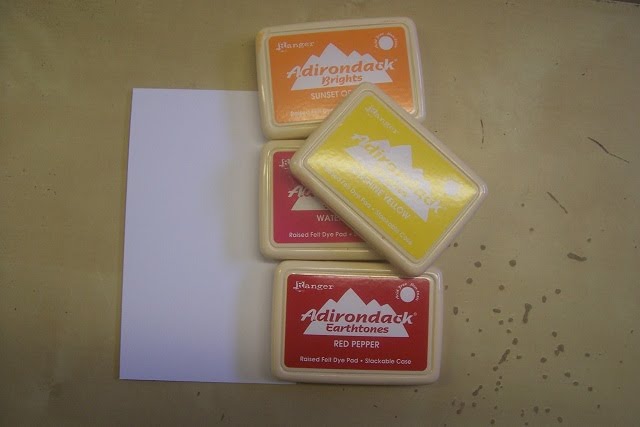
Hi Blogland. Today is Paul's (Joanne's Partner) Birthday. The man loves his food HOT!!! I think he would have hot sauce on his Christmas Dinner if he could!!So, when I saw a decoupage image in the Food & Drink House Mouse set I knew this would work for his Birthday Card!!I started off by cutting out all of the imagesand layering them together.I know that decoupage can be fiddly, but the time spent cutting and layering the pieces together is so worth it when you can get this sort of dimension. Don't get me wrong, die cut decoupage would make life sooooo much easier!!I then matt and layered the image with some Gold and Red Mirror card.I then took a selection of Adirondak Inks, and covered a piece of White card stock,initially with Sunshine Yellow and Orange Sunset.I then embossed the card through the Cuttlebug using the Fauna Embossing Folder.And then went over the image again, this time using Red Pepper and Water Mellon Ink.Highlighting the raised sections with Glossy Accents.Once it was dry I matt and layered the image with Gold and Red Mirror card.I also came across this piece of flame backing paper which I cut to size, matted in Goldand added it to my pre made Easel card.I then added the embossed image to the front of the card,overlaying the decoupage image...I printed my sentiment in a "flame font" from my PC.I really wanted to cut it out in a Chilli shape. The only thing I could find on My Cricut that looked similar was a cut from the Pumpkin Carving cartridge. So I loaded it onto my Gypsy and positioned the image on the cutting mat so that the sentiment would be included in the cut. I stretched the Pumpkin shape to look a little more like a Chilli, this has got to be one of the greatest features of the Gypsy, the fact that you can manipulate any image above and beyond it's intended use!!Once cut out, I applied some Red Pepper and Lettuce Adirondak ink to the imagebefore covering it entirely with Glossy Accents and leaving it to dry overnight.Once it was dry I added it to the card to finish it off!!!And there you go, one very HOT looking card!!! Happy Birthday Paul.
Thanks for checking us out, see you soon.
Andy.