Showing posts with label Templates. Show all posts

Wednesday, 21 October 2015

Let it snow Tri Fold....

Hi folks.. Another little card fold technique for you today as part of my Creative Expressions Design Team project..

It's been made from one piece of A3 card stock, just scored to make the panels,

the main thing about it being that it folds flat'ish to go into a standard envelope...
So, if you fancy giving it or something similar a go, here are the measurements..

Take an A3 piece of card stock and place it landscape on your score board, score at 4" (10.16cm), 6 1/8" (15.5575cm), 10 3/8" (26.3525cm).

As the A3 card stock is longer than my board,

to do the last score flip the card stock left to right and score at 4" (10.16cm).

And then fold and crease along the score lines.

Using this fold gives you two different options on how you want the finished project to look, i.e., having the panels facing inwards or outwards...

Add some decorative papers of your choice,

folding the card just to make sure your matt and layering hasn't stopped the card from folding flat.

And then start decorating as you see fit...

Thanks for checking us out, see you soon.
Andy.

Wednesday, 16 September 2015

Concertina Paper Christmas Trees....

Hi folks.... Back to a Christmas themed project for this week’s Creative Expressions Design Team post..
As I've stated in my previous September posts, this Month’s Design Team goodies were anything but Christmas! But, I'm so in that zone at the moment as I want to get as much done before December as I can! and not leave everything to the last minute as per!!!

So, although the Papers I was sent were Phill Martins Butterflies and Dragonflies I put them to good use to make these Concertina Christmas Trees.. This is a great little project to make use of oddments of paper that we all have laying around, or those pages from paper stacks that you have every intention of putting to good use, one day!!
So, if you fancy giving these a go here's a little step by step guide for you...
I'm sure these can be made in various sizes, the ones I have made have 9 layers.. Personally I don't think I can make the top layer any smaller as it’s quite fiddly for my chunky hands to manipulate into shape! However, I probably would be quite happy to make the bases bigger, given the time!!

I started off with the largest Rosette. Cutting three strips from my 8" paper pad at 2 1/2". (3 @ 8" x 2 1/2") If you were using a 12" piece of paper then you would need 2 strips at 2 1/2". Basically, whatever you are using the ultimate goal seems to be to make the length of the paper 24". 2 x 12", 3 x 8", 4 x 6" etc., etc...

Using a score board and a ball tool,

score each strip at 1/2"

and concertina folds into each piece. In hindsight, I might score these increments first and then cut the paper to size as I found it a little difficult to keep the paper strips straight as you score 15 times, especially when you come onto the smaller strips to make the top layers of the tree.. Just an observation!!!

Once you've scored each piece, join them together. I used a Hot Glue Gun for speed.

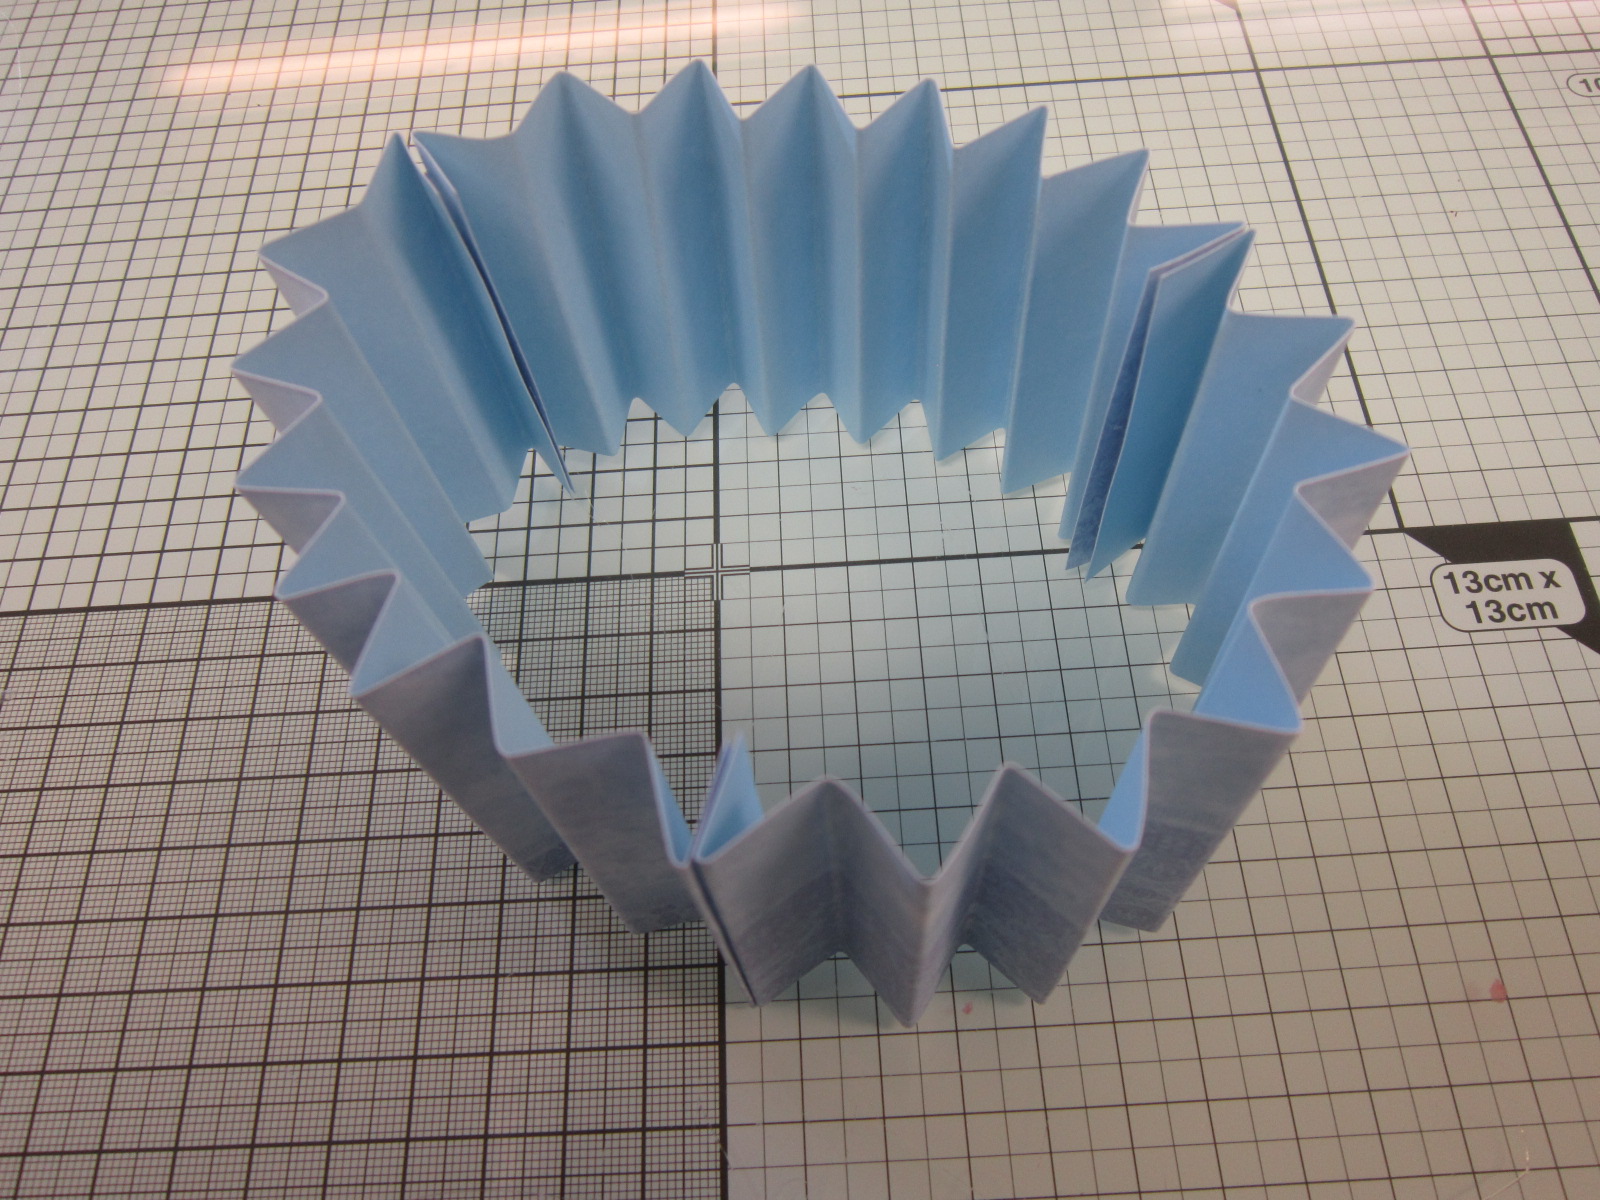
And then join each end together.. And Yes, you have a Cup Cake wrapper!!!!

Whilst the Hot Glue is setting, go ahead and punch yourself some Circles. These will be used to hold the Rosette in shape, doesn't have to be Circles, an oddment of card which coordinates with your project will be just as useful!
The next stage can be a little tricky,

basically you're going to take the shape from this

to this by simply folding the Rosette flat.. It will probably pop itself back up to the original shape (which can be a nightmare when you're trying to take a picture of the process!!!!)
But persevere and it will do as it's told eventually..

Squeeze the Rosette together so that there is just a small hole in the centre,

add Hot Glue to the Circle you previously punched out and stick it to the centre of the Rosette, first on one side,

and then t'other... Adding the punched Circle will give the Rosette strength and also prevent it from popping open.. And yes, an extra pair of hand would be great at this stage!!

So, that's the first layer done. All you have to do is repeat the process with your other pieces of paper.. All I have done is go down in 1/4" increments for each layer.. I.E, Layer 2 will be 3 x 8" strips which are 2 1/4" wide, layer 3 is 3 x 8" strips which are 2" wide, and so on and so on..
When it comes to the top layer (layer 9) I think from now on I would only make it 16" in length as opposed to 24" I.E 2 x 8" cut at 1/2". For me, it was just too tricky to get all of that paper to work easily together (although I obviously did!)

The Green Tree is the one that has been made with only 2 strips and in fact I think it looks moderately better?!)

Once you have made the Rosettes you can then stack them on top of each other trying to keep them straight otherwise you end up with a wonky tree! Which, I know mine is but it's not bad for my first attempt!

I mounted the base of the tree onto a loose lid box, which I could put a little gift in or a few Christmas Sweets,

decorating the top of the tree with a Stick Pin and Beads from Creative Expressions...

And there you go, a veritable forest!!
Thanks for checking us out, see you soon.
Andy.


Wednesday, 5 August 2015

12 Days of Christmas Advent Boxes...

... Hi Folks.. First things first... It's "Happy Birthday" to Pinnacles most precious members of staff.. I know you all come to visit her primarily, and the goodies in the shop come a very close second!!

Can you believe Holly turns Four Today!! Every day she has been with us has been a true blessing, and I can't imagine a day without her by my side, mostly because she never leaves it!! Everywhere I go, she goes too. I'm sure she sleeps with one eye open just in case!! Anyway, Happy Birthday Baby Girl xxxxx
Right, on with today’s Creative Expressions Design Team project...

A new Month means new goodies have been sent for me to "play" with... and here's what I have come up with for today.

I have used some of the sheets from the new 8"x8" Paper Pad designed by Jonathan Lockwood..

Cutting all of the squares to size and then Matt and Layering them with some Mirror card...
I knew where I was intending on going with this project, namely an Advent Calendar, but I really think I was going around it the loooooooong way, very long to be honest! I was intending on making each box individually!! Which would have probably taken my right up to Christmas to finish..

Step in the voice of reason by way of Toni who pointed out to me the Boxes I made last year using the WeRMemory Keepers Envelope Punch Board...
And before you knew it I was a churning them out, because they really do take no time at all to do..
Here's a step by step guide if you wish to make some of your own..

Take a piece of light weight card or paper and cut it 8 1/2" x 6"

With a score board, place the card width ways (8 1/2" way) and score at 2", 4", 6" & 8"

turn the card around (6" way) and score at 1", 1 1/2", 2" & 4"

Fold all of your score lines one way

and then the other, the important thing being that all of your folds should be "Mountain" folds

apart from the score line at 1 1/2" which should be a "Valley" fold.

Next, cut off the very small tab on the bottom of the piece of card,

and snip between each of the squares next to it. This will create the base of the base of the box.

To allow the neck of the box to "concertina", take your Envelope Punch Board and fold over the small tab at one end of the piece of card, place it under the punch element of the board. You should notice that the "little Blue foot" just rests on the 1" scored line, or you could just place the card at the 1 1/2" marker at the back of the board.

And punch through.

This will create a little "oval" shape which will allow the neck of the box to spring up and down.

Fold the next score line over and repeat,

and again at the next score line,

and once more.

For the last section, there is nothing to fold over, so just place under the punch element and punch through.

Now all's left to do is apply some tape to the little flap at the side to secure the back

and then fold in the bottom flaps, taping them as you go to secure the bottom.

This is how the neck of the box should be, it's important that it’s a "Valley" fold for this reason...
Now for the lid.

Cut a piece of card stock 4 1/16"th x 4 1/16"th

score the piece of card at 1" on all sides.

Snip in on each of the squared edges

and then mitre the corners...

Fold all of the score lines and then add tape to the coloured side of the little triangular area and stick them together..

And there you go!!
Personally, when making these I tend to use a random patterned card stock, or at least one that doesn't matter which way is the right way up.

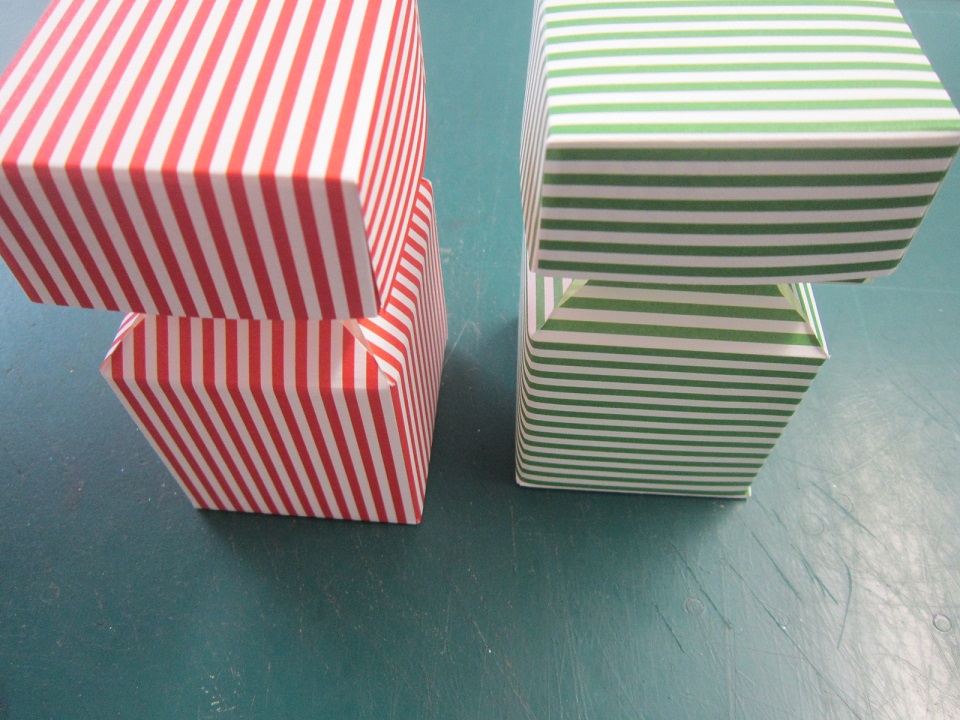
However, if you do choose to use one with a specific design on it, such as stripes, to get them the right way up, cut the card with the 8 1/2" edge as you wish the box to appear.. I.E as shown here with the RED paper, not the Green...

Cut the way the Red is, the stripes of the box will be vertical as opposed to the Horizontal Green ones, depends what you're after really!

That said, whatever way you cut the lid, you will always get two sides going the right way, and two going the wrong way!! Nature of the beast I'm afraid...

Thanks for checking us out, see you soon.
Andy..

Hoogie Board
WeRMemory Keepers Envelope Punch Board