Showing posts with label Pan Pastels. Show all posts

Thursday, 30 October 2014

Pretty in.... erm... Blue....

Although I am working on a Pink version...
Hi folks..... Another sample for Saturday's Demonstration Day here at Pinnacles...

From other bits and bobs that I've posted recently, you may have guessed my colour theme this year is Blue, although not exclusively!
I've teamed this one up with some of the Pearlescent Pan Pastels...

I hope you can notice the holly stamp is stamped both in the negative AND the positive?

I say negative first because in all sense and purpose, it is a negative stamp, but to get a positive out of it too is just an added bonus..

I'll be sharing with you how to do this on Saturday....
Thanks for checking us out, see you soon.
Andy.

Sue Wilson/Creative Expressions - CED3008 Classic Poinsettia
Do Not Open Tag - XCU 503929
Sizzix - Holiday Greens (658759)
JustRite Holly Swirl Cling Background Stamp (02068)
Pearlescent Pan Pastel - Blue
White Coarse Pearl Medium for Pan Pastels

Tuesday, 28 October 2014

Across the miles....

Hi folks.. Just getting a few bits and pieces together for Saturday's (01/11/14) "Festive Inspiration/Finishing Touches" Demonstration Day here at Pinnacles....
It's going to be a mixture of ideas for your festive table, gift giving as well as some quick and simple card making ideas.... including these little lovelies....

If you have family or friends who live abroad I guess you'll be hoping to get those ones out of the way and in the post in plenty of time, if nothing else so you can keep the cost down and grab the 2nd class post?!

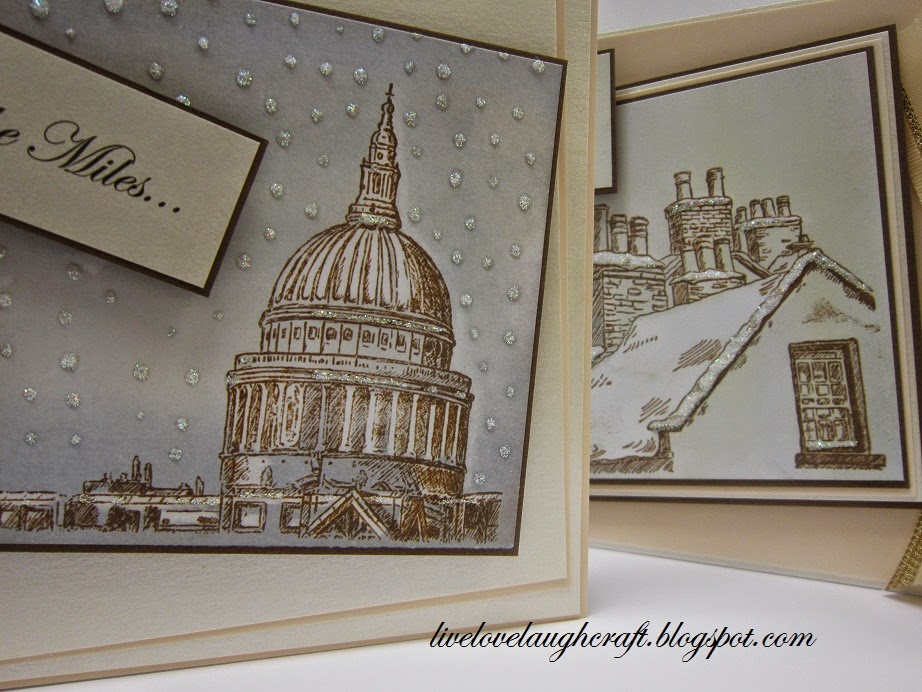
This first one ticks all the boxes for me.. I guess it maybe St Pauls Cathedral and therefore London? but could pass for several different cities around the world?? Either way, I love it! I've teamed it up with some Pan Pastels which have created a "dirty" snow filled sky!! And as Pan Pastels erase out, I've been able to create some light and shade on the building...

Not the easiest thing to see on this one, bit it too has been Pan Pastelled (I know, not a word!) within an inch of its life to create a warming rooftop project...
So, if you're around on the 01st November, pop in and see us and you're likely to see these projects in action...
Thanks for checking us out.
See you soon.
Andy.

Sheena Douglas A little bit festive stamp - City Christmas
Ranger Archival Ink - Coffee
Pan Pastels
Creative EXpressions Twinkles.


Saturday, 18 October 2014

Falling Snowflakes....

Hi folks, from a positively "Tropical" Essex!!!
Just been out taking Hollister for her morning stroll, and to be honest, you'd think it was the middle of June out there, not the middle of October!!
Enjoy it while it lasts I say...

Something to cool us down with todays offering though...

Christmas is on it's way folks....

Thanks for checking us out.
See you soon.
Andy.

Sentimentally Yours Stamp Set - Festive Borders
Do Not Open Tag Die - XCU503929
White Coarse Pearl Medium for Pan Pastels
Black Course Pearl Medium for Pan Pastels
JustRite Holly Swirl Cling Background Stamp (02068)
Ranger Archival Ink - Cornflower, Jet Black
Ranger Stickles - Crystal

Thursday, 8 May 2014

Moon Walk....

This one goes out to all of those hardy folk who will be doing the Moon Walk in London (and other places) this weekend in awareness of Breast Cancer...

Good Luck everyone...

Thursday, 30 January 2014

Somthing a little bit....

... more colourful for today's "Pan's" project, seeing as it's sooo dreary outside.

Let's hope it brightens all of our day's!?

Thanks for checking us out.
See you soon.
Andy.

Tuesday, 28 January 2014

Pan Pastelling....

I know, that's not a word... But it works for me...
Just getting some prep in for Saturday's Pan Pastel workshop...

It's a little bit different from what I normal would do with the Pan's, but a change is as good as a rest eh?... and it really does get the most out of them...
More play time this week.
Thanks for checking us out..
See you soon.
Andy.

Friday, 17 January 2014

Garden Butterfly......

Hi folks...
With any new crafting "toy" I do like to try and get as much out of it as I possibly can!!
So, today, we have a layered Butterfly project..

It does have a little bit of depth to it! Well, quite a lot actually,

but I do love me a little bit of dimension on my projects!!
To start off with, I took two pieces of card stock cut to the same size..

Mine are different colours as I had a specific idea I wanted to try, but in the end it didn't work out as I wanted, so in hindsight, two pieces of card to same colour would have worked!
Lay both pieces of card onto your cutting plate with your die (Tonic Studios Indulgence Semi Circle - 470e Butterfly Lattice) and pass through your machine.

The top layer

should cut as normal

and the second layer should leave an impression in the card,

which you should then be able to line the die up again

and cut all the way through.

This should leave you with two pieces of card, die cut in exactly the same place, so that when you line them up again they match..

You could even off set them to create a nice drop shadow...

With the lower piece of card, I stamped all over it with a VersaMark Ink pad and them applied some Metallic Pan Pastels (Silver, Light Gold & Pewter) and then put it to one side.

Taking the front layer of the card, a Ruler and a Craft Knife,

cut away any of the Flower and Leaf shapes.

Again, apply some VersaMark Ink

and some more Metallic Pans. (Copper, Bronze & Rich Gold).

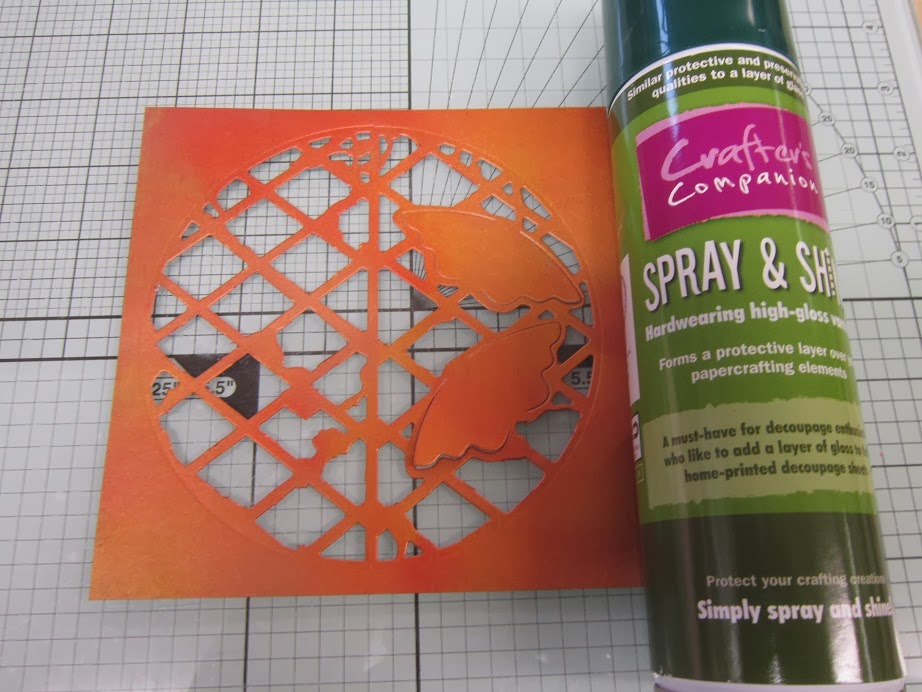
Don't forget to seal your Pans with Spray and Shine...

Next, lay the top layer over the bottom one

and you'll see the Flowers and Leave show through..

I used foam pads,

just to add a little more dimension.
For the Butterflies, I cut and embossed the Die again,

and then hand cut the Butterflies out of the card.

Covered in Versamark,

Added some Pans and sprayed with Spray and Shine.

Once dry, I went over the embossed area (and some of the non embossed area!) with Black StazOn to highlight the detail on the wings...

before attaching them to the project.

Finishing off with a backing of some Rainbow effect card stock and some complementary Vellum...

Nice bright card for a change with some very effective dimension...!
Thanks for checking us out, see you soon.
Andy.

Friday, 8 November 2013

Deck the Halls.....

... Hi folks... I think I have finally settled on a design for my own personal Christmas Cards this year!

It has a little bit of everything on it, Pan Pastels, Embossing and Die Cutting. So, it should keep my busy over the coming weeks!
Off to start churning them out, or variations thereof!!
Thanks for checking us out.
See you soon.
Andy.
Metallic Pan Pastels: Bronze, Copper, Light Gold, Rich Gold, Silver.
Cheery Lynn Die: B148 Holly Lace Flourish
XCut Embossing Folder: Delicate Flourishes
Deck the Halls: Tonic Studios Die Set Christmas Sentiments One

Sunday, 11 August 2013

Happy Birthday

Hi Folks.. Today see's the Birthday of a very special person here at Pinnacles... Irene (Reene)..
Many of you will know her when you visit over Club Members Weekend, her help and crafting knowledge is invaluable as is her love and friendship...

So, here is the card I made for her..
I'm sure we can all relate to how difficult it can be to make cards for fellow crafters?! I think we all have the underlying thought that they are metaphorically picking it to bits and wondering "just how" you put the card together..
Well, for this one I used my trusty Pan Pastels and Stampscape stamps. The idea behind it has come from a couple of my favourite films.. If anyone else has seen "What Dreams May Come" with Robin Williams, then you may get the reference to the Red Boat in the water, the other film being "Schindler's List" ... A film shot entirely in Black and White with the only splash of colour being a young girl in a Red Coat. Weird how these things stand out and stick in your mind, but I guess they were designed to do just that!
Happy Birthday Reene, Have a great Day.. xxxx

Friday, 26 April 2013

And now, for something a little different...


Hi Folks.. As much as I have enjoyed playing with the Pan Pastels with my StampScape stamps, I fancied a little change for this project... And boy, am I pleased with the result... And to be honest, not that difficult to achieve... I'll be sharing this one with you at the Pan's Demo Tomorrow....
Oh, and his little Cheetah friend.. Have a great Friday all. Thanks for checking us out, see you soon. Andy.

Memento: Tuxedo Black
Pan Pastels: 280.3 Orange Shade, 250.8 Dairylide Yellow Tint, 220.5 Hansa Yellow, 740.3 Burnt Sienna Shade, 436.8 Magenta Tint
Spellbinder Die: Floral Trim (S2-005)

Tuesday, 23 April 2013

and, I'm back....


Hi folks.. Well, it's been a while since my last post!! Truth is, I took myself off on a last minute, unplanned little break to the Canary Islands... and didn't have time before I flew off to schedule any posts!! But I'm back now and its heads down making samples for our Pan Pastels Demo Day on Saturday... It's come round quickly hasn't it!?
Today's project I sort of had half finished before I went! Well, I had done the Pan Pastelling and Stamping!
It never ceases to amaze me how much happens in Pinnacles in a week.. Being away for only a short few days and I come back to boxes and boxes of new goodies that, initially I need to find space for on our shelves, with the odd few (more than the odd few if truth be told) finding their way onto my desk for me to "play" with!! So, with inspiration from a new Embossing Folder I was able to finish this little project off... It's kinda quirky in style for me, but it has the look and feel off brickwork or maybe a window, and with the House image in the middle I think it would make a pretty neat New Home or Moving House card?? Anyway, there's lots of "technique" involved in the Pan Pastelling and Stamping part of this project which I will be sharing with those who are able to pop along on Saturday... All I can say is "bring a pen and lots of paper" for taking notes...
Thanks for checking us out and see you soon..
Andy.

Memento: Tuxedo Black
Pan Pastels: 280.3 Orange Shade, 680.3 Bright Yellow Green Shade
Stamps: StampScapes, 147F Lakside Cabin (Nature Set #6)
Die: Spellbinders A2 Filigree (S5-177)
Embossing: 6"x6" Lattice EF6-LATT

Monday, 15 April 2013

Pretty in Pink'ish!!!


Hi Guys... A little play on a project I shared with you a few posts back...
This one, a little busier and bolder in colour. But all the same, no less effective.... It's also made good use of quite a small Stamp to build up the scene..
"Still feeling the love for my Stampscape stamps"......
Thanks for checking us out.. See you soon. Andy.

Pan Pastels:
740.3 Burnt Sienna Shade
340.1 Permanent Red Extra Dark
Memento: Rhubard Stalk
Stamps: Stampscape - 019G Cumulus Clouds Large, Small Tree Scape (Nature Set #1)

Friday, 12 April 2013

Marmite.. Love it or not!!!


Hi Folks.. Strange title to today's post I grant you. But I think that today’s project is just like that!
It's none to descript in it's make up and I think that's because it's "all about the technique" of getting the effects with the Pan Pastels and Stamps.. I guess what I'm really trying to say is that it's one that you need to see in the flesh as the picture doesn't really do it justice.. So, next time you're in the shop, have a gander...
Oh, and BTW.. Marmite... I'm a fan!! Thanks for checking us out. See you soon. Andy.

Pan Pastels:
470.8 Violet Tint
430.8 Magenta Tint
470.5 Violet
520.1 Ultra Blue Exte Dark
800.5 Black
Memento: Tuxedo Black
Stamps: StampScapes - 19F Pine (Nature Set #6) Fir & Double Pine (Nature Set #1)

Wednesday, 10 April 2013

Clean and Simple....


Hi Folks. A nice clean and simple one for you today.. Back in February when we had our first lessons using the Pan's, I ended up with a (BIG) pile of semi completed samples.. So, now I'm trying to make them into actual projects!!
This one uses the original "Lakeside Cove" set of stamps I had to play with, although for those who have seen my desk recently know that I now have a lot more sets to keep me occupied!!
I have teamed it up with the Spellbinders D-Lite Die, Flourish Trim (S2-005). Although it is one of Spellbinders smaller dies, joining it together has made it suitable for using on a much bigger project. The card is actually an 8" x 8" matt!!
There we go, another "par example" for the 27th's Pan's Demo.
Thanks for checking us out, see you soon.
Andy.

Monday, 8 April 2013

A little bit of Vintage...


Hi folks.. Still totes obsessed with my Pan Pastels. But this time I've teamed them up with an IndigoBlu Stamp instead of my normal StampScapes! Don't fret, they'll be back making an appearance very soon...
This particular stamped image isn't one I'd initially go for, just because it's not really my style! Do I have a style?? I guess I do! That said, I thought she would go particularly well with the vintage style of the Spellbinders Elegant Labels Four.. Teamed with a selection of vintage toned Pans, I think this one hit's the vintage nail right on the head?? Thanks for checking us out, see you soon. Andy.
Stamp: IndigoBlu - Elizabeth Bennet (ELIZ)
Pan Pastels: 280.3 Orange Shade, 220.5 Hansa Yellow, 340.1 Permanent Red Ex Dark
Memento Ink - Toffee Crunch
Dies: Spellbinders Elegant Labels Four (S6-005), Spellbinders Grand Labels Four (LF190), Craftables CR1244 Swirls & Leaves 2, Craftables Swirls & Leaves 3, Crafts Too A4 Embossing Folder CTA401,