Wednesday, 16 September 2015

Concertina Paper Christmas Trees....

Hi folks.... Back to a Christmas themed project for this week’s Creative Expressions Design Team post..
As I've stated in my previous September posts, this Month’s Design Team goodies were anything but Christmas! But, I'm so in that zone at the moment as I want to get as much done before December as I can! and not leave everything to the last minute as per!!!

So, although the Papers I was sent were Phill Martins Butterflies and Dragonflies I put them to good use to make these Concertina Christmas Trees.. This is a great little project to make use of oddments of paper that we all have laying around, or those pages from paper stacks that you have every intention of putting to good use, one day!!
So, if you fancy giving these a go here's a little step by step guide for you...
I'm sure these can be made in various sizes, the ones I have made have 9 layers.. Personally I don't think I can make the top layer any smaller as it’s quite fiddly for my chunky hands to manipulate into shape! However, I probably would be quite happy to make the bases bigger, given the time!!

I started off with the largest Rosette. Cutting three strips from my 8" paper pad at 2 1/2". (3 @ 8" x 2 1/2") If you were using a 12" piece of paper then you would need 2 strips at 2 1/2". Basically, whatever you are using the ultimate goal seems to be to make the length of the paper 24". 2 x 12", 3 x 8", 4 x 6" etc., etc...

Using a score board and a ball tool,

score each strip at 1/2"

and concertina folds into each piece. In hindsight, I might score these increments first and then cut the paper to size as I found it a little difficult to keep the paper strips straight as you score 15 times, especially when you come onto the smaller strips to make the top layers of the tree.. Just an observation!!!

Once you've scored each piece, join them together. I used a Hot Glue Gun for speed.
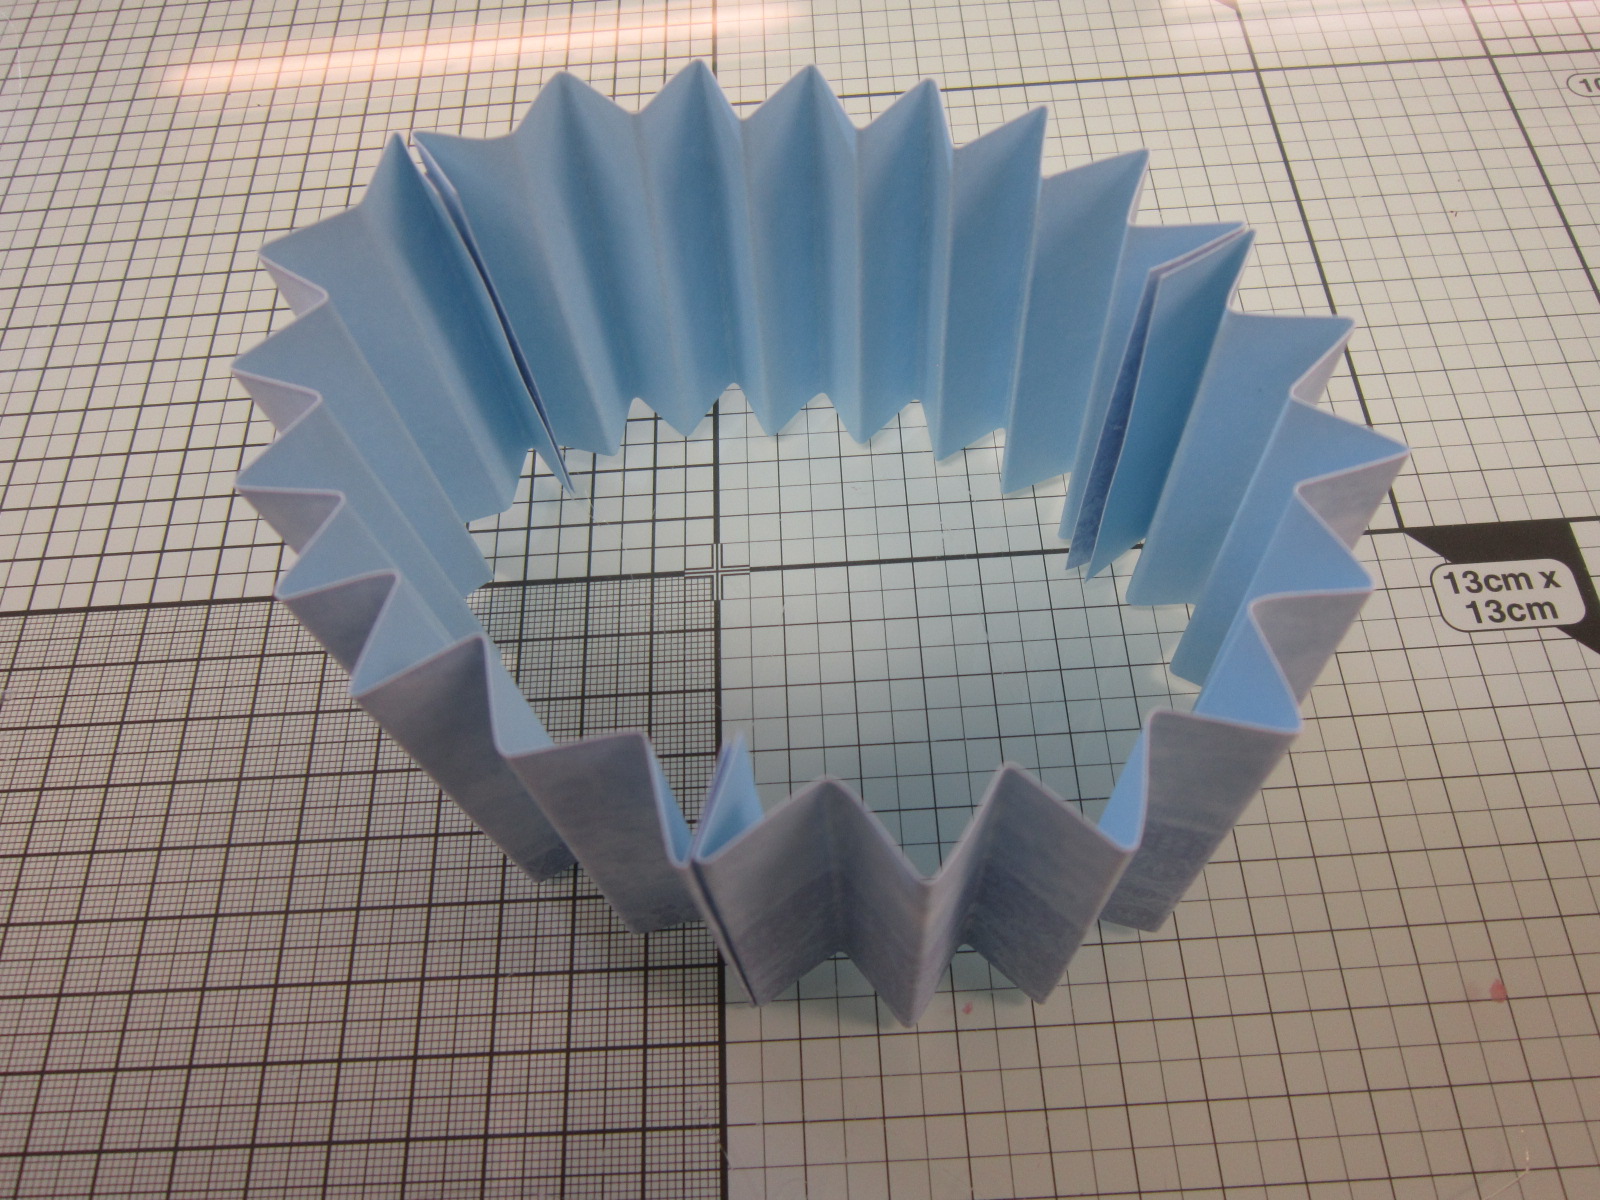
And then join each end together.. And Yes, you have a Cup Cake wrapper!!!!

Whilst the Hot Glue is setting, go ahead and punch yourself some Circles. These will be used to hold the Rosette in shape, doesn't have to be Circles, an oddment of card which coordinates with your project will be just as useful!
The next stage can be a little tricky,

basically you're going to take the shape from this

to this by simply folding the Rosette flat.. It will probably pop itself back up to the original shape (which can be a nightmare when you're trying to take a picture of the process!!!!)
But persevere and it will do as it's told eventually..

Squeeze the Rosette together so that there is just a small hole in the centre,

add Hot Glue to the Circle you previously punched out and stick it to the centre of the Rosette, first on one side,

and then t'other... Adding the punched Circle will give the Rosette strength and also prevent it from popping open.. And yes, an extra pair of hand would be great at this stage!!

So, that's the first layer done. All you have to do is repeat the process with your other pieces of paper.. All I have done is go down in 1/4" increments for each layer.. I.E, Layer 2 will be 3 x 8" strips which are 2 1/4" wide, layer 3 is 3 x 8" strips which are 2" wide, and so on and so on..
When it comes to the top layer (layer 9) I think from now on I would only make it 16" in length as opposed to 24" I.E 2 x 8" cut at 1/2". For me, it was just too tricky to get all of that paper to work easily together (although I obviously did!)

The Green Tree is the one that has been made with only 2 strips and in fact I think it looks moderately better?!)

Once you have made the Rosettes you can then stack them on top of each other trying to keep them straight otherwise you end up with a wonky tree! Which, I know mine is but it's not bad for my first attempt!

I mounted the base of the tree onto a loose lid box, which I could put a little gift in or a few Christmas Sweets,

decorating the top of the tree with a Stick Pin and Beads from Creative Expressions...

And there you go, a veritable forest!!
Thanks for checking us out, see you soon.
Andy.


Wednesday, 9 September 2015

Alcohol Ink Background...

Hi folks.. Creative Expressions Design Team time again today...
As I said in my last post, this Month’s goodies were anything but Christmassy! And although I made last week’s project Christmas because I was in that mode, this weeks has reverted back to everyday use. And more specifically something I can use for a Birthday..
September che Pinnacles is defo a Birthday Month! At the weekend we celebrated the shops 12th Birthday with a little Christmas Demonstration Day, (and I'd just like to thank everyone who was able to pop along, and I hope you enjoyed the inspiration!?) Next week is my Dads Birthday, followed 3 days later by my Mums, then it's mine and finally at the end of the Month we have my Nans!! You wait all year and then they all come at once!!!
Anyhoo... Here's todays sample, I've decided that it’s going to be the one I send my Dad for his Birthday...

And if you fancy giving this fun technique a go, here's a little step by step on how it was achieved...

To start off with I took three colours of Alcohol Ink

Randomly applied them to my Craft Mat

and then added some Alcohol Blending Solution, the final results of how light or dark the colours will be will depend on how much of the solution you add, as it not only reconstitutes the Alcohol Inks, but will also lightens them if you use a little more.

To allow the colours to blend together I tip my Craft Mat from side to side, trying to stay within the centre of the Mat so as not to waste too much of the Ink.

Next, place a piece of Acetate into the Ink

and then remove it and place to one side to dry. As the Inks and the Blending Solution are solvent based, this should only take a minute or two to dry as the Alcohol evaporates.

As effective as this looks on the Acetate, it's not until it is backed onto a plain piece of White card stock that the true effect comes thru..
Now the only decision you need to take is what to do with it.

For this particular project I decided to stamp one of the Silhouette images I was sent. Wasn't quite sure whether to have the Red at the top or the bottom as it seemed to work both ways, but finally went with having it at the bottom.

A little bit of Mat and Layering

and there you have it!!

Using different coloured Inks will give you a choice of different backgrounds to add your Stamps or Die Cut images to..

Using more Brown/Yellow tones has seemed to work wonders as a Desert background for this Die Cut,

or actually any colour combinations seems to work!!
As a result of Saturday’s demo, I now have a nice little pile of backgrounds to work with.. Just need to wait for the right image to add to the front of them though!!
Thanks for checking us out, see you soon.
Andy...

Wednesday, 2 September 2015

Side Stepper Poinsettia....

Hi folks.. This Month’s Creative Expressions Design Team goodies have arrived!! and some of you may be pleased to hear that they have nothing to do with Christmas!!
That said however, I am in complete Christmas mode at the moment so I have carried on utilising some of the goodies in this way..

Taking some of the Phill Martin Butterfly's and Dragonfly's Papers and using them as backing papers for this "Mint" themed Side Stepper card.

Stepper Cards of all variations; side, centre, circle seem to be all the rage at the moment, and I'm sure you are aware that there are now Dies available to cut them out for you? But, if you don't want to go to the expense of the Die, you can quite easily create a Side Stepper Card with stuff you may already have in your crafting stash..
Here's a step by step guide on how I made mine..

Start off with an A4 piece of card stock and cut the length down to 11" (28cm)

Then, using a score board, score a line down the length of the card stock at 4.25" (10cm)

Turn the card landscape and score to the centre line just created in the above step at 1.25" (3cm), 2.5" (6cm), 4" (10cm) & 8.25" (21cm).
Next, score a line at 5.5" (14cm), but this time score all the way through the centre score line...

This is all the scoring you will need to do,

now all needs to be done is to cut along the long centre score line with a craft knife and a ruler between the 1.25" (3cm) & the 8.25" (21cm) score lines...

Then all you need to do is fold the score lines so they concertina to produce your Side Stepper...

I've decorated this particular one with some of the Papers from Phill Martins Butterfly's and Dragonfly's Paper Pad which, are as far from a Christmas Collection of papers as you can get, but this soft Mint colour with a slight "bubble" print looks quick wintery! (if you look at it in the flesh that is!)

I used the reverse side of the papers, (which are the same colours but with no pattern, so they coordinate with your projects very well), to cut out my Poinsettias and Holly Sprays.

Adding them to the Stepper card to which I had stamped my Verse onto..

I'll be sharing this project at our Christmas demo day here at Pinnacles on Saturday (05th September 10am - 3pm). So, if you'd like to see it, and get some other ideas for your Christmas projects this year, feel free to pop along....
Thanks for checking us out, see you soon.
Andy.

Wednesday, 26 August 2015

12 Days of Christmas Mini Album...

Hi folks, as promised in last week’s Creative Expressions Design Team post

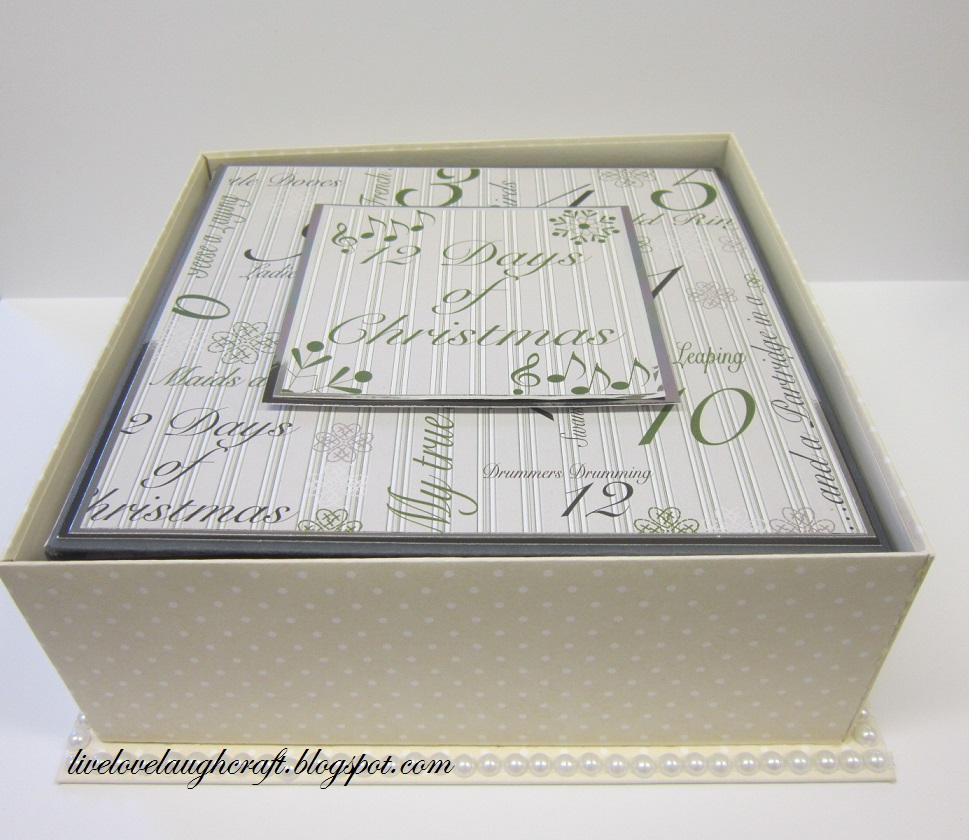
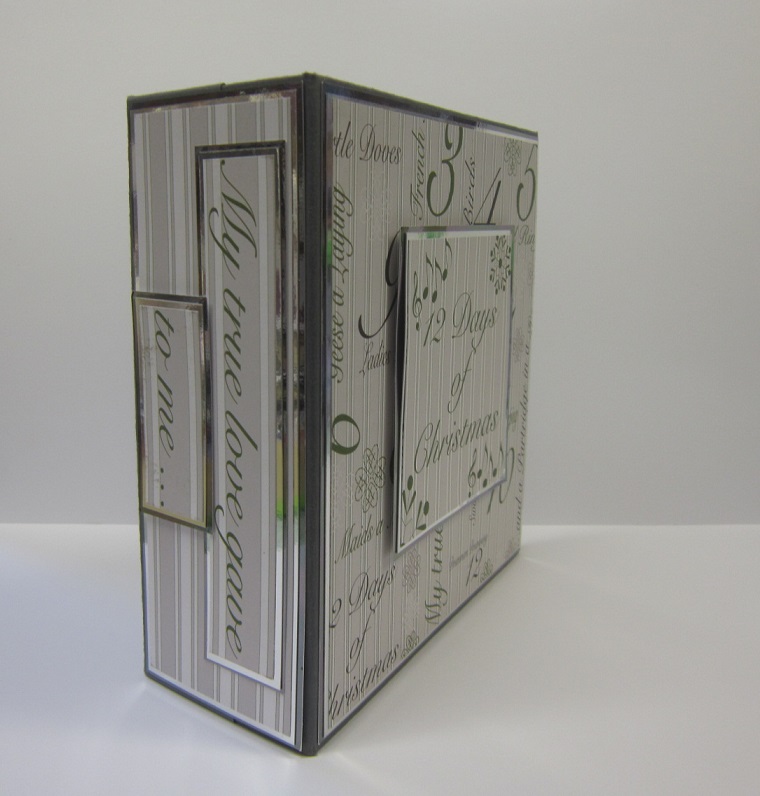
here's the completed Mini Album to go inside the 12 Days of Christmas box..

It nestles quite comfortably inside, and I have learnt from my "many" mistakes to make it fit!!!

The book itself has been made from scratch using Grey Board covered in Grey coloured card stock and

decorated using the 12 Days of Christmas Paper Pad designed by John Lockwood for Creative Expression..
Again, I won’t bore you with measurements at the moment as I have a lesson planned on the 10th October to make something similar, but hopefully I will get around to it eventually!!

Now all's to do is wait for Chrimbo 2015 to come around to fill it with all of this years snaps....
Thanks for checking us out, see you soon
Andy.

Wednesday, 19 August 2015

12 Days Of Christmas Box....

Hi folks... A little bit of a change for today’s Creative Expressions Design Team project..

If you've been in the shop recently you'll know I'm somewhat obsessed with boxes at the moment. Not for any particular reason, I just enjoy their construction, keeps to old grey matter ticking over don't you know!...

So, that's what I've decided to do with some of this Month’s Design Team products.

I've used John Lockwood's 12 Days of Christmas Paper Pad again,

it’s a Pad that just seems to keep on giving and giving cos there is sooo much in it!

Initially, chopping up

and matt and layering some of the images onto Red Mirror card and then putting them to one side whilst I made the box...
Now, I could bore you with facts and figures, measurements galore (in both imperial and metric of course!), but on this occasion I won't.

Needless to say you will need several sheets of Grey Board

even more sheets of your chosen paper to cover them

Copious amounts of Creative Expressions Cosmic Shimmer Glue

and a little time and patience as you see the box come together.

Or, you could just join me for my box making lesson (subject to availability) on the 03rd of October where we'll be making something very similar!

Many of my "oversized" projects have no practical use what so ever! Mainly, they display a technique!

This box however is an exception to the rule.. I've made it to house a Mini Album... And I'll be sharing that with you next time...
Thanks for checking us out.
See you soon.
Andy.