Tuesday, 15 May 2012

1,2,3 Recipe Challenge...

Hi Blogland.. It's a Cuttlebug Blog Spot Challenge Day today... And we have a 1,2,3 recipe challenge for you.. Use 1 Button, 2 Ribbons and 3 papers (one of which should be embossed). I'm sure, like a sketch, that the recipe is open to interpretation?! Well, I hope it is!...
Here is my Design Team submission.. I really struggled with this one; I'm not really one for adding 6 elements to my projects! Unlike many of you, I guess I just cannot multi task! But hey ho, I eventually got it done. So, here's a quick step by step...
I started off by cutting out the 3 smallest shapes using the Spellbinders Die Wonky Rectangles (S4-306) onto some Blue Vellum (Paper #1)
and then threaded some cord (Ribbon #1) through each shape to form my sails...
These were attached to my nautical striped patterned paper (paper #2) using Pinflair Glue.
There really wasn't any other way of attaching the Vellum and you can see it soaking through, nothing more I could do than to cover it up with some nautical Peel Off's..
I then added my second piece of Ribbon to the side of the card.
Next, I stamped my image onto some White card stock (Paper #3)
and cut it out using the largest shape from the Spellbinders Wonky Rectangles set,
whilst the card stock was still within the Die I inked around the image.
When the Die is removed it creates a really nice faux embossed edge (paper #3 Embossed).
As much as I liked the effect, it was too White against my chosen background, so I inked it a little more to soften it.
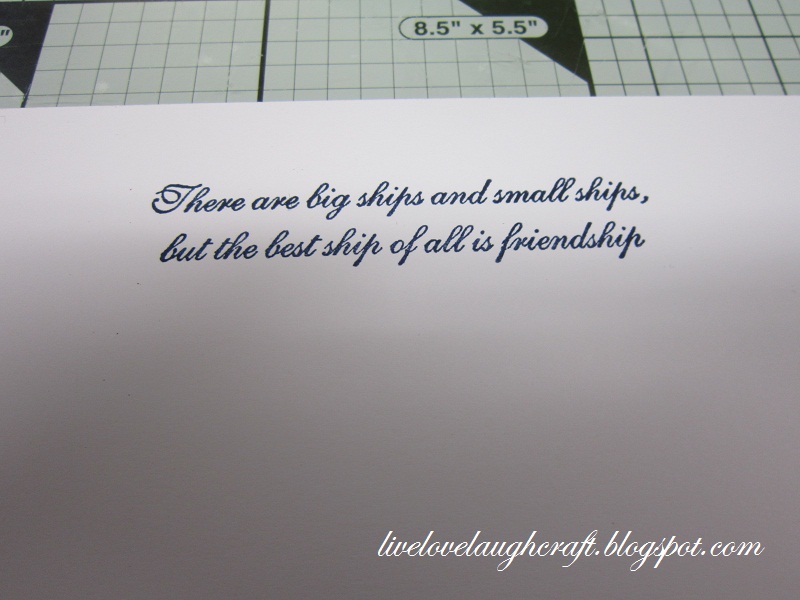
Next, I stamped my sentiment
and again softened the "Whiteness" with my ink, before attaching the 2 stamped images to my base card.
Adding the last "ingredient" of the recipe, a Button.....
to complete the project. Don't forget to hop on over to the Cuttlebug Blog Spot to check out what my fellow Design Team Members have been creating with this week’s theme.. Thanks for checking us out. See you soon. Andy.

Tuesday, 8 May 2012

Mica Powder Masking....

Hi Gang, how's it going? I hope you all enjoyed your Bank Holiday Weekend?, despite the weather!... Never mind if not, there'll be another one along very soon.. I've been asked by a couple of people if I could go over the technique I used on this project.. It's one of the ones I prepared for our Demo day a week or so ago now.. I was in a bit of a rush to get those cards made, that I didn't take my usual step by step pictures, so my posts may have seemed slightly different from the norm.. But, with plenty of time to "play" over the weekend,
I can now show a similar project using the same technique in full.. So, grab a cuppa, and let’s begin shall we?!!
To start off with, I cut a shape out using the Memory Box Die Catalina Wreath (98189) onto a medium weight card stock.
After spraying a piece of Acetate with some Stick and Stay Spray, I placed my die cut shape into the centre; this will form your mask..
Next, take your chosen Cosmic Shimmer Mica Powder and, with a Paint Brush, cover all of the exposed, sticky Acetate.
Next, peel back your Mask; this will expose areas untouched by the previous application of Mica Powder, therefore allowing you to add different colours.
Before adding my second colour of Mica Powder, I cut the flowers off of my Wreath template and stuck them back onto the Acetate.
This was so that I could add one colour for the Wreath itself,
and the another colour for the Flowers. It's very subtle at this stage, remember it is on Acetate and it's this subtleness that "makes" this project I think. If it had been done on solid or darker card I suspect the colours would be much stronger..
Finish this part of the project off by sealing the Mica Powder with a cheap generic brand of Hair Spray. No, this is not from my own personal hair care regime!!
Once the Hair Spray is dry, adhere the Acetate to your chosen backing paper. I prefer to spray my backing paper with Stick and Spray as opposed to spraying the Acetate. The backing paper seems to "soak up" some of the "wetness" of the Spray Glue and doesn't show through the Acetate. The other way round, the Acetate will hold onto the "wetness" as it is not porous! By the way, this is all done on the back of the Acetate, the side that you applied the Mica Powder. This way the front will be as smooth as a baby's, well, you know the rest!
I repeated the application of the Mica Powder onto another piece of my backing paper, matt and layering the pieces with some Gold Mirror card. I also stamped my sentiment into the centre of my "masked" image
and applied the pieces to my base card.
The Mica Powder colours I used have certainly turned this project in the direction of "Vintage". So, I added some vintage Blossoms and Leaves which were cut from The Spellbinders Die Bitty Blossoms (S5-086). Now, with my chosen sentiment, I guess it would be wrong not to actually add a Butterfly or Two!
These were cut from The Memory Box Die Vivienne Butterfly (98265) in Gold Mirror Card.
Sticking the pieces together
and then applying them to the project to finish it off... There you go ladies; I said I would post this for you. I hope you can now put all of your Mica Powders to good use.. Thanks for checking us out. See you soon. Andy.

Friday, 4 May 2012

When is a leaf....

...not a leaf?
When it's a feather of course... Hi Blogland. You know when sometimes you see something different in a product other than its intended use? Well, I do anyway!
This was the case with one of the new Leaf Dies from Marianne Designs Cretables.. I doubt that I will ever use it as a leaf as to me it looked like it would work perfectly as a Peacock feather....
So, to start this project off I made my own Peacock paper using some of the new Vintage Cosmic Shimmer Mists (Egyptian Blue, Antique Green & Tarnished Gold).
Cutting out as many Leaves as I could using the Creatables Die Anja's Leaves 3 (LR0228)
to create my individual Feathers...
This was the image that gave me the inspiration to make the feathers.. It's great as a one dimensional image but really could do with a little bit of oomph in the feather department to add that much sought after dimension.. So, once stamped and randomly coloured,
I cut it out, trimming off the bits that I would not use.
I then attached the Leaves/Feathers to the body,
adding some Peacock coloured Gems as the "eyes" of the Feathers...
Whilst this was drying I prepared my base card, cutting out the largest Die from the Spellbiders set Floral Ovals (S4-356) in some Light Green coloured Mirror card and the largest die from the Spellbinders Set Classic Ovals Large (S4-110). This was cut in White card stock and then coloured with... what else.... "Peacock Feathers Distress Ink" which is part of the new Spring set of Distress Inks...
Layering the two together to form my frame.
For my corner elements, I cut out a shape using the Marianne Creatables Anja's Corner (LR0200). Note that the Die only cuts only two of the edges,
so if you want it as a separate corner then you will have to cut the third edge manually..
Repeat this for each corner piece
and then attach them to your project
along with the frame
and finally the Peacock... Very opulent I think you'll agree? Thanks for checking us out, see you soon. Andy.

Tuesday, 1 May 2012

Say it with Flowers....

Hi gang. I hope you had a good weekend? Tuesday again, so that means it's time for another Cuttlebug Blog Spot Challenge. This week’s theme is, Flowers. It's Mother's Day in the States (where the Cuttlebug Blog Spot hails from) on 13th May. But, seeing as we in the UK have already celebrated this event we were able to be quite open on the theme.. So, I guess you couldn't get much further away from Mother's Day than with....
A Christmas card!! I did say at the beginning of the year that there would be a few random Crimbo posts popping up now and then... Just to give those, who want to get ahead of the game, some inspo to get those Crimbo cards done and out of the way. And with the cost of postage going through the roof, I guess the sooner we get them made, the quicker we can send them out using second class post and save a little bit of bish bosh (dosh - Money £).
To make the Poinsettia's I punched out my shapes using the McGill Punch Star Lily (64511PS) onto some Red Pearlised Paper. Each time you punch you will get 4 different sized petals.
To make 2 full Poinsettia's you will need 8 sets of petals.
Shape each petal using a Ball Tool and a Rubber Mat,
and then add a little more dimension by manipulating each petal with a pair of Tweezers.
Next, punch out 2 shapes using the McGill Punch - Crystal (64510PS),
shaping them with your Ball Tool and Rubber Mat.
Take 4 of the largest petals and attach them to one of the Crystal shapes on alternate ends,
then take 4 of the second largest petal shapes and attach them to the other 4 ends.
With the second Crystal shape, add 4 of the third largest petal shapes,
alternating with the smallest petal shape.
Until you end up with a large and a small Poinsettia.
Layer the smaller Poinsettia to the larger one, adding some Gold Beads to the centre.
Repeat this process for the second Poinsettia... I guess its then up to you what you do with them!
I chose to add them to a card to which I had added; leaves which I had cut from the Spellbinders Die Set Foliage (S4-328), a Flourish which was cut from the Cheery Lynn Die Mega Flourish Two (B169) and my sentiment which was cut from Spellbinders Labels Twenty Two (S4-346). So, that's another Crimbo card to add to the pile.. I think I'm up to 20 now, how are you getting on with yours? Don’t forget to hop on over to the Cuttlebug Blog Spot to see what my fellow Design Team Members have created for this week’s challenge. Thanks for checking us out. See you soon Andy.